Google VBO2KR2018 - Manuals

User Manual Google VBO2KR2018


Summary
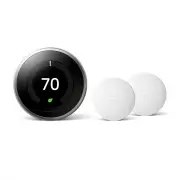
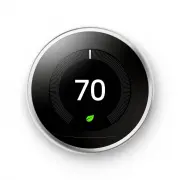
Compatibility The Nest Thermostat E works with most 24V systems, including forced air, variable speed, heat pump and radiant systems, as well as common fuel types such as natural gas, electricity and oil. It can control:• Heating and cooling: one stage of heating and cooling, and a second stage of e...
Breaker box System switch or In the box 1. Switch off power This protects you and avoids blowing a fuse in your equipment. To make sure the power is off, change the temperature with your current thermostat and wait at least five minutes to be sure that your system doesn’t turn on. 2. Remove the cove...
B O G Y W A AC NOT USED 3. Take a picture of the wires Take a picture of your thermostat’s wires and save it for reference. Make sure you can read the wire terminal labels. Incompatible wiring and voltage Stranded wires Stranded wires aren’t compatible with the Nest Thermostat. High-voltage wires If...
Google Thermostats Manuals
-
 Google BH1252-US
User Manual
Google BH1252-US
User Manual
-
 Google GA01334-US
User Manual
Google GA01334-US
User Manual
-
 Google GA02081-US
User Manual
Google GA02081-US
User Manual
-
 Google GA02082-US
User Manual
Google GA02082-US
User Manual
-
 Google GA02083-US
User Manual
Google GA02083-US
User Manual
-
 Google GA03700
User Manual
Google GA03700
User Manual
-
 Google GA03701
User Manual
Google GA03701
User Manual
-
 Google GA03797
User Manual
Google GA03797
User Manual
-
 Google T3007ES
User Manual
Google T3007ES
User Manual
-
 Google T3017US
User Manual
Google T3017US
User Manual
-
 Google T3018US
User Manual
Google T3018US
User Manual
-
 Google T3019US
User Manual
Google T3019US
User Manual
-
 Google T3021US
User Manual
Google T3021US
User Manual
-
 Google T3032US
User Manual
Google T3032US
User Manual
-
 Google VB00XX17
User Manual
Google VB00XX17
User Manual
-
 Google VBCC8CCTKSW20
User Manual
Google VBCC8CCTKSW20
User Manual
-
 Google VBCC8FGCA7CC20
User Manual
Google VBCC8FGCA7CC20
User Manual
-
 Google VBCC8FGCA8CC20
User Manual
Google VBCC8FGCA8CC20
User Manual
-
 Google VBCC8FGTKSW20
User Manual
Google VBCC8FGTKSW20
User Manual
-
 Google VBCC8SDTKSW20
User Manual
Google VBCC8SDTKSW20
User Manual