Page 2 - CONGRATULATIONS; Important Information
CONGRATULATIONS Congratulations and thank you for choosing a Falmec rangehood. To avoid the risks that are always present when you use an electric al appliance it is important that the rangehood is installed correctly and that you read the safet y instructions c arefully to avoid misuse and hazards....
Page 3 - PRODUCT DESCRIPTION & CARTON CONTENTS; OPTION 1 - INTEGRATED HOOD - ON BOARD HOOD
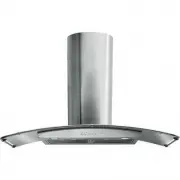
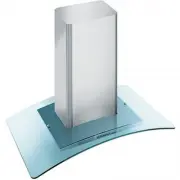
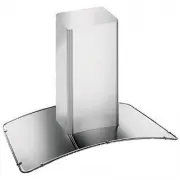
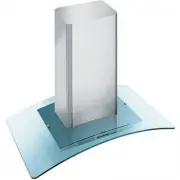
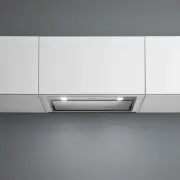
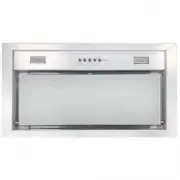
PRODUCT DESCRIPTION & CARTON CONTENTS CARTON 1 - HOOD UNIT You will be supplied with one of the three hood unit options detailed below. OPTION 1 - INTEGRATED HOOD - ON BOARD HOOD Models include: SIENA F3SN60S1, F3SN90S1 and F3SND90S1 Included in the carton: 1. Main hood housing including control...
Page 4 - CARTON 2 - FAN MOTOR UNIT
PRODUCT DESCRIPTION & CARTON CONTENTS CARTON 2 - FAN MOTOR UNIT You will be supplied with one of the two fan motor options detailed. OPTION 1 - IN ROOF SOLUTION (FIG.4a) Models include: IR-765 and IR-1140 Unit designed to be located in a roof space and then ducted to an external vent. Included i...
Page 5 - WARNINGS FOR THE INSTALLER; USER WARNINGS; INSTALLATION; only intended for qualified personnel
Installation operations are to be carried out by skilled and qualified installers in accordance with the instructions in this booklet and in compliance with the regulations in force. DO NOT use the hood if the power supply cable or other components are damaged: disconnect the hood from the electrica...
Page 6 - OPERATION; OPERATING YOUR CONTROL PANEL WITH THE 6 SENSOR TOUCH CONTROL
OPERATION OPERATING YOUR CONTROL PANEL WITH THE 6 SENSOR TOUCH CONTROL Turning the extraction function ON or OFF: • In standby mode, press button 2 to turn on operating mode, then press buttons 3 through to 5 to change the speed. • The hood has three speed options and a boost speed plus the off func...
Page 7 - USIN THE RADIO CONTROL
WARNINGS!:The radio control is optional.Follow the entire procedure described below if purchased. Place the hood away from sources of electromagnetic waves (e.g. microwave ovens), which could interfere with the radio control and with the hood electronics.The maximum operating distance is 5 metres, t...
Page 8 - CLEANING OF EXTERNAL SURFACES; CLEANING OF INTERNAL SURFACES; LIGHTING; MAINTENANCE; DISP OSAL AFTER END OF USEFUL LIFE
Before cleaning or carrying out maintenance operations, disconnect the equipment by removing the plug or switching off the main switch.Do not use detergents containing abrasive, acidic or corrosive substances or abrasive cloths. Regular maintenance guarantees proper operation and performance over ti...
Page 10 - SERVICING OF REMOTE MOTORS
SERVICING OF REMOTE MOTORS The installation and fitting of the external or in-roof motor should be done in such a way that will allow the unit to be removed if service is required. Additional costs incurred in the removal, such as damage to walls and roofs, are not covered under warranty. The extern...
Page 11 - PART 1: HOOD INSTALLATION GUIDE - INTEGRATED HOODS - ON BOARD MOTOR; ON BOARD HOOD
PART 1: HOOD INSTALLATION GUIDE - INTEGRATED HOODS - ON BOARD MOTOR ON BOARD HOOD Models include SIENA F3SN60S1, F3SN90S1 and F3SND90S1 CONFIGURING HOOD FOR BACK DUCTED INSTALLATION Note: Hood is delivered in with motor positioned for ducting through top of unit. To alter perform the following steps...
Page 12 - GREASE TRAP AND BAFFLE FILTERS:
PART 1: HOOD INSTALLATION GUIDE - INTEGRATED HOODS - ON BOARD MOTOR STEP 4: The returns on the main body are now exposed. These are used to fix the main body on to the cabinetry. Place the hood in the cabinet in the level position ensuring that the controls and display will be visible when standing ...
Page 15 - HOLE MEASUREMENTS FOR INSTALLATION
13 kg 250 512 / 822 560 / 870 505 / 815 10 150 280 87 24 7 331 SIENA 60 / 90 HOLE MEASUREMENTS FOR INSTALLATION All measurements in mm
Page 17 - PART 1: HOOD INSTALLATION GUIDE - INTEGRATED HOODS - REMOTE MOTOR; INTEGRATED HOOD
PART 1: HOOD INSTALLATION GUIDE - INTEGRATED HOODS - REMOTE MOTOR INTEGRATED HOOD Models include MILANO F3ML60S1, F3ML90S1, F3MLD90S1, F3MLD12S1 and GENOVAF3GV12S1 STEP 1: To install into your overhead cupboard, several holes may need to be cut into shelves to enable the ducting to exit the cavity. ...
Page 21 - MILANO
13 kg 10 200 280 117 24 331 MILANO HOLE MEASUREMENTS FOR INSTALLATION "MMNFBTVSFNFOUTJONN
Page 23 - PART 1: HOOD INSTALLATION GUIDE - WALL HUNG; WALL HUNG CANOPY; Models include; MODENA
PART 1: HOOD INSTALLATION GUIDE - WALL HUNG WALL HUNG CANOPY Models include LATINA F5LT90S1, TREVISO F5TV90S1, ROMA F5RM90B1, MODENA F5ME12S1 and TRENTO F5TN12S1 STEP 1: Measure the height of the hood from the base to the top of the mounting hooks. NOTE: The height of the underside of the hood body ...
Page 24 - STEP
PART 1: HOOD INSTALLATION GUIDE - WALL HUNG B C V2 (x2) 1 4 ø 8 mm V1 (x2) 2 3 STEP 7 : Insert the flue extension into the main flue cover. Fasten to the hood body using the screws provided (V5). Slide the extension until it reaches the desired height. STEP 8 : Place the white flue bracket on the wa...
Page 26 - PART 1: HOOD INSTALLATION GUIDE - ISLAND CANOPIES - REMOTE MOTOR; ISLAND HUNG CANOPY; TRENTO
PART 1: HOOD INSTALLATION GUIDE - ISLAND CANOPIES - REMOTE MOTOR ISLAND HUNG CANOPY Models include TREVISO F7TV90S1, ROMA F7RM90S1 and TRENTO F7TN12S1 STEP 1: Using a weighted stringline (plumb line), determine the central position of hood on the ceiling. It is best to centre the hood unit to the co...
Page 28 - STEP 3
G T1 F 1 V5 (x4) 2B 2A V5 (x4) STEP 3 Insert the extension flue into the main piece and secure at the required height with masking tap. Slide the stainless steel chimney covers up and secure to the bracket. You may need to drill some new holes through the cover and bracket to secure the chimney cove...
Page 29 - Airflow; R E M OT E M OTO R S O LU T I O N S
241 268 375 Airflow 380 R E M OT E M OTO R S O LU T I O N S 185 440 60 702 200 108 17 EXTERNAL ROOF SOLUTION 765 , 1140 & 2010m3/h EXTERNAL WALL SOLUTION 765 , 1140 & 2010m3/h IN-ROOF MOTOR SOLUTION 765 & 1140m3/h 1. Fan power supply connects to internal hood unit 2. Tile or metal roof f...
Page 30 - PART 2: MOTOR INSTALLATION GUIDE; IN ROOF SOLUTION
PART 2: MOTOR INSTALLATION GUIDE IN ROOF SOLUTION Positioning your In-Roof Unit: It is recommended that the In-Roof motor unit be mounted in a roof space or wall cavity. Please ensure that the In-Roof motor unit is positioned in an environment that is free of other gases to enable an efficient expul...
Page 31 - EXTERNAL ROOF SOLUTION - METAL ROOF INSTALLATION; INSTALLATION ON METAL DECK:
PART 2: MOTOR INSTALLATION GUIDE EXTERNAL ROOF SOLUTION - METAL ROOF INSTALLATION Inspection: Ensure the unit has arrived in good condition and that the impeller will spin freely. This product is designed to be installed on a roof up to 45° pitch. 1. Installation of this product should be carried ou...
Page 32 - EXTERNAL ROOF SOLUTION - TILE ROOF INSTALLATION
PART 2: MOTOR INSTALLATION GUIDE EXTERNAL ROOF SOLUTION - TILE ROOF INSTALLATION Inspection: Ensure the unit has arrived in good condition and that the impeller will spin freely. This product is designed to be installed on a roof up to 45° pitch. 1. Installation of this product should be carried out...
Page 33 - EXTERNAL WALL SOLUTION
PART 2: MOTOR INSTALLATION GUIDE EXTERNAL WALL SOLUTION Inspection: Ensure the unit has arrived in good condition and that the impeller will spin freely. Installation: 1. Installation of this product should be carried out by appropriately qualified persons.2. This fan is designed for connection to 2...
Page 35 - D E S I G N E R WA R R A N T Y
All FALMEC Designer range hoods and remote motors come with a 3 year parts and labour warranty. PRKS will correct, free of charge, any defects in material or workmanship for the period of 3 years, subject to the terms of our warranty stated below. This warranty will be void if a model from the desig...
Page 36 - P R O F E S S I O N A L WA R R A N T Y
FALMEC Professional series hoods are covered under the same 3 year parts and labour warranty as stated for the Designer series models and as such incorporates the same terms and conditions, benefits and statutory rights however the following provisions also apply: OUTDOOR USE OF PROFESSIONAL RANGEHO...
Page 37 - NOTES