Epson 206636 - PocketJet 3 Plus- Manuals
Epson 206636 - PocketJet 3 Plus– User Manual in PDF format online.
Manuals:
User Manual Epson 206636 - PocketJet 3 Plus
1

2

3

4

5

6

7

8

9

10

11

12

13

14

15

16

17

18

19

20

21

22

23

24

25

26

27

28

29

30

31

32

33

34

35

36

37

38

39

40

41

42

43

44

45

46

47

48

49

50

51

52

53

54

55

56

57

58

59

60

61

62

63

64

65

66

67

68

69

70

71

72

73

74

75

76

77

78

79

80

81

82

83

84

85

86

87

88

89

90

91

92

93

94

95

96

97

98

99

100

Summary
Page 2 - Page ii
BlackBerry is a registered trademark of Research in Motion. Bluetooth is a registered trademark of Bluetooth SIG, Inc. Symbian OS is a registered trademark of Symbian Ltd. PALM and PALM OS are registered trademarks of Palm, Inc. PENTAX and PocketJet are registered trademarks of Pentax Corporation. P...
Page 3 - Page iii
Page 4 - Contents; Page iv
Contents Safety Information .................................................................................. vi Printer Features ....................................................................................... ix Warranty Information ............................................................
Epson Manuals
-
 Epson V11HA52820
User Manual
Epson V11HA52820
User Manual
-
Epson V11HA67820
User Manual
-
 Epson V12H004UA3
User Manual
Epson V12H004UA3
User Manual
-
Epson V12H004UA3
Troubleshooting Guide
-
 Epson V11HA85020
Installation Manual
Epson V11HA85020
Installation Manual
-
 Epson C11CK65201
User Manual
Epson C11CK65201
User Manual
-
 Epson V11H980020
Manual
Epson V11H980020
Manual
-
 Epson HOME CINEMA 3200
Manual
Epson HOME CINEMA 3200
Manual
-
 Epson HOME CINEMA 3800
User Manual
Epson HOME CINEMA 3800
User Manual
-
Epson HOME CINEMA 3800
Manual
-
 Epson B11B252201
User Manual
Epson B11B252201
User Manual
-
Epson C11CJ91201
User Manual
-
 Epson WF 7210
Installation Manual
Epson WF 7210
Installation Manual
-
Epson WF 7210
Manual
-
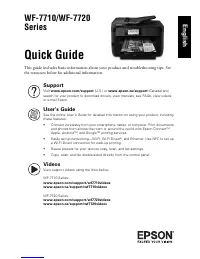 Epson WF 7720
User Manual
Epson WF 7720
User Manual
-
 Epson ET 2750
User Manual
Epson ET 2750
User Manual
-
 Epson ET 7700
User Manual
Epson ET 7700
User Manual
-
Epson ET 7700
Manual
-
Epson ET 7700
Troubleshooting Guide
-
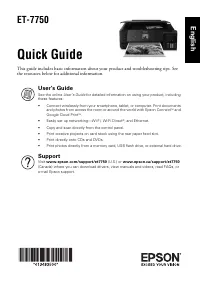 Epson ET 7750
Troubleshooting Guide
Epson ET 7750
Troubleshooting Guide