Page 15 - Cutting capacities; Mitre saw mode; Vibration emission value a; Defi nitions: Safety Guidelines
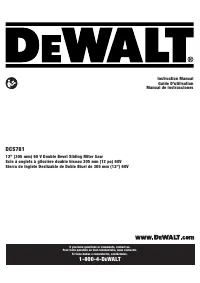
13 E N G L I S H FLIP-OVER SAW D27105, D27105V Congratulations! You have chosen a D E WALT tool. Years of experience, thorough product development and innovation make D E WALT one of the most reliable partners for professional power tool users. Technical data D27105/D27105V Type 3 Voltage V 115 Powe...
Page 16 - E N G L I S H; Safety Instructions; SAVE THIS MANUAL FOR FUTURE REFERENCE; General Safety Rules
14 E N G L I S H Safety Instructions WARNING! When using electric tools basic safety precautions should always be followed to reduce the risk of fire, electric shock and personal injury including the following. Read all these instructions before attempting to operate this product and save these inst...
Page 17 - Additional safety rules for fl ip-over saws
15 E N G L I S H • Never operate the saw without the upper and lower guards in place. • Never place either hand in the blade area when the saw is connected to the electrical power source. • Disconnect the saw from the mains before changing blades or carrying out maintenance. • Use a push stick at al...
Page 18 - Markings on Tool; Package contents; For use in mitre saw mode:
16 E N G L I S H Markings on Tool The following pictograms are shown on the tool: Read instruction manual before use. Wear ear protection. Wear eye protection. Carrying Point Hands Away O / I When using the machine in the mitre saw mode, make sure to operate the trigger switch in the handle when swi...
Page 19 - For use in all modes:; INTENDED USE; Electrical Safety; Unpacking the machine and its parts.; Rear legs
17 E N G L I S H For use in all modes: A10 44 Three way dust extraction kit (D271054) A11 144 Laser INTENDED USE Your D E WALT D27105 flip-over saw has been designed to operate as a mitre saw or a saw bench to perform the four main sawing operations of ripping, cross-cutting, bevelling and mitring e...
Page 20 - WARNING; Adjustments for mitre saw mode
18 E N G L I S H Assembly for mitre saw mode Mounting the under-table guard (fi g. E) The under-table guard (63) is fi tted to the top of the saw bench table. • Place the two fasteners on the left of the guard into the slots (64) on the left of the blade slot (65). Turn the plastic screws countercloc...
Page 21 - The blade should not foul the lower blade guard.
19 E N G L I S H • If adjustment is required, proceed as follows:• Turn the bevel position adjustment stop screw (95) in or out as necessary until the pointer (88) indicates 45° with the angle position stop resting against the bevel position adjustment stop. Checking and adjusting the intermediate b...
Page 22 - OPERATION; Always observe the safety instructions and; Basic saw cuts; Sawing in mitre saw mode
20 E N G L I S H • Tighten the knob (117).• Check that the pointer (120) indicates zero on the scale (121). Adjust if necessary. Changing from saw bench to mitre saw mode (fi g. A3, E & M1) • Remove the parallel fence (22), or the mitre fence, if fi tted (fi g. A3).• Remove the upper blade guard (...
Page 23 - If the cutting angle varies from cut to cut, check
21 E N G L I S H • Loosen the fence clamping knob (91) and slide the upper part of the side fence to the left as far as it will go. • Loosen the bevel clamp knob (17) and set the bevel as desired.• Tighten the bevel clamp knob fi rmly.• Proceed as for a vertical straight cross-cut. Compound mitre (fi...
Page 24 - Lubrication
22 E N G L I S H • After completing the cut, switch the machine off, allow the saw blade to stop and remove the workpiece. WARNING: Never push or hold the free or cut-off side of the workpiece. WARNING: Always use a push stick when ripping small workpieces. Bevel cuts (fi g. U2) • Set the required b...
Page 25 - Cleaning; Mounting the Saw Blade; Optional Accessories; Protecting the Environment; 0 DAY NO RISK
23 E N G L I S H • Loosen the screw (140) of the adjustment cam (141).• Rotate the adjustment cam using a pair of needle nose pliers.• Hold the adjustment cam with the pliers and tighten the screw.• Replace the retainer plate and tighten the screws.• Rotate the machine into mitre saw mode. Check the...
Page 26 - KALE
24 01/10 N047925 Belgique et Luxembourg Black & Decker - D E WALT Tel: +32 (0)015 - 15 47 9211 België en Luxemburg Nieuwlandlaan 7, IZ Aarschot B156 Fax: +32 (0)015 - 15 47 9210 B-3200 Aarschot www.dewalt.be Danmark D E WALT Tlf: 70201511 Sluseholmen 2-4 Fax: 70224910 2450 København SV www.dewal...