Brio CLPOU520UVRO4 - Manuals
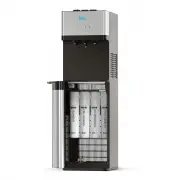
User Manual Brio CLPOU520UVRO4


Summary
2 Table of Contents Safety Information � � � � � � � � � � � � � � � � � � � � � � � � � � � � � � � � � � � � � � � � � � � � � � � � � � � � � � � � � � � � � � � � � � � 3 Intended Use � � � � � � � � � � � � � � � � � � � � � � � � � � � � � � � � � � � � � � � � � � � � � � � � � � � � � � � � ...
3 Safety Information WARNING: To reduce risk of injury and property damage, you must read this entire manual before assembling, installing, and operating the dispenser. WARNING: This product dispenses water at very high temperatures. Failure to use properly can cause personal injury. When operating ...
5 Indicator Panel Description 1� Power/Self cleaning indicator – When illuminated, indicates that the dispenser is on. When blinking, indicates that the self-cleaning feature is operating. 2� Hot water indicator light – When illuminated, indicates that the dispenser is heating water. 3� Cold water i...
Brio Water Dispensers Manuals
-
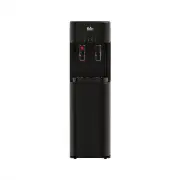
 Brio CL520CV
User Manual
Brio CL520CV
User Manual
-
 Brio CLBL320BSCP
User Manual
Brio CLBL320BSCP
User Manual
-
 Brio CLBL320SCP
User Manual
Brio CLBL320SCP
User Manual
-
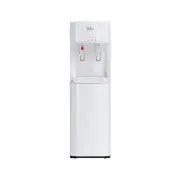 Brio CLBL320WSCP
User Manual
Brio CLBL320WSCP
User Manual
-
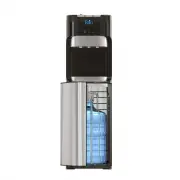 Brio CLBL420V2
User Manual
Brio CLBL420V2
User Manual
-
 Brio CLBL520SC
User Manual
Brio CLBL520SC
User Manual
-
 Brio CLBL520SCBLK
User Manual
Brio CLBL520SCBLK
User Manual
-
 Brio CLBL720SC
User Manual
Brio CLBL720SC
User Manual
-
 Brio CLBL720SCBLK
User Manual
Brio CLBL720SCBLK
User Manual
-
 Brio CLBL720SCX
User Manual
Brio CLBL720SCX
User Manual
-
 Brio CLCTPOU320UVF3P
User Manual
Brio CLCTPOU320UVF3P
User Manual
-
 Brio CLCTPOU620UVF2
User Manual
Brio CLCTPOU620UVF2
User Manual
-
 Brio CLCTPOU720UVF3
User Manual
Brio CLCTPOU720UVF3
User Manual
-
 Brio CLCTTL520
User Manual
Brio CLCTTL520
User Manual
-
 Brio CLNLPOU520SCF2B
User Manual
Brio CLNLPOU520SCF2B
User Manual
-
 Brio CLPOU320BSLUV2P
User Manual
Brio CLPOU320BSLUV2P
User Manual
-
 Brio CLPOU320BUVF3P
User Manual
Brio CLPOU320BUVF3P
User Manual
-
 Brio CLPOU320BUVF4P
User Manual
Brio CLPOU320BUVF4P
User Manual
-
 Brio CLPOU320SLUVF2P
User Manual
Brio CLPOU320SLUVF2P
User Manual
-
 Brio CLPOU320UVF3P
User Manual
Brio CLPOU320UVF3P
User Manual