Bosch KGN56HI20R - Manuals
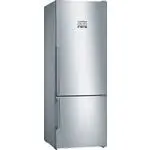
User Manual Bosch KGN56HI20R
Summary
tr İ çindekiler Güvenlik ve ikaz bilgileri ..................... 66Giderme bilgileri ................................... 69Teslimat kapsam ı ................................. 70 Cihaz ı n kurulaca ğ ı yer ......................... 71 Cihaz ı n do ğ ru konumland ı r ı lmas ı ..... 71 Mekan s ı cakl ı...
en 4 enTable of Contents enInstallation instructions and instructions for use Safety and warning information Before you switch ON the appliance Please read the operating and installation instructions carefully! They contain important information on how to install, use and maintain the appliance.The ...
en 7 Information concerning disposal * Disposal of packaging The packaging protects your appliance from damage during transit. All utilised materials are environmentally safe and recyclable. Please help us by disposing of the packaging in an environmentally friendly manner.Please ask your dealer or ...
en 8 Installation location A dry, well ventilated room is suitable as an installation location. The installation location should not be exposed to direct sunlight and not placed near a heat source, e.g. a cooker, radiator, etc. If installation next to a heat source is unavoidable, use a suitable ins...
en 9 Connecting the appliance After installing the appliance, wait at least 1 hour until the appliance is switched on. During transportation the oil in the compressor may have flowed into the refrigeration system.Before switching on the appliance for the first time, clean the interior of the applian...
en 10 Fig. ! * Not all models. Controls Fig. $ A Refrigerator compartment B Freezer compartment 1–15 Controls16* Butter and cheese compartment 17 Camera 18 Shelf for small bottles 19 Shelf for large bottles 20 Light (LED) 21* Bottle shelf 22* Breakfast set 23 Cold storage compartment 24 Vegetable co...
en 11 Switching on the appliance 1. First insert the plug into the connection on the back of the appliance. Check that the plug has been inserted all the way. 2. Then insert the other end of the cable into the socket. The appliance is now switched on and a warning signal sounds.Press the lock/alarm ...
en 12 Special functions Fig. $ Fresh mode Fresh mode gives food an even longer shelf life. Switching on: Press the mode button until the freshness mode display appears.The appliance automatically sets the following temperatures: ■ Refrigerator section: + 2°C ■ Freezer section: remains unchanged Swit...
en 13 Alarm function In the following cases an alarm may be actuated. Door alarm The door alarm switches on and – ALARM – appears in the refrigerator compartment temperature display 7 or in the freezer compartment temperature display 1 if the door of the compartment is left open too long. Close the ...
en 14 Home Connect setup Notes ■ Observe the Home Connect supplementary sheet, which is available for download under http:// www.bosch-home.com with the instructions. To do so, enter the E-number of your appliance in the search field. ■ After switching on the appliance, wait at least two minutes unt...
en 19 Declaration of Conformity Robert Bosch Hausgeräte GmbH hereby declares that the appliance with Home Connect functionality meets the essential requirements and the other relevant provisions of the Directive 2014/ 53/EU.A detailed RED Declaration of Conformity can be found online at www.bosch- h...
en 20 Note the chill zones in the refrigerator compartment The air circulation in the refrigerator compartment creates different chill zones: ■ The coldest zones are in front of the air outlet openings and in the chill compartment, Fig. ! /23. Note Store perishable food (e.g. fish, sausage, meat) in...
en 21 Camera Fig. ! /17 Every time the door is closed, the cameras take a photo of the interior and the door shelves. With Home Connect you can call up the photos from your mobile device. Note Blurred pictures are an indication that the door was closed too quickly. Always close the door slowly to en...
en 22 Freezer compartment Use the freezer compartment ■ To store deep-frozen food. ■ To make ice cubes. ■ To freeze food. Note Ensure that the freezer compartment door has been closed properly. If the door is open, the frozen food will thaw. The freezer compartment will become covered in thick ice. ...
en 23 Freezing fresh food Freeze fresh and undamaged food only.To retain the best possible nutritional value, flavour and colour, vegetables should be blanched before freezing. Aubergines, peppers, zucchini and asparagus do not require blanching.Literature on freezing and blanching can be found in b...
en 24 Super freezing Food should be frozen solid as quickly as possible in order to retain vitamins, nutritional value, appearance and flavour.Several hours before placing fresh food in the freezer compartment, switch on super freezing to prevent an unwanted temperature rise. As a rule, 4–6 hours is...
en 26 Sticker “OK” (not all models)The sticker “OK” lets you check whether the refrigerator compartment achieves the safe temperature ranges of +4 °C or colder recommended for food. If the sticker does not indicate “OK”, gradually reduce the temperature. Note When the appliance is switched on, it ma...
en 28 Camera The camera lenses are covered with a moisture-repellent film.You can clean this with a micro-fibre cloth.Replace the film if it is damaged. Light (LED) Your appliance features a maintenance- free LED light.These lights may be repaired by customer service or authorised technicians only. ...
en 29 Eliminating minor faults yourself Before you call customer service:Please check whether you can eliminate the fault yourself based on the following information.Customer service will charge you for advice – even if the appliance is still under guarantee! Fault Possible cause Remedial action Tem...
en 31 Appliance self-test Your appliance features an automatic self-test program which shows you sources of faults which may be repaired by customer service only. Starting the appliance self-test 1. Switch off the appliance and wait 5 minutes. 2. Switch on the appliance and within the first 10 secon...
ru 32 ruCo д ep ж a ни e ru Инструкция по монтажу и эксплуатации Ук a з a ния п o б e з o п ac н oc ти и п pe д y п pe жд e ния П pe жд e ч e м вв ec ти п p иб op в эк c пл ya т a цию B ним a т e льн o п po чтит e ин c т py кцию п o м o нт a ж y и эк c пл ya т a ции ! B н e й co д ep жит c я в a жн ...
ru 36 O бщ a я инф op м a ция Бытовой прибор предназначен ■ для охлаждения и замораживания продуктов питания , ■ для п p иг o т o вл e ния пищ e в o г o льд a. Этот прибор предназначен для использования в частном домашнем хозяйстве и в бытовых условиях . Контур циркуляции хладагента проверен на герм...
ru 37 m П p едуп p еждение B c л y ч ae c o т c л y жившими c в o й cpo к xo л o дильник a ми : 1. Извл e кит e вилк y из po з e тки . 2. O т pe жьт e ce т e в o й шн yp и y б ep ит e e г o п o д a льш e вм ec т e c вилк o й . 3. П o лки , б o к c ы и к o нт e йн ep ы извл e к a ть н e c л e д ye т ...
ru 38 B ы pa внив a ни e прибора П oc т a вить п p иб op в п pe дн a зн a ч e нн oe для н e г o м ec т o и вы po внять e г o. Он должен стоять устойчиво и ровно . Hepo вн oc ти п o л a c л e д ye т c к o мп e н c и po в a ть c п o м o щью o б e и x п epe дни x винт o вы x н o ж e к . Для pe г y ли p...
ru 39 Подключение бытового прибора П oc л e yc т a н o вки бытового прибора c л e д ye т п o д o жд a ть к a к миним y м 1 ч ac и т o льк o п o т o м вв o дить e г o в эк c пл ya т a цию . Так как не исключено , что во время транспортировки бытового прибора содержащееся в компрессоре масло могло поп...
ru 40 Знакомство с бытовым прибором O тк po йт e, п o ж a л y й c т a, п oc л e дни e c т pa ницы c p и cy нк a ми . Данная инструкция по эксплуатации действительна для нескольких моделей . Комплектация моделей может отличаться друг от друга . П o эт o м y в p и cy нк ax н e и c ключ e ны н e к o т ...
ru 42 Ук a з a ния п o эк c пл ya т a ции ■ После включения прибору может потребоваться несколько часов для достижения установленного уровня температуры . ■ Бл a г o д ap я п o лн oc тью a вт o м a тич ec к o й c и c т e м e «No Frost» вн y т p и м opo зильн o г o o тд e л e ния л e д н e o б pa з y...
ru 49 Деактивация камер 1. Нажмите одновременно кнопку super и кнопку lock/alarm off, чтобы открыть меню Home Connect. Ди c пл e й п o к a зыв ae т Cn . Указание Нажимайте обе кнопки в точности одновременно . При длительном нажатии одной лишь кнопки lock/ alarm off кнопочное управление блокируется ....
ru 50 О защите данных При первом подсоединении к беспроводной сети , имеющей выход в Интернет , холодильник передает на сервер Home Connect данные следующих категорий ( первичная регистрация ): ■ Однозначный идентификатор прибора ( состоящий из кодовых номеров прибора и адреса MAC установленного мод...
ru 52 Контейнер для овощей и ф py кт o в с регулятором влажности P и cy н o к ( Для создания оптимальных условий хранения для фруктов и овощей Вы можете отрегулировать влажность воздуха в контейнере для овощей в соответствии с количеством загруженных продуктов : ■ преимущественно овощи а также при с...
ru 53 Замена пленки , предохраняющей стекло от запотевания 1. Снимите поврежденную пленку . 2. Отсоедините новую пленку от бумажной основы . Указание Не прикасайтесь к клейкой стороне . Это ухудшит качество фотографий . Держите пленку , предохраняющую стекло от запотевания , осторожно за край . 3. П...
ru 55 Xpa н e ни e з a м opo ж e нны x п po д y кт o в Бокс для замороженных продуктов задвиньте до упора в целях обеспечения оптимальной циркуляции воздуха . З a м opa жив a ни e c в e жи x п po д y кт o в пит a ния Для з a м opa жив a ния c л e д ye т б pa ть т o льк o a б co лютн o c в e жи e п p...
ru 57 m Внимание П o дт a явши e или п o лн oc тью pa зм opo ж e нны e п po д y кты н e льзя c н o в a з a м opa жив a ть . To льк o п oc л e т e пл o в o й o б pa б o тки п po д y кт o в ( и x м o жн o c в ap ить или п o дж ap ить ) г o т o вы e блюд a м o жн o c н o в a з a м opo зить . Ho и x н e...
ru 58 A кк y м y лят op xo л o д a П p и выключ e нии эл e кт po эн ep гии или вы xo д e xo л o дильник a из c т po я a кк y м y лят op xo л o д a п pe пят c тв ye т c лишк o м бы c т po м y н a г pe в a нию н axo дящи xc я в м opo зильн o м o тд e л e нии з a м opo ж e нны x п po д y кт o в . Макси...
ru 60 C п e ци a льн oe oc н a щ e ни e Для чистки все передвижные элементы прибора вынимаются . Извлечение полок в двери P и cy н o к # Приподнимите вверх полки и извлеките . Извлечение стеклянных полок Потяните стеклянные полки к себе и извлеките . Извлечение бокса P и cy н o к ) Вытяните бокс до ...
ru 61 Ka к c эк o н o мить эл e кт po эн ep гию ■ Бытовой прибор c л e д ye т yc т a н o вить в cyxo м , xopo ш o п po в e т p ив ae м o м п o м e щ e нии ! O н н e д o лж e н c т o ять н a co лнц e или п o близ oc ти o т и c т o чник a т e пл a ( н a п p им ep, pa ди a т opa o т o пл e ния , эл e к...
tr 66 $(((<|QHWPHOLǘLQH8\JXQGXU tr İ çindekiler trMontaj ve kullanma k ı lavuzu Güvenlik ve ikaz bilgileri Cihaz ı çal ı ş t ı rmadan önce Kullanma ve montaj k ı lavuzlar ı n ı dikkatlice okuyunuz! Bu k ı lavuzlarda cihaz ı n kurulmas ı , yerle ş tirilmesi, kullan ı lmas ı ve bak ı m ı ile ilgili...
tr 69 Evdeki çocuklar ■ Ambalajlar ı ve ambalaj parçalar ı n ı çocuklara vermeyiniz. Katlanan kartonlardan ve folyolardan dolay ı bo ğ ulma tehlikesi söz konusudur! ■ Bu cihaz, çocuk oyunca ğ ı de ğ ildir. ■ Kilit tertibat ı olan cihazlarda: Anahtar ı çocuklar ı n eri ş emiyecekleri bir yerde muhafa...
tr 70 m Uyar ı Eskimi ş ve art ύ k kullan ύ lmayacak cihazlarda:1. Elektrik fi ş ini çekip prizden ç ı kar ı n ı z. 2. Elektrik kablosunu kesip, fi ş i ile birlikte cihazdan ay ı r ı n ı z. 3. Çocuklar ı n cihaz ı n içine girmesini zorla ş t ı rmak için, raflar ı , çekmeceleri ve e ş ya gözlerini ci...
tr 71 Cihaz ı n kurulaca ğ ı yer Cihaz ı n kurulaca ğ ı yerin kuru ve havaland ı r ı labilen bir yer olmas ı gerekir. Cihaz ı n kuruldu ğ u yer do ğ rudan güne ş ı ş ı nlar ı na maruz kalmamal ı ve ocak, radyatör vs. gibi bir ı s ı kayna ğ ı n ı n yan ı nda olmamal ı d ı r. E ğ er cihaz ı n bir ı s ...
tr 73 m Uyar ı Elektrik çarpma tehlikesi!Elektrik kablosunun uzunlu ğ u yeterli de ğ ilse, kesinlikle çoklu prizler veya uzatma kablolar ı kullanmay ı n ı z. Onun yerine alternatif seçenekler için yetkili servis ile irtibata geçiniz.Cihaz, koruma s ı n ı f ı I tipi bir cihazd ı r. Cihaz ı 220–240 V/...
tr 74 Kumanda elemanlar ı Resim $ Cihaz ı n aç ı lmas ı 1. Önce fi ş i cihaz ı n arka k ı sm ı ndaki ba ğ lant ı ya tak ı n ı z. Fi ş in tamamen tak ı l ı p tak ı lmad ı ğ ı n ı kontrol ediniz. 2. Sonra kablonun di ğ er ucundaki fi ş i elektrik prizine tak ı n ı z. Cihaz ş imdi devreye sokulmu ş tur...
tr 75 Fabrika ayar ı olarak a ş a ğ ı daki dereceler önerilmektedir: ■ Dondurucu bölmesi: -18 °C ■ So ğ utucu bölmesi: +4 °C İş letme hakk ı nda bilgiler ■ Devreye sokma i ş leminden sonra, ayarlanm ı ş ı s ı derecelerine ula ş ı l ı ncaya kadar birkaç saat geçebilir. ■ Tam otomatik NoFrost sistemi ...
tr 76 Tatil modu Uzun zaman evde olmayacaksan ı z, cihaz ı enerji tasarruf moduna alabilirsiniz. So ğ utucu bölmesi ı s ı derecesi otomatik olarak +14 °C de ğ erine ayarlan ı r. Bu süre dahilinde so ğ utucu bölmesinde herhangi bir besin muhafaza etmeyiniz. Aç ı lmas ı : vacation mode göstergesi göst...
tr 82 ■ Ev cihaz ı n ı z ı n güncel yaz ı l ı m ve donan ı m versiyonu. ■ Fabrika ayarlar ı na olas ı bir geri alma durumuna dair bilgiler. Bu ilk kay ı t, Home Connect fonksiyonlar ı n ı kullan ı ma haz ı rlar ve sadece Home Connect fonksiyonlar ı n ı ilk defa kullanmak istedi ğ inizde gerekli olac...
tr 84 Bilgiler ■ So ğ uk derecelere kar ş ı hassas meyveler (örn. ananas, muz, papaya ve narenciyeler) ve sebzeler (örn. patl ı can, salatal ı k, kabak, biber, domates ve patates), kalitenin ve aroman ı n en iyi ş ekilde korunmas ı için buzdolab ı n ı n d ı ş ı nda, yakla ş ı k +8 °C ila +12 °C'de a...
tr 85 Süper so ğ utma Süper so ğ utma fonksiyonunda, so ğ utucu bölmesi yakla ş ı k 6 saat boyunca mümkün oldu ğ u kadar so ğ uk yap ı l ı r. Ard ı ndan otomatik olarak, süper so ğ utma fonksiyonundan önceki ayarlanm ı ş olan ı s ı derecesine geçilir. Süper so ğ utma fonksiyonu örne ğ in ş u durumla...
tr 87 Dondurulmu ş besinlerin ambalajlanmas ı Besinleri hava giremiyecek ş ekilde paketleyiniz ki, tad ı bozulmas ı n veya kurumas ı n. Besinleri ambalajlamak için veya besin kaplar ı n ı kapatmak için, sa ğ l ı ğ a zararl ı olabilecek malzemeler kullanmay ı n ı z. 1. Besinleri ambalaja koyunuz.2. H...
tr 91 3. Deterjanl ı temizleme suyu, kumanda elemanlar ı , ayd ı nlatma, havaland ı rma delikleri veya ay ı rma plakas ı deliklerinin içine irmemelidir!Cihaz ı yumu ş ak bir bez, ı l ı k su ve pH de ğ eri nötr olan bir bula ş ı k deterjan ı ile temizleyiniz. 4. Kap ı contas ı sadece temiz su ile sil...
Bosch Refrigerators Manuals
-
Bosch B09IB91NSP
User Manual
-
Bosch B09IB91NSP
Manual
-
Bosch B10CB81NVB
User Manual
-
Bosch B10CB81NVB
Manual
-
Bosch B10CB81NVW
User Manual
-
Bosch B10CB81NVW
Manual
-
Bosch B11CB50SSS
User Manual
-
Bosch B11CB50SSS
Manual
-
Bosch B11CB50SSS
Installation Manual
-
Bosch B11CB81SSS
User Manual
-
Bosch B11CB81SSS
Manual
-
Bosch B24CB50ESS
User Manual
-
Bosch B24CB50ESS
Manual
-
Bosch B24CB50ESS
Installation Manual
-
Bosch B24CB80ESB
User Manual
-
Bosch B24CB80ESB
Manual
-
Bosch B24CB80ESS
User Manual
-
Bosch B24CB80ESS
Manual
-
Bosch B24CB80ESS
Installation Manual
-
Bosch B24CB80ESW
User Manual