Bosch B24CB50ESS - User Manual
Bosch B24CB50ESS Refrigerator – User Manual, read for free online in PDF format. We hope this helps you resolve any issues you may have. If you have further questions, please contact us through the contact form.


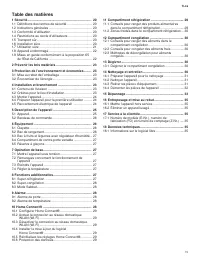
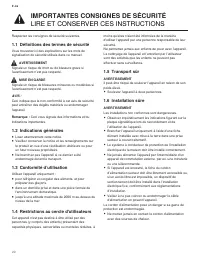
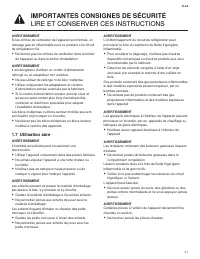
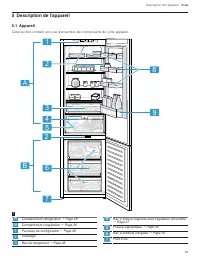
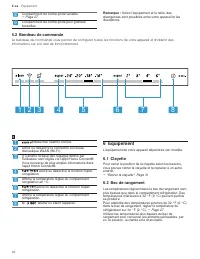
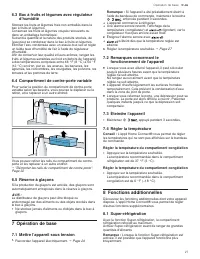
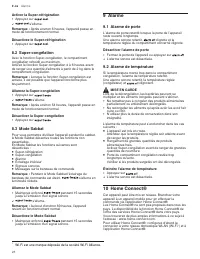
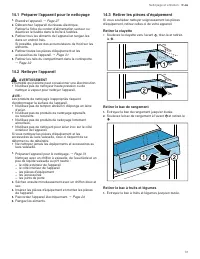
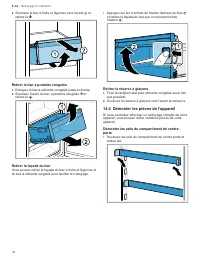


Table of Contents:
- Page 2 – Table of contents; Switching off the connection to the WLAN home
- Page 3 – Safety definitions; WARNING; General information; IMPORTANT SAFETY INSTRUCTIONS; READ AND SAVE THESE INSTRUCTIONS
- Page 5 – Damaged appliance; Never operate a damaged appliance.; Switch off the appliance.; State of California Proposition 65
- Page 6 – Preventing material damage; Disposal of packaging; Selecting the installation location; Note: The arrangement of the fittings does not affect the; Installation and connection; Included in delivery; Installing the appliance; Depending on the appliance specifications
- Page 7 – Connecting the appliance to the electric-; Insert the power plug of the appliance's power cord in a
- Page 8 – Here you can find an overview of the parts of your appliance.
- Page 9 – Note: Your appliance may differ from the diagrams with; Features; Storage container
- Page 10 – Variable door rack; Basic Operation; Switching on the appliance; Note: If the appliance has been previously switched off; Switching off the appliance; Setting the refrigerator compartment temperature; Switching on Super cooling; Note: After approximately 6 hours, the appliance switches; Switching off Super cooling
- Page 11 – Note: After approximately 54 hours, the appliance; Alarm; Temperature alarm; CAUTION
- Page 12 – Notes; 1 Refrigerator compartment; Coldest zone
- Page 13 – Tip: Store groceries that do not spoil easily in the warmest; 2 Freezer compartment; Packing frozen food; 4 Cleaning and maintenance
- Page 14 – Removing the fittings; Removing the shelf
- Page 15 – Removing the ice cube container; Removing the appliance components; Removing the door rack rail
- Page 16 – 5 Troubleshooting
- Page 17 – Issue; 6 Storage and disposal; Taking the appliance out of operation
- Page 18 – Disposal of your old appliance; 7 Customer Service; 8 Technical specifications; Information regarding Free and Open
- Page 19 – Table des matières; Désactiver la connexion au réseau domestique
- Page 20 – Respectez les consignes de sécurité suivantes.; Définitions des termes de sécurité; AVERTISSEMENT; Indications générales; Lisez attentivement cette notice.; Conformité d’utilisation; IMPORTANTES CONSIGNES DE SÉCURITÉ; LIRE ET CONSERVER CES INSTRUCTIONS
- Page 22 – Ne consommez pas les aliments contaminés.; Appareil endommagé; Les réparations non conformes sont dangereuses.; Mises en garde conformément à la
- Page 23 – Prévenir les bris matériels; Mise au rebut de l’emballage; Choisir le lieu d'installation; Installation et branchement; Contenu de livraison; Pas dans tous les pays
- Page 24 – utilisation
- Page 26 – Bandeau de commande; Équipement
- Page 27 – Remarque : Si l'appareil a été préalablement éteint à; Régler la température du compartiment congélation
- Page 28 – Remarque : Pendant le Mode Sabbat l'éclairage du; Alarme; Alarme de température; MISE EN GARDE
- Page 29 – Remarques; 1 Compartiment réfrigération
- Page 30 – Zone la plus froide; 2 Compartiment congélation; Emballer les surgelés; 4 Nettoyage et entretien
- Page 31 – Préparer l'appareil pour le nettoyage; Retirer les pièces d’équipement; Retirer la clayette
- Page 32 – Retirer le bac à produits congelés
- Page 34 – Défaut; Panne de courant
- Page 35 – 6 Entreposage et mise au rebut; Mettre l’appareil hors service; 7 Service à la clientèle; Informations sur le logiciel libre
- Page 40 – • Expert tips & tricks for your appliance; USA
Register
your
appliance and join
the Bosch
family of perks:
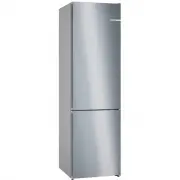
Freezer refrigerator
B24...50
"Loading the manual" means you need to wait until the file loads and becomes available for online reading. Some manuals are very large, and the time they take to appear depends on your internet speed.
Was this manual helpful?
About this manual
- Brand
- Bosch
- Model
- B24CB50ESS
- Document type
- User Manual
- Category
- Refrigerator
- Language(s)
- English, French
- Pages
- 40
- File size
- 4.1 MB
- Format
Other Manuals for Bosch B24CB50ESS
Summary
en-us 2 Table of contents 1 Safety .......................................................................... 31.1 Safety definitions........................................................ 31.2 General information.................................................... 31.3 Intended use .................
en-us 3 Observe the following safety instructions. 1.1 Safety definitions Here you can find explanations of the safety signal wordsused in this manual. WARNING This indicates that death or serious injuries may occur asa result of non-observance of this warning. CAUTION This indicates that minor or m...
en-us 5 1.8 Damaged appliance WARNINGIf the appliance or the power cord is damaged, this is dan-gerous. ▶ Never operate a damaged appliance. ▶ Never pull on the power cord to unplug the appliance.Always unplug the appliance at the power outlet. ▶ If the appliance or the power cord is damaged, immedi...
Ask a question
Related manuals
Popular Bosch Refrigerators
More Bosch Refrigerators models
 Bosch KSV33VI3A User Manual
 Bosch B10CB81NVW Manual
 Bosch B11CB50SSS User Manual
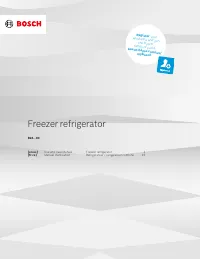 Bosch B24CB80ESB User Manual
- Bosch B24CB80ESS User Manual
 Bosch B30BB935SS User Manual
 Bosch B30IB905SP User Manual
 Bosch B36BT935NS User Manual
 Bosch B36CD50SNB User Manual
 Bosch B36CD50SNS User Manual
 Bosch B36CL80SNS User Manual
 Bosch B36CL81ENG User Manual