Page 2 - Table of contents; Switching off the connection to the WLAN home
en-us 2 Table of contents 1 Safety .......................................................................... 31.1 Safety definitions........................................................ 31.2 General information.................................................... 31.3 Intended use .................
Page 3 - Observe the following safety instructions.; Safety definitions; WARNING; General information; Read this manual carefully.; Safe installation; Do not use extension cords or multiple socket strips.; IMPORTANT SAFETY INSTRUCTIONS; READ AND SAVE THESE INSTRUCTIONS
en-us 3 Observe the following safety instructions. 1.1 Safety definitions Here you can find explanations of the safety signal wordsused in this manual. WARNING This indicates that death or serious injuries may occur asa result of non-observance of this warning. CAUTION This indicates that minor or m...
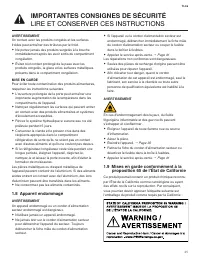
Page 5 - Damaged appliance; Never operate a damaged appliance.; Switch off the appliance.; State of California Proposition 65
en-us 5 1.8 Damaged appliance WARNINGIf the appliance or the power cord is damaged, this is dan-gerous. ▶ Never operate a damaged appliance. ▶ Never pull on the power cord to unplug the appliance.Always unplug the appliance at the power outlet. ▶ If the appliance or the power cord is damaged, immedi...
Page 6 - Preventing material damage; Disposal of packaging; Selecting the installation location; Note: The arrangement of the fittings does not affect the; Installation and connection; Included in delivery; Installing the appliance; Depending on the appliance specifications
en-us Preventing material damage 6 Preventing material damage 2 Preventing material damage Preventing material damage NOTICE: If not rolling in a straight line, the appliance's castors may damage the floor when the appliance is moved. ▶ Transport the appliance using a hand-cart. ▶ Use floor protect...
Page 7 - Connecting the appliance to the electric-; Insert the power plug of the appliance's power cord in a
Installation and connection en-us 7 4.5 Connecting the appliance to the electric- ity supply 1. Insert the power plug of the appliance's power cord in a socket outlet nearby.The connection data of the appliance can be found onthe rating plate. → "Appliance", Fig. 1 / 7 , Page 8 2. Check the...
Page 8 - Here you can find an overview of the parts of your appliance.
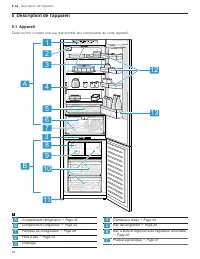
en-us Familiarizing yourself with your appliance 8 Familiarizing yourself with your appliance 5 Familiarizing yourself with your appliance Familiarizing yourself with your appliance 5.1 Appliance Here you can find an overview of the parts of your appliance. 1 2 3 4 5 6 7 9 10 11 12 13 A B 3 8 1 A R...
Page 9 - Note: Your appliance may differ from the diagrams with; Features; Storage container
Features en-us 9 8 Ice cube maker → Page 14 9 Ice storage container → Page 10 10 Frozen food container → Page 16 11 Screw foot 12 Variable door rack → Page 10 13 Door rack for large bottles Note: Your appliance may differ from the diagrams with regard to features and dimensions. 5.2 Control pan...
Page 10 - Note: If the appliance has been previously switched off; Setting the refrigerator compartment temperature; Switching on Super cooling
en-us Basic Operation 10 6.3 Fruit and vegetable container with hu- midity controller Store fresh fruit and vegetables loose in the fruit and veg- etable container. Cover any chopped fruit and vegetables, or store in air- tight packaging. Condensation may form in the fruit and vegetable con- tainer...
Page 11 - Note: After approximately 6 hours, the appliance switches; Alarm; Temperature alarm; CAUTION
Alarm en-us 11 Note: After approximately 6 hours, the appliance switches to normal operation. Switching off Super cooling ▶ Press . 8.2 Super freezing With Super freezing, the freezer compartment cools as cold as possible. Switch on Super freezing 4 to 6 hours before placing food weighing 4.4 lbs (...
Page 12 - Notes; 1 Refrigerator compartment
en-us Refrigerator compartment 12 The Home Connect® app guides you through the entire registration process. Follow the instructions in the Home Connect® app to implement the settings.Tips ¡ Consult the Home Connect® documents supplied. ¡ Follow the instructions in the Home Connect® app as well. Not...
Page 13 - Coldest zone; 2 Freezer compartment; Packing frozen food; Tips
Freezer compartment en-us 13 11.2 Chill zones in the refrigerator compart- ment The air circulation in the refrigerator compartment creates different chill zones. Coldest zone The coldest zone is in the storage container.Tip: Store highly perishable food such as fish, sausages and meat in the colde...
Page 14 - Changing the water filter or replacing it with a; Note: When removing it, a small amount of water may; Dispensing water
en-us Water system 14 Changing the water filter or replacing it with a bypass cap 1. Reach into the recess below the filter cover, pull it for- ward slightly and remove it. 2. Turn the water filter counterclockwise by 90° and re- move it . ‒ Remove the water filter with care as it is under pres-...
Page 15 - Putting the ice maker into operation; Defrosting in the freezer compartment; Preparing the appliance for cleaning
Defrosting en-us 15 Tip: If the ice cubes taste stale, dispose of the remaining ice cubes and the cubes produced over the next 24 hours. If the ice cubes still taste stale, change the water filter. Putting the ice maker into operation Notes ¡ Ice cube production starts as soon as the appliance is s...
Page 16 - Removing the fittings; Removing the shelf
en-us Cleaning and maintenance 16 15.3 Removing the fittings If you want to clean the fittings thoroughly, remove these from your appliance. Removing the shelf ▶ Lift the shelf at the front , pull it out and remove it . Removing the storage container 1. Pull the storage container out all the way...
Page 17 - Removing the ice cube container; Removing the appliance components; Removing the door rack rail
Cleaning and maintenance en-us 17 ▶ Press in the snap-in hooks on the side of the container and remove the front from the container in a turning motion . Removing the ice cube container 1. Pull out the flat frozen food container as far as it will go. 2. Lift the ice cube container at the front and...
Page 18 - 6 Troubleshooting
en-us Troubleshooting 18 Troubleshooting 16 Troubleshooting Troubleshooting You can eliminate minor issues on your appliance your- self. Please read the information on eliminating issues be- fore contacting Customer Service. This may avoid unnec- essary repair costs. WARNING Improper repairs are da...
Page 19 - Issue
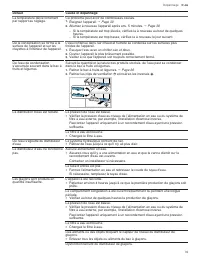
Troubleshooting en-us 19 Issue Cause and troubleshooting Condensation accumulates on the surface of the appliance and on the shelves inside. The water contained in warm and humid air condenses on the colder surfaces of the appliance. 1. Wipe away the water with a soft, dry cloth. 2. Open the applia...
Page 20 - 7 Storage and disposal; Taking the appliance out of operation
en-us Storage and disposal 20 Issue Cause and troubleshooting The ice maker is not functioning. ▶ Ensure that there is a water supply and that the shut-off valve on the water con- nection is open.Contact an installer if necessary. Kink in the water hose. ▶ Turn off the water supply and straighten t...
Page 21 - Disposal of your old appliance; 8 Customer Service; 9 Technical specifications; Information regarding Free and Open
Customer Service en-us 21 6. NOTICE: Objects jammed between the door and the housing may damage the door hinge. ▶ Open the door until it remains open by itself. ▶ Do not insert any objects between the door and the housing. To ensure the ventilation inside the appliance, leave the appliance open. 17...
Page 22 - Table des matières; Désactiver la connexion au réseau domestique
fr-ca 22 Table des matières 1 Sécurité..................................................................... 231.1 Définitions des termes de sécurité ........................... 231.2 Indications générales ............................................... 231.3 Conformité d’utilisation ..................
Page 23 - Respectez les consignes de sécurité suivantes.; Définitions des termes de sécurité; AVERTISSEMENT; Indications générales; Lisez attentivement cette notice.; Conformité d’utilisation; IMPORTANTES CONSIGNES DE SÉCURITÉ; LIRE ET CONSERVER CES INSTRUCTIONS
fr-ca 23 Respectez les consignes de sécurité suivantes. 1.1 Définitions des termes de sécurité Vous trouverez ici des explications sur les mots designalisation de sécurité utilisés dans ce manuel. AVERTISSEMENT Signale un risque de mort ou de blessure grave sil’avertissement n’est pas respecté. MISE...
Page 25 - Ne consommez pas les aliments contaminés.; Appareil endommagé; Les réparations non conformes sont dangereuses.; Mises en garde conformément à la
fr-ca 25 AVERTISSEMENTUn contact avec les produits congelés et les surfacesfroides peut entraîner des brûlures par le froid. ▶ Ne portez jamais des produits surgelés à la boucheimmédiatement après les avoir sortis du compartimentcongélation. ▶ Évitez tout contact prolongé de la peau avec lesproduits...
Page 26 - Prévenir les bris matériels; Mise au rebut de l’emballage; Choisir le lieu d'installation; Installation et branchement; Contenu de livraison; Pas dans tous les pays
fr-ca Prévenir les bris matériels 26 Prévenir les bris matériels 2 Prévenir les bris matériels Prévenir les bris matériels AVIS : Le basculement des roulettes de l'appareil peut endommager le sol lors du déplacement de l'appareil. ▶ Transportez l'appareil avec un diable. ▶ Lorsque vous déplacez l'a...
Page 27 - utilisation
Installation et branchement fr-ca 27 4.3 Monter l'appareil ▶ Montez l'appareil selon les instructions de montage jointes. 4.4 Préparer l'appareil pour la première utilisation 1. Retirez le matériel d'informations. 2. Retirer les films protecteurs et les sécurités de transport, par ex. les bandes ad...
Page 29 - Bandeau de commande; Équipement
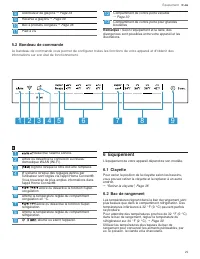
Équipement fr-ca 29 8 Distributeur de glaçons → Page 34 9 Réserve à glaçons → Page 30 10 Bac à produits congelés → Page 36 11 Pied à vis 12 Compartiment de contre-porte variable → Page 30 13 Compartiment de contre-porte pour grandes bouteilles Remarque : Selon l'équipement et la taille, des div...
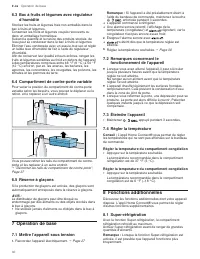
Page 30 - Remarque : Si l'appareil a été préalablement éteint à; Régler la température du compartiment congélation
fr-ca Opération de base 30 6.3 Bac à fruits et légumes avec régulateur d’humidité Stockez les fruits et légumes frais non emballés dans le bac à fruits et légumes. Conservez les fruits et légumes coupés recouverts ou dans un emballage hermétique. Suivant la quantité et la nature des produits stocké...
Page 31 - Remarque : Pendant le Mode Sabbat l'éclairage du; Alarme; Alarme de température; MISE EN GARDE
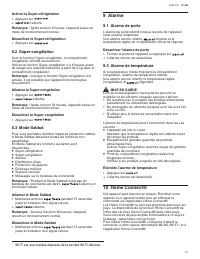
Alarme fr-ca 31 Activer la Super-réfrigération ▶ Appuyez sur . a s'allume. Remarque : Après environ 6 heures, l'appareil passe en mode de fonctionnement normal. Désactivez le Super-réfrigération ▶ Appuyez sur . 8.2 Super-congélation Avec la fonction Super-congélation, le compartiment congélation re...
Page 32 - Remarques; 1 Compartiment réfrigération
fr-ca Compartiment réfrigération 32 Attendez au moins 2 minutes après la mise en marche de l’appareil, jusqu'à ce que l’initialisation interne de l’appareil soit achevée. Réglez ensuite d'abord Home Connect®. L’appli Home Connect® vous guide tout au long du processus de connexion. Suivez les étapes...
Page 33 - Zone la plus froide; 2 Compartiment congélation; Emballer les surgelés
Compartiment congélation fr-ca 33 ¡ Pour ne pas entraver la circulation de l'air et pour éviter que les aliments ne gèlent, ne placez pas les aliments en contact direct avec la paroi arrière. ¡ Laissez les boissons et aliments chauds refroidir avant de les ranger. ¡ Respectez la date de péremption ...
Page 34 - Conseils; Changer le filtre à eau ou le remplacer par un; Distributeur d’eau; Prélever de l’eau; Distributeur de glaçons
fr-ca Système hydraulique 34 Conseils ¡ Pour un filtre à eau neuf, adressez-vous à notre service après-vente, à votre revendeur ou consultez notre site Web. ¡ Si vous ne souhaitez pas utiliser de filtre à eau dans votre appareil ou faire installer un système de filtre à eau externe, vous pouvez rem...
Page 35 - Remarque : Le distributeur de glaçons détecte; Mettre en service le distributeur de glaçons; Lancer la production de glaçons; Remarque : En appuyant sur le bouton du distributeur de; Remarque : En appuyant sur le bouton du distributeur de; Dégivrer le compartiment congélation; 5 Nettoyage et entretien; Préparer l'appareil pour le nettoyage
Dégivrer fr-ca 35 Remarque : Le distributeur de glaçons détecte automatiquement que la réserve à glaçons est pleine et arrête la production de glaçons. Le remplissage de la réserve à glaçons peut prendre jusqu'à 48 heures.Conseil : Si les glaçons ont un goût désagréable, jetez les glaçons restants ...
Page 36 - Retirer les pièces d’équipement; Retirer la clayette
fr-ca Nettoyage et entretien 36 15.2 Nettoyer l'appareil AVERTISSEMENT L'humidité qui pénètre peut occasionner une électrocution. ▶ N'utilisez pas de nettoyeur haute pression ou de nettoyer à vapeur pour nettoyer l'appareil. AVIS : Les produits de nettoyage inappropriés risquent d'endommager la sur...
Page 37 - Retirer la façade du bac
Nettoyage et entretien fr-ca 37 2. Soulevez l'avant du bac à produits congelés et retirez-le . Retirer la façade du bac Vous pouvez retirer la façade du bac à fruits et légumes et du bac à aliments surgelés pour faciliter le nettoyage. ▶ Appuyez sur les crochets de fixation latéraux du bac et reti...
Page 39 - Défaut
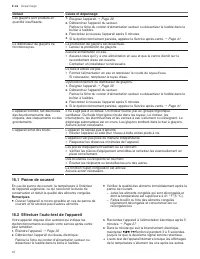
Dépannage fr-ca 39 Défaut Cause et dépannage La température dévie fortement par rapport au réglage. Ce problème peut avoir de nombreuses causes. 1. Éteignez l’appareil. → Page 30 2. Allumez à nouveau l'appareil après env. 5 minutes. → Page 30 ‒ Si la température est trop élevée, vérifiez-la à nou...
Page 40 - Panne de courant
fr-ca Dépannage 40 Défaut Cause et dépannage Les glaçons sont produits en quantité insuffisante. 1. Éteignez l’appareil. → Page 30 2. Débranchez l'appareil du secteur.Retirez la fiche du cordon d'alimentation secteur ou désactivez le fusible dans le boîtier à fusibles. 3. Raccordez à nouveau l'app...
Page 41 - 7 Entreposage et mise au rebut; Mettre l’appareil hors service; 8 Service à la clientèle; Informations sur le logiciel libre
Entreposage et mise au rebut fr-ca 41 a Si, à la fin de l'auto-test, 2 signaux sonores retentissent et si l'affichage de la température indique la température réglée, cela signifie que votre appareil fonctionne correctement. L'appareil revient en fonctionnement normal. a Si vous entendez 5 signaux ...
Page 44 - • Expert tips & tricks for your appliance; USA
Thank you for buying a Bosch Home Appliance! Register your new device on MyBosch now and profit directly from: • Expert tips & tricks for your appliance • Warranty extension options • Discounts for accessories & spare-parts • Digital manual and all appliance data at hand • Easy access to Bos...


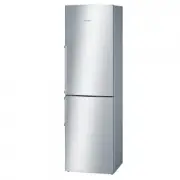
 Bosch B09IB91NSP
User Manual
Bosch B09IB91NSP
User Manual
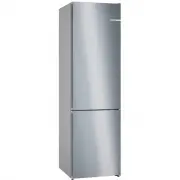
 Bosch B10CB81NVB
User Manual
Bosch B10CB81NVB
User Manual
 Bosch B10CB81NVW
User Manual
Bosch B10CB81NVW
User Manual
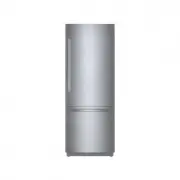
 Bosch B11CB50SSS
User Manual
Bosch B11CB50SSS
User Manual
 Bosch B11CB81SSS
User Manual
Bosch B11CB81SSS
User Manual
 Bosch B24CB50ESS
User Manual
Bosch B24CB50ESS
User Manual
 Bosch B30BB935SS
User Manual
Bosch B30BB935SS
User Manual