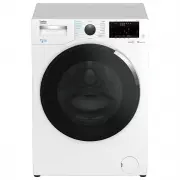
Page 2 - General safety instructions; Life and property safety; problems with your product.
2 / EN Washing Machine / User’s Manual 1 General safety instructions This section contains safety instructions that will help protect from risk of personal injury or property damage. Failure to follow these instructions shall void any warranty. 1.1 Life and property safety u Never place the product ...
Page 3 - Electrical safety; authorised service agent; Hot surface safety
3 / EN Washing Machine / User’s Manual trained on the safe usage of the product and the risks it brings out. Children should not play with the product. Cleaning and maintenance works should not be performed by children unless they are supervised by someone. Children under the age of 3 should be kept...
Page 4 - Important instructions for environment; Compliance with WEEE Directive; Compliance with RoHS Directive:; Package information; Intended use; out of its intended use.; Technical specifications; Supplier name or trademark
4 / EN Washing Machine / User’s Manual 2 Important instructions for environment 2.1 Compliance with WEEE Directive This product complies with EU WEEE Directive (2012/19/EU). This product bears a classification symbol for waste electrical and electronic equipment (WEEE). This product has been manufac...
Page 5 - Damaged products cause risks for your safety.
5 / EN Washing Machine / User’s Manual 4.1 Installation • Preparation of the location and electrical, tap water and waste water installations at the place of installation is under customer's responsibility. • Make sure that the water inlet and discharge hoses as well as the power cable are not folde...
Page 6 - Connecting the drain hose to the drain; • Connect the drain hose to a minimum height of 40 cm
6 / EN Washing Machine / User’s Manual 4.1.4 Connecting water supply C The water supply pressure required to run the product is between 1 to 10 bars (0.1 – 1 MPa). It is necessary to have 10 – 80 liters of water flowing from the fully open tap in one minute to have your machine run smoothly. Attach ...
Page 7 - spanner
Page 8 - • Always observe the instructions given on the garment care labels.; and; machine
8 / EN Washing Machine / User’s Manual 4.2 Preparation 4.2.1 Sorting the laundry • Sort laundry according to type of fabric, color, and degree of soiling and allowable water temperature. • Always observe the instructions given on the garment care labels. 4.2.2 Preparing laundry for washing • Laundry...
Page 9 - The detergent drawer is composed of three compartments:; Detergent, softener and other cleaning agents; Detergent type to be used depends on the fabric type and color.; Adjusting detergent amount; • Use lesser detergent for small amounts or lightly soiled clothes.; Using softeners
9 / EN Washing Machine / User’s Manual 4.2.6 Using detergent and softener C When using detergent, softener, starch, fabric dye, bleach and descaling agents; read the manufacturer's instructions written on the package and follow the dosages specified. Use measuring cup if available. 1 3 2 The deterge...
Page 10 - Put the liquid detergent container into the compartment no “2”.
10 / EN Washing Machine / User’s Manual Using liquid detergentsIf the product contains a liquid detergent cup: • Put the liquid detergent container into the compartment no “2”. • If the liquid detergent lost its fluidity, dilute it with water before putting it into the detergent container. 2 2 If th...
Page 11 - Clothes
11 / EN Washing Machine / User’s Manual 4.2.7 Tips for efficient washing Clothes Light Colours and Whites Colours Black/Dark Colours Delicates/ Woolens/Silks (Recommended temperature range based on soiling level: 40-90°C) (Recommended temperature range based on soiling level: cold -40°C) (Recommende...
Page 12 - Operating the product
12 / EN Washing Machine / User’s Manual 4.3 Operating the product 4.3.1 Control panel 1 - Programme Selection knob 2 - Temperature level lights 3 - Spin level indicator lights 4 - Display 5 - Start / Pause button 6 - Remote Control button. 7 - End Time Setting button 8 - Auxiliary Function button 3 ...
Page 13 - Note for test institutions:; : See the programme description for maximum load.
13 / EN Washing Machine / User’s Manual 4.3.3 Programme and consumption table C Note for test institutions: Data required for performance tests shall be provided upon request. Requests can be e-mailed to the following address: [email protected] Do not forget to provide the code, stock and serial num...
Page 14 - Select the desired programme with the; Programme Selection; • Cottons Eco
14 / EN Washing Machine / User’s Manual C The auxiliary functions in the table may vary according to the model of your machine.Water and power consumption may vary subject to the changes in water pressure, water hardness and temperature, ambient temperature, type and amount of laundry, selection of ...
Page 15 - automatically selected for this cycle and cannot be cancelled.; • Rinse
15 / EN Washing Machine / User’s Manual • Anti-Allergy+ Use this programme for your laundry (baby clothes, bed sheets, bedlinen, underwear, etc. cotton items) that requires an anti-allergy and hygienic washing at high temperature with intensive and long washing cycle. Steam vapour is automatically a...
Page 16 - • Auto Program; • Delicates
16 / EN Washing Machine / User’s Manual • Auto Program Use to wash frequently washable cotton, synthetic or blended (cotton+synthetic) clothes. Programme detects the type and quantity of the laundry to automatically adjust water consumption and programme time. A WARNING: Do not wash your woolen and ...
Page 17 - • Downloaded Program; Temperature Adjustment button
17 / EN Washing Machine / User’s Manual • Select the stain you want to clean by locating it in the groups above and selecting the related group with the quick auxiliary function button. • Read the garment tag carefully and ensure that correct temperature and spin speed are selected. • Downloaded Pro...
Page 18 - Spin Speed; Rinse hold
18 / EN Washing Machine / User’s Manual This function holds the laundry in the final rinsing water. If you want to spin your laundry after the Rinse Hold function: - Adjust the Spin Speed . - Press Start / Pause / Cancel . The programme will resume. Machine drains the water and spins the laundry. If...
Page 19 - • Pet Hair Removal; Drum Clean 3”; • Night Mode 3”
19 / EN Washing Machine / User’s Manual • Pet Hair Removal This function helps to remove pet hair that remain on your garments more effectively. When you select this function, Prewash and Extra Rinse steps are added to the normal programme. Thus, washing is performed with more water and the pet hair...
Page 20 - • Child lock; Press and hold Auxiliary Function button 3; • Bluetooth 3’’
20 / EN Washing Machine / User’s Manual • Child lock Use Child Lock function to prevent children from tampering with the machine. Thus you can avoid any changes in a running programme. C You can switch on and off the machine with On / Off button when the Child Lock is active. When you switch on the ...
Page 21 - on and off
21 / EN Washing Machine / User’s Manual If you want to cancel End Time function, turn the knob to on and off position. machine. C When you have activated the End Time function, do not add liquid detergent in the powder detergent compartment no 2. There is the risk of staining of the clothes. 1 Open ...
Page 22 - 2 Changing the selections after programme has started; Adding laundry after the programme has started; button, the door lock will be; Switching the machine to pause mode:
22 / EN Washing Machine / User’s Manual • Open the pump filter cap. • Release the loading door emergency handle located at the rear side of the filter cap. • Pull down the loading door emergency handle once and open the loading door. After opening the loading door, re-insert the loading door emergen...
Page 23 - Changing the programme selection after programme has started:; Changing the auxiliary function, speed and temperature; 5 HomeWhiz Feature and Remote Control Function
23 / EN Washing Machine / User’s Manual Changing the programme selection after programme has started: The programme change is allowed when the current programme is running unless the Child Lock is enabled. This action will cancel the current programme. C The selected program starts anew. Changing th...
Page 24 - in this mode. Other buttons will be inactive.
24 / EN Washing Machine / User’s Manual • To start the setup, make sure that your machine is turned off. Press and hold the Temperature button and the Remote Control Function button simultaneously for 3 seconds to switch your machine to HomeWhiz setup mode. • When the appliance is in HomeWhiz setup ...
Page 25 - When your washing machine undergoes a power interruption.
25 / EN Washing Machine / User’s Manual 4.3.15.3 Remote Control function and its use After HomeWhiz setup, bluetooth will automatically turn on. To activate or deactivate the bluetooth connection, please see 4.3.8.2 Bluetooth 3’’’. If you turn off and on your machine while bluetooth is active, it wi...
Page 26 - Maintenance and cleaning; Cleaning the loading door and the drum; Cleaning the body and control panel
26 / EN Washing Machine / User’s Manual 4.4 Maintenance and cleaning Service life of product extends and frequently experienced problems will be reduced if it is cleaned at regular intervals. 4.4.1 Cleaning the detergent drawer Clean the detergent drawer at regular intervals (every 4-5 washing cycle...
Page 27 - Draining remaining water and cleaning the pump filter; In order to clean the dirty filter and discharge the water:
27 / EN Washing Machine / User’s Manual 4.4.5 Draining remaining water and cleaning the pump filter The filter system in your machine prevents solid items such as buttons, coins and fabric fibers clogging the pump impeller during discharge of washing water. Thus, the water will be discharged without...
Page 28 - Troubleshooting; Problem
28 / EN Washing Machine / User’s Manual 5 Troubleshooting Problem Cause Solution Programs do not start after the loading door is closed. Start / Pause / Cancel button is not pressed. • Press Start / Pause / Cancel button. It may be difficult to close the loading door in case of excessive loading. • ...