Page 3 - Use and Care Guide
Use and Care Guide MODEL: A3BLOZONEWTRCLR Registration Please visit the website below to register your new water cooler within the first 30 days of purchase. Registration within the first 30 days will activate your one year warranty. www.avalonh2o.com/register-my-avalon-cooler Please keep your model...
Page 4 - Contents
Contents About Your Water Cooler Meet Your Avalon Product Part Names Indicator Lights Tech Specs Getting Started Unpacking your Avalon Water Cooler Install Water Bottle Install/Remove Drip Tray Powering the Dispenser Activate Heating and Cooling 2-3 8-9 1 45 7 10 11 12
Page 6 - Meet Your Avalon Product
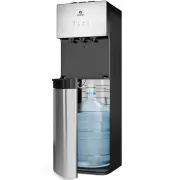
1 Meet Your Avalon Product Custom Temperature Piping hot, room temperatureor crisp cold water Empty bottle indicator Notifies you when your bottle is empty Attractive Design Stainless steel design with three water spouts Bottom loading No more lifting, flipping or spills UL Listed We design & ma...
Page 7 - Part Names
2 Part Names 8. Cold Water Push Button 14. Drip Tray 9. Panel 7. Room Temperature Water Push Button 5. Hot Water Push Button 6. Child Safety Lock 1. Power/Self-Cleaning Indicator Light 3. Cooling Indicator Light 4. Empty Bottle Indicator Light 2. Heating Indicator Light 11. Room Temp Spout 10. Hot W...
Page 9 - Indicator Lights
4 Indicator Lights Power/Self-Cleaning Indicator Light This light will remain steady on to indicate that the unit is plugged in and the power is on. When the unit is placed into self-cleaning mode this indicator light will blink until the cycle is complete. When the cycle is complete the light will ...
Page 10 - Tech Specs
5 Tech Specs Model A3BLOZONEWTRCLR Hot/Cold/Room Temp Output Hot Water Capacity Hot Tank Volume Cold Water Capacity Cold Tank Volume Product Size Packing Size Net Weight/Gross Weight Voltage/Frequency Cooling Method Heating Method Heating Watts / Cooling Watts Power Consumption 1.2L/min / 1.2L/min /...
Page 11 - G e t t i n g Sta r te d
Page 12 - Unpacking your Avalon Water Cooler
7 Unpacking your Avalon Water Cooler The unit has been cleaned prior to departing from the factory. To remove any dust and debris that may collect during shipping we recommend cleaning the unit prior to installation. For cleaning instructions, see pages 17-21. Do NOT plug in the power cord yet.Place...
Page 13 - Installing the Water Bottle
8 Installing the Water Bottle 1. Open the cabinet door. 3. Place a fresh bottle outside of the cabinet. 2. Place the probe assembly on the probe hanger. 4. Remove the entire plastic cap from the top of the bottle. 5. Clean the outside of the new bottle with a cloth. Getting Started
Page 15 - Installing and Removing the Drip Tray
10 Installing and Removing the Drip Tray 1. To install the drip tray, simply slide it into the area at the top of the door until it snaps into place. 2. To remove the drip tray, place your fingers in the grid of the drip tray with one hand and hold the door of the cooler shut with the other. 3. Gent...
Page 16 - Powering the Dispenser
11 Powering the Dispenser Plug cord into a properly grounded wall outlet. At this time the pump will begin to move water from the bottle to the hot and cold tanks. It will take up to 12 minutes to fill the tanks for the first time. During this period the pump will run continuously. This is normal. G...
Page 17 - Activate Heating and Cooling
12 Activate Heating and Cooling To activate the cold water, push the cooling switch (#17) into the on (I) position by pushing the top of the switch in. If you do not wish to have cold water you can leave the switch in the off (O) positon.To activate the hot water, push the heating switch (#18) into ...
Page 18 - Us e r G u i d e a n d Ma i n te n a n c e
Page 19 - Dispensing Water
14 Dispensing Water Cold Water Hot Water Room Temperature Water Once you have turned the cooling switch (#17) into the on (I) position it will take initially 1 hour for the water to cool. During this time the cooling indicator light (#3) above the cold water icon will be steady. During this time the...
Page 20 - Changing the Bottle
15 Changing the Bottle When the empty bottle indicator light (#4) is flashing red this is an alert that your bottle is empty and will need to be replaced as soon as possible.Notice: Do not dispense hot, room temperature or cold water if the light is flashing as you could empty the tanks and cause th...
Page 22 - C l e a n i n g
Page 23 - Activating Self-Cleaning Function
18 Activating Self-Cleaning Function 3. Ozone will be produced and injected into the water system, it will kill bacteria and bio-films typically found in water dispensers. By the end of the cleaning cycle the ozone will convert into harmless oxygen and will be emitted into the air. 1. To activate, p...
Page 29 - Tro u b l e s h o ot i n g
Page 32 - S a fe t y