Page 2 - Congratulations
Fresh, warm homemade bread is just a few easy steps away with your new Sunbeam Bakehouse.With your new Sunbeam Bakehouse you can have delicious home made bread in just over an hour. And you’re only limited by your imagination… rye bread, artisan style bread, gluten free bread, doughs and specialty b...
Page 3 - Contents
Sunbeam’s Safety Precautions 1 Using your Bakehouse safely 2 Getting to know your Bakehouse 3 The Control Panel 5 Menu Settings 6 Menu Times and Settings 8 Ingredients 10Ingredient hints for New Zealand 11 Using your Bakehouse 12 Using the Time Delay Function 14 Using the Bake Only Menu 14 Fruit and...
Page 4 - Sunbeam’s Safety Precautions
If you have any concerns regarding the performance and use of your appliance, please visit www.sunbeam.com.au or contact the Sunbeam Consumer Service Line. Ensure the above safety precautions are understood. SAFETY PRECAUTIONS FOR YOUR SUNBEAM BREADMAKER • Do not use attachments not recommended by S...
Page 5 - Using your Bakehouse
12 Before use 1. Read all instructions, product labels and warnings. Save these instructions 2. Remove all foreign matter from the bread pan and baking chamber 3. Wipe over bread pan and kneading blade before use 4. Always use the bread maker from a 230-240V AC power outlet 5. Do not allow anything ...
Page 6 - Getting to know your Bakehouse
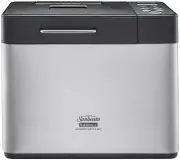
3 Getting to know your Bakehouse ® Removable lid Viewing Window Non-stick removable bread pan with removable kneading blade Steam Vents
Page 8 - The Control Panel
5 The Control Panel 1. LCD Window The window indicates the Menu setting, the Crust colour and the Loaf Size. The display will show the number of hours and minutes until the cycle is complete – “0:00”. 2. Timer Buttons Use to adjust the BAKE ONLY time and to set the Delay Start timer. Increases the t...
Page 9 - Menu Settings
6 Menu Settings 1. Basic Use this setting to make traditional white bread. Press the MENU button once and the LCD window will show ‘1’. You have a choice of 3 crust colours - Light, Medium or Dark. 2. Basic Turbo Use this turbo setting for ready made Basic bread in approximately 1 hour. The crust co...
Page 11 - Menu Times and Settings
8 Menu Times and Settings Menu Crust Size Time Warm F & N Delay 1 Basic Light 500g 3:07 60 4 15:00 750g 3:10 60 4 15:00 1.0kg 3:13 60 4 15:00 Medium 500g 3:15 60 4 15:00 750g 3:20 60 4 15:00 1.0kg 3:25 60 4 15:00 Dark 500g 3:30 60 4 15:00 750g 3:35 60 4 15:00 1.0kg 3:40 60 4 15:00 2 Basic Turbo ...
Page 12 - Menu Times and Settings continued
9 Menu Times and Settings continued Menu Crust Size Time Warm F & N Delay 5 French Light 500g 3:22 60 4 15:00 750g 3:33 60 4 15:00 1.0kg 3:44 60 4 15:00 Medium 500g 3:42 60 4 15:00 750g 3:46 60 4 15:00 1.0kg 3:50 60 4 15:00 Dark 500g 3:45 60 4 15:00 750g 3:52 60 4 15:00 1.0kg 3:52 60 4 15:00 6 F...
Page 13 - Ingredients
10 Menu Crust Size Time Warm F & N Delay 5 French Light 500g 3:22 60 4 15:00 750g 3:33 60 4 15:00 1.0kg 3:44 60 4 15:00 Medium 500g 3:42 60 4 15:00 750g 3:46 60 4 15:00 1.0kg 3:50 60 4 15:00 Dark 500g 3:45 60 4 15:00 750g 3:52 60 4 15:00 1.0kg 3:52 60 4 15:00 6 French Turbo Medium 1.0kg 1:08 60 ...
Page 14 - Ingredients continued; Ingredient hints for New Zealand
11 Fats Many breads use fats to enhance the flavour and retain moisture. Typically, we use margarine in the recipes. Softened butter or oil may be used in equivalent quantities.If you choose not to add any fat, your bread may vary in taste and texture. Bread mixes A variety of bread mixes can be use...
Page 17 - Using the Time Delay; Using the Bake Only menu
14 The Bakehouse allows you to delay the completion of your bread by up to 15 hours, so you can wake up to the smell of freshly baked bread, or go out for the day while your Bakehouse does all the work. Note: Do not use the Time Delay when the recipe has perishable ingredients such as milk, eggs or ...
Page 18 - Fruit and Nut Dispenser
15 Power Interruption Program Protection Your Bakehouse features a 7 minute Power Interruption Protection that protects the program memory in the advent of power surges, or short term power failure (blackout)This means that if there is a power interruption during your bread making, the machine will ...
Page 19 - Important Measuring Tips
16 Each ingredient in a loaf of bread plays a specific role, so it is extremely important to measure the ingredients correctly to get the best results.We recommend using Australian standard measuring jugs, cups and spoons. Weight measurements are provided if you wish to use a kitchen scale.Australia...
Page 20 - Handy Hints
17 Order of ingredients Place liquid in first, the dry ingredients in next and the yeast in last. Fruits and nuts are added later, after the machine has completed the first knead. This will ensure a crisp and evenly baked loaf every time. Freshness Ensure all ingredients are fresh and used before th...
Page 21 - Care and Cleaning
Before cleaning the Bakehouse, unplug it from the power outlet and allow it to cool completely. To clean the exterior Wipe exterior with a slightly dampened cloth and polish with a soft dry cloth. Do not use metal scourers or abrasives as this may scratch the exterior surface. To clean the non-stick...
Page 22 - Questions and Answers
19 Questions and Answers Question Answer Why does the height and shape of each loaf differ? It is normal for the height and shape of each loaf to vary depending on the ingredients, accurate measurement of ingredients and the room temperature. Kneading blade comes out with the bread This can happen a...
Page 23 - Basic
20 Basic To use the Basic Bread Setting: 1. Ensure the kneading blade is upright in the bread pan.2. Add the ingredients to the bread pan in the order listed. Add the specified ingredients to the Fruit and Nut dispenser (if applicable). 3. Wipe any spills from the outside of the bread pan. Insert th...
Page 24 - Basic continued
21 Basic continued Cornbread 500g 750g 1kg Water, luke-warm 160mls 235mls 315mls Butter or margarine 10g 15g 20g Polenta 2 tablespoons ¼ cup (40g) ¹⁄³ cup (55g) White Sugar 2 teaspoons 3 teaspoons 1 tablespoon Salt 1 teaspoon 1 teaspoon 1 ½ teaspoons Skim milk powder 2 teaspoons 3 teaspoons 1 tables...
Page 25 - Basic Turbo
22 Any of the 1.0kg Basic bread recipes can be made on this setting. Crust colour is automatically set to medium. This turbo function doesn’t use the automatic fruit and nut dispenser. If following a recipe that uses the dispenser, the ingredients will need to be added straight to the pan, before th...
Page 26 - Wheat
23 Wheat 1. Ensure the kneading blade is upright in the bread pan.2. Add the ingredients to the bread pan in the order listed. Add the specified ingredients to the Fruit and Nut dispenser (if applicable). 3. Wipe any spills from the outside of the bread pan. Insert the pan into the baking chamber an...
Page 27 - Wheat continued
24 *For mixed grain, we use a combination of sesame seeds, poppy seeds, sunflower seeds, pepitas, linseed and coarse polenta. Wheat continued Multigrain Bread 500g 750g 1kg Water, luke-warm 140mls 205mls 275mls Butter or margarine 2 teaspoons 3 teaspoons 1 tablespoon Salt 1 teaspoon 1 teaspoon 1 ½ t...
Page 28 - Wheat Turbo
25 Wheat Turbo Any of the 1.0kg Basic bread recipes can be made on this setting. Crust colour is automatically set to medium. This turbo function doesn’t use the automatic fruit and nut dispenser. If following a recipe that uses the dispenser, the ingredients will need to be added straight to the pa...
Page 29 - French
26 French To use the French Setting: 1. Ensure the kneading blade is upright in the bread pan.2. Add the ingredients to the bread pan in the order listed. Add the specified ingredients to the Fruit and Nut dispenser (if applicable). 3. Wipe any spills from the outside of the bread pan. Insert the pa...
Page 30 - French continued
27 French continued Italian Herb Bread 500g 750g 1kg Water, luke-warm 160mls 235mls 315mls Butter or margarine 10g 15g 20g Italian dried herbs 1 teaspoon 1 ½ teaspoon 2 teaspoons Salt ½ teaspoon ½ teaspoon 1 teaspoon Sugar 2 teaspoons 3 teaspoons 1 tablespoon Skim milk powder 2 teaspoons 3 teaspoons...
Page 31 - French Turbo
28 Any of the 1.0kg French bread recipes can be made on this setting. Crust colour is automatically set to medium. This turbo function doesn’t use the automatic fruit and nut dispenser. If following a recipe that uses the dispenser, the ingredients will need to be added straight to the pan, before t...
Page 32 - Sweet
29 We recommend light crust colour for this setting. To use the Sweet setting: 1. Ensure the kneading blade is in the bread pan.2. Add the ingredients to the bread pan in the order listed. Add the specified ingredients to the Fruit and Nut dispenser (if applicable). 3. Wipe any spills from the outsi...
Page 33 - Sweet continued
30 Sweet continued Panettone 500g 750g 1kg Water, luke-warm 60mls 80mls 100mls Salt ¼ teaspoon ½ teaspoon ¾ teaspoon Skim Milk Powder 1 ½ teaspoons 2 teaspoons 2 ½ teaspoons Caster Sugar 1 tablespoon 1 ½ tablespoons 2 tablespoons Egg 1 1 1 Egg Yolk 1 1 2 Butter 30g 40g 50g Orange Rind 1 teaspoon 2 t...
Page 34 - Yeast Free. Gluten Free Bread Mix
31 To use the Yeast Free. Gluten Free Bread Mix setting: 1. Ensure the kneading blade is in the bread pan.2. Add the ingredients to the bread pan in the order listed. Add the specified ingredients to the Fruit and Nut dispenser (if applicable). 3. Wipe any spills from the outside of the bread pan. I...
Page 35 - Yeast Free. Gluten Free Bread Mix continued
32 *For mixed grain, we use a combination of sesame seeds, poppy seeds, sunflower seeds, pepitas, linseed and coarse polenta. Yeast Free. Gluten Free Bread Mix continued Yeast Free Grain Bread Vegetable oil 60mls Eggs 3 Milk 220mls Salt ¼ teaspoon White sugar 2 tablespoons Mixed grain* ½ cup Self-Ra...
Page 36 - Rye
33 Rye To use the Rye setting: 1. Ensure the kneading blade is in the bread pan.2. Add the ingredients to the bread pan in the order listed. Add the specified ingredients to the Fruit and Nut dispenser (if applicable). 3. Wipe any spills from the outside of the bread pan. Insert the pan into the bak...
Page 37 - Rye continued
34 Rye continued Pumpernickel Bread Water, luke-warm 300mls Butter or margarine 30g Skim milk powder 2 tablespoons Cocoa 2 tablespoons Treacle 2 tablespoons Salt 1 teaspoon Bread improver 1 teaspoon Plain flour 200g Wholemeal flour 220g Rye flour 120g Dry yeast 1 ½ teaspoons
Page 38 - Gluten Free Recipe
35 Gluten Free Recipe To use the Gluten Free Recipe Setting: 1. Ensure the kneading blade is in the bread pan.2. Add the ingredients to the bread pan in the order listed. Add the specified ingredients to the Fruit and Nut dispenser (if applicable). 3. Wipe any spills from the outside of the bread pa...
Page 39 - Gluten Free Recipe continued
36 *For mixed grain, we use a combination of sesame seeds, poppy seeds, sunflower seeds, pepitas, linseed and coarse polenta. Gluten Free Recipe continued Gluten Free Mixed Grain Bread 750g 1kg Water, Luke-warm 365mls 455mls Eggs 2 3 Olive Oil 80mls 100mls White Vinegar 1 ½ teaspoons 2 teaspoons Xan...
Page 41 - Dough
38 Dough You will find this section particularly useful when using the Dough (11) setting and the Artisan-Style Dough (12) setting. Once the cycle is complete, place the dough onto a floured surface and using floured hands, shape as desired. Prepare your baking trays by greasing them lightly with bu...
Page 42 - Dough continued
Dough continued 39 Shaping Techniques:Rustic loaf – Working on a lightly floured surface, use the palms of your hands (dusted with flour) to gently tuck dough under itself until you get a smooth rounded top surface. Place on prepared baking tray. Using a sharp knife, make 1cm deep slashes across the...
Page 49 - Artisan-Style Dough continued
46 Artisan-Style Dough continued Sweet Pistachio & Craisin Dough Water, luke-warm 100mls Salt ¾ teaspoon White sugar 2 tablespoons Egg 1 Egg yolks 2 Butter 50g Orange rind 2 ½ teaspoons Orange Juice 1 ½ tablespoons Ground cinnamon 1 teaspoon Plain Flour 375g Dry yeast 1 ½ teaspoons Fruit & N...
Page 50 - Jam
47 Jam 1. Ensure the kneading blade is in the bread pan.2. Prepare the fruit as instructed. Add the ingredients to the bread pan in the order listed. 3. Wipe any spills from the outside of the bread pan. Insert the pan into the baking chamber and press down to ensure the pan is firmly clicked in pla...
Page 51 - Jam continued
48 Jam continued If your marmalade still has large sections of pith, you may want to add ½ cup water and run it through another cycle. Keep an eye on it if running a second cycle as the large quantity of sugar may cause it to burn. This relish goes well with barbecued meat or on burgers! Ginger and ...
Page 52 - Troubleshooting
49 Troubleshooting Machine Malfunctions Display Window Bread Sides of Browned & Sides Time Indicator Ingredients takes bread Under centre brown Slices Check does not not mixed too long collapse browned sticky & but flour unevenly the turn on to bake & bottom raw or not coated & stick...
Page 53 - Troubleshooting continued
50 Baking Results Open, Bread Browned Heavy Not baked coarse or Bread doesn’t Floured Over & floured Check dense in centre holey Collapse rises rise top browned sides, the texture texture too much enough centre following sticky/raw Measurement Errors FLOUR Not enough 7 Too much 7 7 YEAST Not eno...
Page 54 - Notes
Page 57 - 2 Month Replacement Guarantee
Should you experience any difficulties with your appliance, please phone our customer service line for advice on 1300 881 861 in Australia, or 0800 786 232 in New Zealand. Alternatively, you can send a written claim to Sunbeam at the address listed below. On receipt of your claim, Sunbeam will seek ...
Page 58 - Need help with your appliance?
Need help with your appliance? Contact our customer service team or visit our website for information and tips on getting the most from your appliance. In Australia Visit www.sunbeam.com.au Or call 1300 881 861 In New Zealand Visit www.sunbeam.co.nz Or call 0800 786 232 ‘Bakehouse’ is a registered t...
Page 59 - Instruction/Recipe Supplement for New Zealand; NEW ZEALAND SUPPLEMENT; PLEASE READ THIS BOOKLET FIRST
Instruction/Recipe Supplement for New Zealand NEW ZEALAND SUPPLEMENT PLEASE READ THIS BOOKLET FIRST This booklet covers the use and care of the following Sunbeam Breadmakers: BM7800 QUANTUM SMARTBAKE which can produce loaf sizes 750g; 1.0kg and 1.25kg BM4500 BAKEHOUSE which can produce loaf sizes 50...
Page 61 - Ingredients to use
Flour Use fresh, good quality flour. Do not use self-raising flour. White Flour Most large New Zealand milling companies produce two lines of white flour for the domestic market. One is finely milled 'weak' flour which is ideal for sponges, biscuits, shortbread and short pastry. This type of flour i...
Page 62 - Measuring Ingredients
Measuring Ingredients New Zealand standard metric kitchen measures have been used for all the recipes. All measurements should be level. Accuracy with measuring is important when making bread in a breadmaker. To measure flour For optimum results we recommend weighing flour. If scales are not availab...
Page 63 - White Bread
White Bread White Bread Method 1. Place ingredients into bread pan in the order listed. Wipe spills from the outside of the pan.2. Place the bread pan into the breadmaker and close the lid.3. Press the MENU button to program BASIC. 4. Select CRUST colour, loaf SIZE and press "START". Bread w...
Page 65 - Cinnamon Raisin Bread
6 Cinnamon Raisin Bread Cinnamon Raisin Bread Method 1. Place ingredients into bread pan and the fruit & nut dispenser in the order listed. Wipe spills from the outside of the pan. 2. Place the bread pan into the breadmaker and close the lid.3. Press the MENU button to program SWEET. 4. Select C...
Page 66 - Bread Rolls
7 Bread Rolls Method 1. Place ingredients into bread pan in the order listed. Wipe spills from the outside of the pan.2. Place the bread pan into the breadmaker and close the lid. 3. Press the MENU button to program DOUGH and press "START". 4. Remove completed dough from the bread pan. Line ...
Page 67 - Hot Cross Buns
8 Hot Cross Buns Method 1. Place ingredients into bread pan in the order listed. Wipe spills from the outside of the pan.2. Place the bread pan into the breadmaker and close the lid. 3. Press the MENU button to program DOUGH and press "START". 4. Remove completed dough from the bread pan. Li...