Smeg PVA750 - Manual

Smeg PVA750 – Manual, read for free online in PDF format. We hope this helps you resolve any issues you may have. If you have further questions, please contact us through the contact form.


Table of Contents:
- Page 2 – Precautions for Safety and Use; Precautions for safety and use
- Page 3 – Instructions for the Installer; Fitting the appliance in the top; Fixing to the supporting structure
- Page 4 – Fitting the adhesive foam rubber strip; Fitting the fixing clips
- Page 5 – Fitting the hob into the hole in the work-top
- Page 6 – Electrical connection
- Page 7 – Gas connection; Bottled gas connection
- Page 8 – Adapting to different types of gas; Removing the hob skin
- Page 9 – Adjusting for bottled gas
- Page 10 – Adjusting the primary air flow
- Page 11 – Reassembling the hob skin; Adjusting the minimum setting for natural ga; Adjusting the minimum for bottled gas; Greasing the gas taps
- Page 12 – Instructions for the User; Description of controls; The front panel
- Page 13 – Using the hob; Fitting the pan stands
- Page 16 – Lighting burners with safety device
- Page 17 – Pan diameters
- Page 18 – Cleaning and maintenance; Cleaning the hob
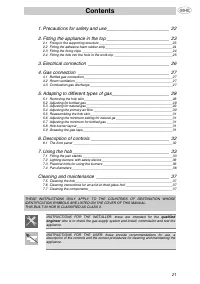
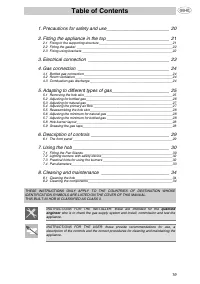
Contents
21
Precautions for safety and use________________________ 22
Fitting the appliance in the top ________________________ 23
Fixing to the supporting structure _______________________________________23
Fitting the adhesive foam rubber strip____________________________________24
Fitting the fixing clips ________________________________________________24
Fitting the hob into the hole in the work-top _______________________________25
Electrical connection _______________________________ 26
Gas connection ___________________________________ 27
Bottled gas connection _______________________________________________27
Room ventilation ____________________________________________________27
Combustion gas discharge ____________________________________________27
Adapting to different types of gas______________________ 28
Removing the hob skin _______________________________________________28
Adjusting for bottled gas ______________________________________________29
Adjusting for natural gas ______________________________________________29
Adjusting the primary air flow __________________________________________30
Reassembling the hob skin____________________________________________31
Adjusting the minimum setting for natural ga ______________________________31
Adjusting the minimum for bottled gas ___________________________________31
Hob burner layout ___________________________________________________31
Greasing the gas taps________________________________________________31
Description of controls ______________________________ 32
The front panel _____________________________________________________32
Using the hob _____________________________________ 33
Fitting the pan stands ________________________________________________33
Lighting burners with safety device______________________________________36
Practical hints for using the burners _____________________________________36
Pan diameters______________________________________________________37
Cleaning and maintenance __________________________ 38
Cleaning the hob____________________________________________________38
Cleaning the components _____________________________________________38
THESE INSTRUCTIONS ONLY APPLY TO THE COUNTRIES OF DESTINATION WHOSE
IDENTIFICATION SYMBOLS ARE LISTED ON THE COVER OF THIS MANUAL.
THIS BUILT-IN HOB IS CLASSIFIED AS CLASS 3.
INSTRUCTIONS FOR THE INSTALLER: these are intended for the
qualified
engineer
who is to check the gas supply system and install, commission and test the
appliance.
INSTRUCTIONS FOR THE USER: these provide recommendations for use, a
description of the controls and the correct procedures for cleaning and maintaining the
appliance.
"Loading the manual" means you need to wait until the file loads and becomes available for online reading. Some manuals are very large, and the time they take to appear depends on your internet speed.
Was this manual helpful?
About this manual
- Brand
- Smeg
- Model
- PVA750
- Document type
- Manual
- Language(s)
- English
- Pages
- 18
- File size
- 2.1 MB
- Format
Other Manuals for Smeg PVA750
Summary
Precautions for Safety and Use 22 1. Precautions for safety and use THIS MANUAL IS AN INTEGRAL PART OF THE APPLIANCE. TAKE GOOD CARE OF IT AND KEEP IT TO HAND THROUGHOUT THE HOB'S LIFE CYCLE. USERS ARE ADVISED TO READ THIS MANUAL AND ALL THE INSTRUCTIONS IT CONTAINS BEFORE USING THE HOB. ALSO KEEP T...
Instructions for the Installer 23 2. Fitting the appliance in the top If the hob has to be adapted for a type of gas different from the one for which it is preset in the factory, make this adjusting before building it into the unit, following the instructions in point “5. Adapting to different types...
Instructions for the Installer 24 2.2 Fitting the adhesive foam rubber strip Fit the adhesive foam rubber strip (supplied with the hob) around the outside edge of its surround. It will act as a cushion between the surface of the surround and that of the cabinet. The diagram on the right shows the co...