Page 2 - IMPORTANTES INSTRUCCIONES DE SEGURIDAD; CONSERVE ESTE MANUAL DE INSTRUCCIONES; interferencia de radio.
2 SINGER ® es una marca registrada de The Singer Company Ltd o sus afiliados. © 2007 Todos los derechos reservados. IMPORTANTES INSTRUCCIONES DE SEGURIDAD Cuando se usa un aparato eléctrico, debe seguirse unas precauciones básicas y que vienen incluidas a continuación."Leer las instrucciones ant...
Page 3 - TABLE OF CONTENTS; For European version
3 1. KNOWING YOUR SEWING MACHINE Machine identification ---------------------------------------------- 6 - 7 Accessories ----------------------------------------------------------- 8 - 9Setting up your machine --------------------------------------- 10 - 11Spool pins, Presser foot lifter -----------...
Page 4 - Version pour l’Europe; TABLE DES MATIÈRES
4 Version pour l’Europe 1. VOTRE MACHINE À COUDRE Description de la machine ---------------------------------------- 6 - 7Accessoires ----------------------------------------------------------- 8 - 9Préparation de la machine ------------------------------------- 10 - 11Porte-bobine, Levier du pied p...
Page 5 - Para versión europea; PRINCIPALES PARTES DE LA MAQUINA; INDICE DE CONTENIDOS; CUADRO DE VERIFICACION DE
5 Para versión europea 1. PRINCIPALES PARTES DE LA MAQUINA Identificación de la máquina ------------------------------------- 6 - 7 Accesorios ------------------------------------------------------------ 8 - 9Preparación de la máquina ------------------------------------ 10 - 11Porta carretes ------...
Page 6 - KNOWING YOUR SEWING MACHINE; MACHINE IDENTIFICATION
6 1. Thread guide 2. Thread tension control 3. Threading lever 4. Face cover 5. Thread cutter/holder 6. Extension table (Accessory box) 7. Bobbin winder shaft 8. Bobbin winder stop 9. Reverse stitch button 10. Horizontal spool pin 11. Handle 12. Hand wheel 13. Power/light switch 14. Cord socket 15. ...
Page 7 - DESCRIPTION DE LA MACHINE; VOTRE MACHINE À COUDRE; IDENTIFICATION DE LA MAQUINA; PRINCIPALES PARTES DE LA
7 DESCRIPTION DE LA MACHINE 1. VOTRE MACHINE À COUDRE 1. Guía hilo 2. Control tensión hilo 3. Palanca de ensartado 4. Cubierta frontal 5. Cortador de hilo 6. Base de extensión (caja de accesorios) 7. Eje devanador canilla 8. Tope devanador canilla 9. Botón de puntadas hacia atrás 10. Pasador de carr...
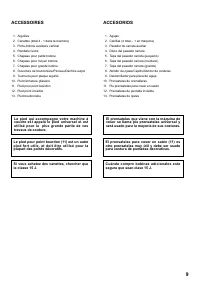
Page 8 - ACCESSORIES
8 ACCESSORIES 1. Needles 2. Bobbins (4 total - 1 in machine) 3. Auxiliary spool pin 4. Spool pin felt discs (2) 5. Spool pin cap (small) 6. Spool pin cap (medium) 7. Spool pin cap (large) 8. Buttonhole opener/Brush/Seam Ripper 9. Screwdriver for needle plate10. Zipper foot 11. Satin stitch foot12. B...
Page 10 - SETTING UP YOUR MACHINE; POWER LINE CORD/FOOT CONTROL
10 Power/light switch “OFF” Interrupteur moteur/lumière “OFF” Interruptor corriente/luz “OFF” Power/light switch “ON” Interrupteur moteur/lumière “ON” Interruptor corriente/luz “ON” SETTING UP YOUR MACHINE B e s u r e t o w i p e o ff a n y s u r p l u s o i l f r o m needle plate area before using ...
Page 11 - PRÉPARATION DE LA MACHINE; CORDON ÉLECTRIQUE/RHÉOSTAT; PRÉPARACION DE LA MAQUINA; CORDON DE LA LINEA ELECTRICA/CONTROL
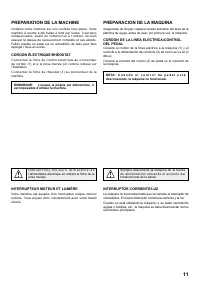
11 PRÉPARATION DE LA MACHINE Installez votre machine sur une surface bien plane. Votre machine à coudre a été huilée à fond par l’usine. Il est donc indispensable, avant de commencer à l’utiliser, de bien essuyer la plaque de recouvrement complète et ses abords. Faites ensuite un essai sur un échant...
Page 12 - SPOOL PINS; HORIZONTAL SPOOL PIN for normal; PRESSER FOOT LIFTER; VERTICAL SPOOL PIN for large thread
12 SPOOL PINS HORIZONTAL SPOOL PIN for normal thread spool Place thread spool on the pin and secure with a spool cap to ensure smooth flow of thread. If the thread spool has a thread retaining slit, it should be placed to the right.Select the correct spool pin cap according to the type and diameter ...
Page 13 - PORTA CARRETES; LEVIER DU PIED PRESSEUR
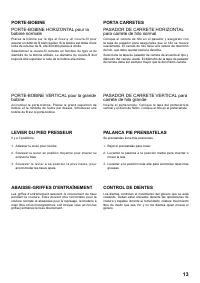
13 PORTE-BOBINE PORTE-BOBINE HORIZONTAL pour la bobine normale Placez la bobine sur la tige et fixez-y un couvre-fil pour assurer un débit de fil bien régulier. Si la bobine est dotée d’une fente de retenue de fil, elle doit être placée à droite. Sélectionner le couvre-fil correcte en fonction du ty...
Page 14 - CONVERTING TO FREE-ARM SEWING
14 CONVERTING TO FREE-ARM SEWING Your machine can be used either as a flat-bed or as a free- arm model.With the extension table in position, it provides a large working surface as a standard flat-bed model.To remove the extension table, hold it firmly with both hands and pull it off to the left as s...
Page 15 - UTILISATION DU BRAS LIBRE; CONVERSION PARA LA COSTURA CON
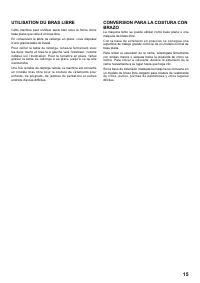
15 UTILISATION DU BRAS LIBRE Cette machine peut s’utiliser aussi bien sous la forme d’une base plane que celle d’un bras libre. En conservant la table de rallonge en place, vous disposez d’une grande table de travail.Pour retirer la table de rallonge, tenez-la fermement avec les deux mains et tirez-...
Page 16 - WINDING THE BOBBIN; Be sure to use Class 15 J bobbins.
16 WINDING THE BOBBIN 1. Place a spool of thread on the spool pin, and secure it with the spool pin cap. Pull the thread out from the spool and place it through thread guides as shown in illustration. 2. Put end of thread through the hole in bobbin as shown. 3. Push bobbin winder shaft to far left p...
Page 17 - Utilisez que la canette 15 J.
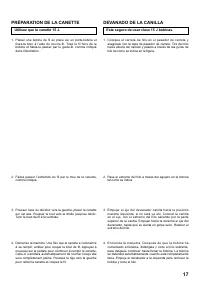
17 PRÉPARATION DE LA CANETTE 1. Placez une bobine de fil en place sur un porte-bobine et fixez-la bien à l’aide du couvre-fil. Tirez le fil hors de la bobine et faites-le passer par le guide-fil, comme indiqué dans l’illustration. 2. Faites passer l’extrémité du fil par le trou de la canette, comme ...
Page 18 - THREADING THE BOBBIN THREAD
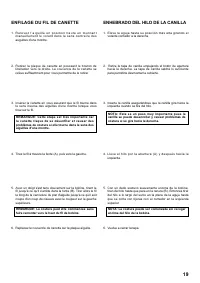
18 6 5 4 3 2 1 A THREADING THE BOBBIN THREAD 1. Raise the needle to its highest position by rotating the hand wheel counter clockwise. 2. Remove the bobbin cover plate by pushing the release button to the right. Bobbin cover will pop up sufficiently to allow you to remove the cover. 3. Insert the bo...
Page 19 - ENFILAGE DU FIL DE CANETTE; ENHEBRADO DEL HILO DE LA CANILLA
19 ENFILAGE DU FIL DE CANETTE 1. R e l e v e z l ’ a i g u i l l e e n p o s i t i o n h a u t e e n t o u r n a n t m a n u e l l e m e n t l e v o l a n t d a n s l e s e n s c o n t r a i r e d e s auguilles d’une montre. 2. Retirez la plaque de canette en poussant le bouton de libération vers la...
Page 20 - THREADING THE TOP THREAD
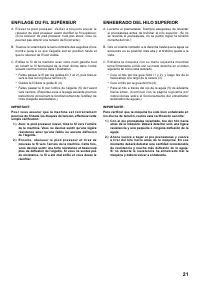
20 THREADING THE TOP THREAD A. Raise the presser foot lifter. Always be sure to raise the presser foot lifter before threading the top thread. (If the presser foot lifter is not raised, correct thread tension cannot be obtained.) B. Turn the hand wheel counter clockwise until the needle is in its hi...
Page 21 - ENFILAGE DU FIL SUPÉRIEUR; ENHEBRADO DEL HILO SUPERIOR
21 ENFILAGE DU FIL SUPÉRIEUR A. E l e v e z l e p i e d p r e s s e u r. Ve i l l e z à t o u j o u r s é l e v e r l e releveur de pied presseur avant d’enfiler le fil supérieur. (Si le releveur de pied presseur n’est pas élevé, vous ne pourrez pas obtenir une tension de fil correcte.) B. Tournez l...
Page 22 - USING AUTOMATIC NEEDLE THREADER
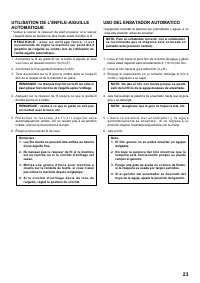
22 USING AUTOMATIC NEEDLE THREADER * Be sure to raise the presser foot lifter and raise the needle to its highest position before threading. NOTE: Don’t pull thread with strong force or thread may be pulled off from needle hole after threading. NOTE: Make sure that the guide doesn’t touch fabric, et...
Page 23 - USO DEL ENSATADOR AUTOMATICO; UTILISATION DE L’ENFILE-AIGUILLE
23 USO DEL ENSATADOR AUTOMATICO * Asegúrese levantar la palanca pie prensatelas y aguja, a su más alta posición antes de ensartar. NOTA: No jale el hilo con fuerza porque se puede salir del orificio de la aguja después de ensartada. NOTA: Asegúrese que la guía no toque la tela, etc. Nota: 1. El hilo...
Page 24 - NEEDLE, THREAD AND FABRIC CHART; Changing the needle
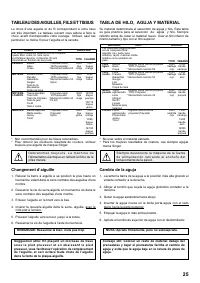
24 NEEDLE, THREAD AND FABRIC CHART Your fabric will determine the choice of a needle and thread. The following table is a practical guide to needle and thread selection. Always refer to it before a new sewing project. Be sure to use the same size and type of thread in the bobbin as in the top thread...
Page 25 - Cambio de la aguja; TABLA DE HILO, AGUJA Y MATERIAL; Changement d’aiguille
25 Cambio de la aguja 1. Levantar la barra de la aguja a la posición más alta girando el volante contador a la derecha. 2. Aflojar el tornillo que sujeta la aguja girándolo contador a la derecha. 3. Quitar la aguja sacándola hacia abajo. 4. Insertar la aguja nueva en la brida porta-aguja con el lado...
Page 26 - ADJUSTING TOP THREAD TENSION; STRAIGHT STITCHING; ZIG ZAG and DECORATIVE SEWING; CHANGING PRESSER FOOT; Well balanced
26 ADJUSTING TOP THREAD TENSION 90% of your sewing will be accomplished with the word “AUTO” exposed on the tension control dial on top of the machine. STRAIGHT STITCHING The correct appearance of your stitching is largely determined by the balanced tension of both top and bobbin threads. The tensio...
Page 28 - FUNCTIONS OF CONTROL PANEL
28 FUNCTIONS OF CONTROL PANEL When the machine is turned on, straight stitch is selected and pop-up screen for individual preference settings appears on the LCD display. 1. LCD DISPLAY Stitch information is indicated on the display and changed according to pattern or mode. 2. MULTI-FUNCTION BUTTONS ...
Page 30 - ERROR MESSAGES; NEEDLE STOP POSITION SELECTOR SWITCH
30 ERROR MESSAGES If an incorrect operation is made, the sewing machine will not operate with beep sound and an error message will be displayed. When an error message is displayed, fix the problem following the instructions below. 1. If foot control is depressed, while no pattern is selected. Sele...
Page 31 - MESSAGE D’ERREUR; MENSAJE DE ERROR; TOUCHE DE POSITION D’ARRÊT D’AIGUILLE
31 MESSAGE D’ERREUR Si vous effectuez une opération incorrecte, la machine à c o u d r e c e s s e r a d e f o n c t i o n n e r ; u n m e s s a g e d ’ e r r e u r accompagné d’un bip sonore sera alors émis. Si un message d’erreur s’affiche, résoudre le problème en suivant les instructions ci-desso...
Page 32 - REVERSE OPERATION BUTTON; Dual purpose reverse/tacking stitch button
32 REVERSE OPERATION BUTTON Dual purpose reverse/tacking stitch button * Reverse stitch function for straight and zigzag stitches ( ) Reverse sewing is carried out while the reverse stitch button is pushed. The machine will continue to sew in reverse as long as the reverse button is pressed. * Tacki...
Page 33 - TOUCHE COUTURE ARRIÈRE; Interrupteur de couture arrière/point d’arret; BOTÓN REVERSO DE LA OPERACIÓN; Botón de costura hacia atrás/remate
33 TOUCHE COUTURE ARRIÈRE Interrupteur de couture arrière/point d’arret * Fonction couture arrière pour les points droits et zigzags ( ) La couture arrière se produit lorsque l’interrupteur couture arrière reste appuyé. L a m a c h i n e c o n t i n u e l a c o u t u r e e n a r r i è r e t a n t q ...
Page 34 - UTILITY AND CONTINUOUS STITCHES; SELECTING THE PATTERN
34 There are two main categories available for selecting stitches.One is the Utility & Continuous Stitch category. These stitches sew continuously when selected. They do not sew as single patterns, nor do they combine into combinations with other stitches to create stitch sequences. Simply selec...
Page 35 - POINTS UTlLITAlRES ET CONTINUS; SÉLECTION DU MOTIF; RÉGLAGES DE LA LARGEUR ET DE LA; DÉMARRAGE DE LA COUTURE; PUNTADA UTlLlTARlA Y PUNTADA; SELECCIONANDO EL PATRON
35 II y a deux catégories disponibles pour le choix des motifs.Le premier choix est les points Utilitaires et Continus. Ces points sont continus quand ils sont choisis. Ces points sont uniques et ne peuvent pas être combinés avec les autres motifs. Vous n'avez qu'à choisir le motif et il se produit ...
Page 36 - MIRROR IMAGE SETTING; TWIN NEEDLE SETTING
36 MIRROR IMAGE SETTING Mirror image of a selected pattern can be selected by pressing the mirror image button, if the mirror image icon appears on the display. TWIN NEEDLE SETTING Twin needle mode can be selected by pressing the twin needle button, if the twin needle icon appears on the display. Do...
Page 37 - RÉGLAGE DE L’IMAGE MIROIR; RÉGLAGE DE L’AIGUILLE DOUBLE; AJUSTE DE IMAGEN EN ESPEJO
37 RÉGLAGE DE L’IMAGE MIROIR Vous pouvez sélectionner l’image miroir d’un motif sélectionné en appuyant sur la touche d’image miroir, si l’icône de l’image miroir apparaît sur l’affichage. RÉGLAGE DE L’AIGUILLE DOUBLE Vo u s p o u v e z s é l e c ti o n n e r l e m o d e d ’ a i g u i l l e d o u b ...
Page 40 - KEEPING SEAMS STRAIGHT
40 C A B D 1 6 5 2 3 4 3/4" (19 mm) 5/8" (16 mm) 1/2" (13 mm) 3/8" ( 9 mm) 1/4" ( 6 mm) STRAIGHT STITCHING Straight stitch is most frequently used for all types of sewing. Let’s begin by following the steps below.1. SETTINGS Presser foot - General Purpose Foot Thread tension cont...
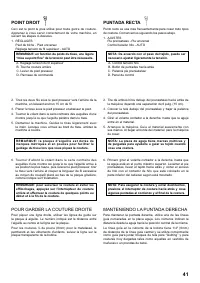
Page 41 - PUNTADA RECTA; POUR GARDER LA COUTURE DROITE; POINT DROIT
41 PUNTADA RECTA Punto recto se usa más frecuentemente para coser todo tipos de costura. Comencemos siguiendo los pasos abajo.1. AJUSTES Pie prensatelas - Pie universal Control tensión hilo - AUTO A. Control tensión hilo B. Botón de puntadas hacia atrás C. Palanca pie prensatelasr D. Panel de contro...
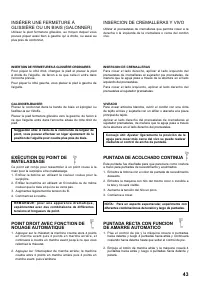
Page 42 - INSERTING ZIPPERS AND PIPING; HAND-LOOK QUILT STITCH; STRAIGHT STITCH WITH AUTO
42 INSERTING ZIPPERS AND PIPING Use zipper foot to sew to the right or left of the zipper or to sew close to the cording. INSERTING ZIPPERS To sew down the right side, attach left side of zipper foot to presser foot holder so that the needle passes through the opening on the left side of the foot. T...
Page 44 - ZIGZAG STITCHING; ADJUSTING STITCH WIDTH AND LENGTH; SATIN STITCH
44 mm 0 0.5 1.0 1.5 2.0 2.5 3.0 3.5 4.0 4.5 5.0 5.5 6.0 0 0.25 0.5 0.75 1.0 1.25 1.5 1.75 2.0 2.5 3.0 Under side Côté de dessous Reverso Top side Côté de dessus Cara ZIGZAG STITCHING The top thread may appear on the bottom depending on the thread, fabric, type of stitch and sewing speed, but the bob...
Page 45 - POINT ZIGZAG; POSITIONNEMENT DES MOTIFS
45 POINT ZIGZAG Le fil supérieur peut paraître sur l’envers, en fonction du fil, du tissu et de la vitesse de couture, mais le fil de la canette ne doit jamais paraître sur l’endroit. Si le fil de la canette tire vers le haut ou si des fronces se produisent, réduisez légèrement la tension à l’aide d...
Page 46 - BLINDHEM STITCH; Settings : Presser foot - Blind Stitch Foot
46 1 2 1 2 4 3 Medium to heavyweight fabric Material de peso medio a pesado Tissus moyens et lourds Under side Reverso Envers Under side Reverso Envers Under side Reverso Envers Under side Reverso Envers Fine fabric Material fino Tissus fins Top side Cara Endroit 1. First finish the raw edge. Do thi...
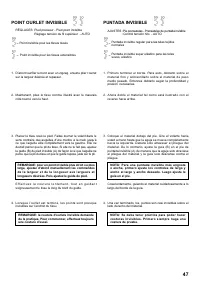
Page 47 - POINT OURLET INVISIBLE; PUNTADA INVISIBLE
47 POINT OURLET INVISIBLE 1. D’abord surfiler le bord avec un zigzag, ensuite plier l’ourlet sur la largeur désirée et repasser. 2. Maintenant, pliez le tissu comme illustré avec le mauvais côté tourné vers le haut. 3. Placez le tissu sous le pied. Faites tourner le volant dans le sens contraire des...
Page 48 - SHELL STITCH
48 MULTI-STITCH ZIGZAG This is a strong stitch because as its name implies, it makes three short stitches where the normal zig-zag makes only one.For this reason it is recommended for overcasting nearly all types of fabrics.It is also ideal for bartacks, mending tears, patching, sewing towelling, pa...
Page 49 - POINT AJOURÉ
49 ZIGZAG MULTI-POINT Pour réparer des déchirures droites ou en angle placez le tissu avec le début de l’accroc sous la partie centrale du pied. Lorsque vous avez un accroc en deux parties, reprisez à partir de chaque extrèmité pour revenir au centre. Pour renforcer votre couture, placez un morceau ...
Page 50 - STRETCH AND DECORATIVE STITCHES; STRAIGHT STRETCH STITCH; FEATHER STITCH
50 STRETCH AND DECORATIVE STITCHES Stretch stitches are mainly for use on knit, or stretchable fabrics, but can also be used on woven materials. SETTINGS :Presser foot - General Purpose Foot or Satin Stitch Foot :Thread tension control - AUTO STRAIGHT STRETCH STITCH Straight stretch stitch is far st...
Page 51 - POINTS EXTENSIBLE ET DÉCORATIFS; POINT DROIT EXTENSIBLE; PUNTADAS ELASTICAS Y DECORATIVOS; PUNTADA RECTA TRIPLE
51 POINTS EXTENSIBLE ET DÉCORATIFS Les points extensible sont généralement utilisés pour les tissus élastiques, mais peuvent ètres utilisès sur tissus tissés. RÉGLAGES :Pied presseur - Pied universel ou pour point bourdon :Réglage tension du fil supérieur - AUTO POINT DROIT EXTENSIBLE Ce point est b...
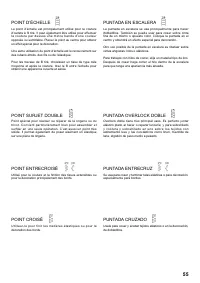
Page 54 - CROSSED STITCH
54 LADDER STITCH T h e L a d d e r s t i t c h i s p r i m a r i l y u s e d f o r d r a w n t h r e a d hemstitching. It can also be used for sewing over thin tape in a same or contrasting color. Place the stitch in the center and a special effect will be obtained for decoration. Another use for th...
Page 58 - THORN STITCH; REINFORCED OVEREDGE STITCH; WIZARD STITCH; CHEVRON STITCH
58 THORN STITCH It is a versatile stitch used for joining fabric pieces and as a decorative touch. REINFORCED OVEREDGE STITCH This stitch is perfect for attaching flat elastic. It can also be used for smocking and as a seam finish. WIZARD STITCH Wizard stitch, as well as being a decorative stitch, i...
Page 59 - PUNTADA MAGO
59 POINT D’ÉPINE C’est un point polyvalent utilisé pour joindre des morceaux de tissu et l’embellissement. POINT SURJET RENFORCÉ Convient particulièrement bien pour assembler et surfiler en une seule opération. C’est aussi un point très solide. Il permet également de poser aisément un élastique sur ...
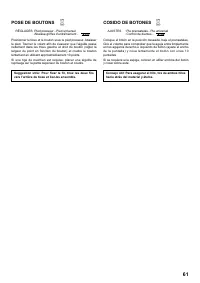
Page 60 - SEWING ON A BUTTON
60 SEWING ON A BUTTON Position your fabric and button under the presser foot. Lower presser foot. Turn the handwheel to make sure needle clears both left and right openings of button. Adjust width if required. Sew 10 stitches across.If a shank is required, place a pin on top of the button and sew ov...
Page 61 - POSE DE BOUTONS; COSIDO DE BOTONES
61 POSE DE BOUTONS Positionner le tissu et le bouton sous le pied presseur. Abaisser le pied. Tourner le volant afin de s'assurer que I'aiguille passe nettement dans les trous gauche et droit du bouton (régler la largeur du point en fonction du bouton) et coudre le bouton lentement en utilisant appr...
Page 62 - SEWING A BUTTONHOLE; USING BUTTONHOLE FOOT
62 (A) (B) (C) Buttonhole foot Pied boutonnière Prensatelas de ojales Tab ALanguette ALengüeta A Tab B Languette B Lengüeta B SEWING A BUTTONHOLE USING BUTTONHOLE FOOT Your machine offers you two different widths of bartack, keyhole and round end buttonholes sewn by a system that measures the size o...
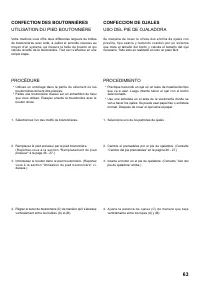
Page 63 - CONFECTION DES BOUTONNIÈRES; UTILISATION DU PIED BOUTONNIÈRE; CONFECCION DE OJALES; USO DEL PIE DE OJALADORA
63 CONFECTION DES BOUTONNIÈRES UTILISATION DU PIED BOUTONNIÈRE Votre machine vous offre deux différentes largeurs de brides de boutonnières avec arrêt, à oeillet et arrondie cousues au moyen d’un système qui mesure la taille du bouton et qui calcule la taille de la boutonnière. Tout ceci s’effectue ...
Page 66 - CORDED BUTTONHOLES; FABRICS
66 Spur Saliente Tige CORDED BUTTONHOLES Hook filler cord (crochet thread or buttonhole twist) over the spur and pull both ends of the cord forward under the foot and tie off the cord as shown in the illustration. Sew buttonhole so that zigzag stitches cover the cord.When completed, release the cord...
Page 67 - BOUTONNIÈRES GANSEES; OJALES CON CORDON; HACIENDO OJALES EN MATERIALES
67 BOUTONNIÈRES GANSEES (RENFORCEES) Accrocher le cordonnet (fil de passe ou fil de soie) sur la tige du pied pour boutonnière et tirer les deux extrémitès sous le pied vers le devant.C o u d r e l a b o u t o n n i è r e d e m a n i è r e à c e q u e l a z i g - z a g recouvre le cordonnet.La bouto...
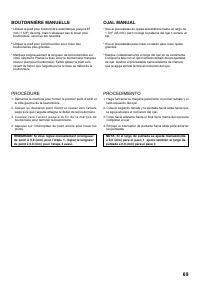
Page 68 - MANUAL BUTTONHOLE; PROCEDURE
68 MANUAL BUTTONHOLE * Use the automatic buttonhole foot up to 1 3/4 “(45 mm) in length, but don’t lower the buttonhole lever or a beep will sound. * Use the satin foot to create larger buttonholes. * Carefully mark the buttonhole length on your garment. Place the fabric with the buttonhole marked u...
Page 69 - BOUTONNIÈRE MANUELLE; PROCÉDURE; OJAL MANUAL; PROCEDIMIENTO
69 BOUTONNIÈRE MANUELLE * Utilisez le pied pour boutonnière automatique jusqu’à 45 mm (1 3/4") de long, mais n’abaissez pas le levier pour boutonnière, sinon un bip retentira. * Utilisez le pied pour point bourdon pour créer des boutonnières plus grandes. * Marquez soigneusement la longueur de l...
Page 70 - SELECTING LETTER AND DECORATIVE PATTERNS
70 LETTER SEWING AND DECORATIVE PATTERNS The Decorative stitch and Letter patterns found here can be sewn as a single pattern or sew repeatedly by pressing the Continuous Sewing Button.These stitches and letters can also be combined into a string, making a sequence which can also sew one time or rep...
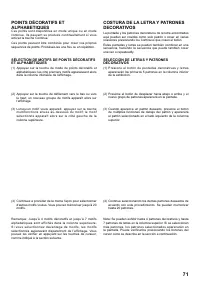
Page 71 - SÉLECTION DE MOTIFS DE POINTS DÉCORATIFS; COSTURA DE LA LETRA Y PATRONES; SELECCION DE LETRAS Y PATRONES
71 POINTS DÉCORATIFS ET ALPHABETIQUES Ces points sont disponibles en mode unique ou en mode continue. Ils peuvent se produire continuellement si vous activez la touche Continue.Ces points peuvent être combinés pour créer vos propres séquences de points. Produisez-les une fois ou en répétition. SÉLEC...
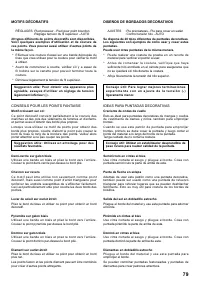
Page 78 - DECORATIVE DESIGNS; IDEAS FOR DESIGN STITCHING
78 DECORATIVE DESIGNS 20 different types of decorative stitches are available. Following are examples of how to use and sew these stitches. You can use other stitches in the same way. * You should carry out a test sewing on an extra piece of the fabric to be sewn to check the pattern to be used. * B...
Page 79 - CONSEILS POUR LES POINTS FANTAISIE
79 DISEÑOS DE BORDADOS DECORATIVOS Se dispone de 20 tipos diferentes de puntadas decorativas. Los siguientes son ejemplos de como usar y coser estas puntadas. Puede usar otras puntadas de la misma manera. * Puede realizar una costura de prueba en un recorte de material para verificar el patrón a usa...
Page 80 - CARING FOR YOUR MACHINE; CLEANING HOOK AREA AND FEED
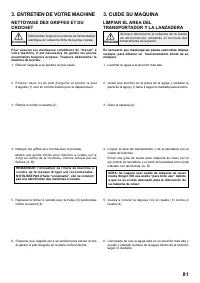
80 2 1 (1) 3. CARING FOR YOUR MACHINE CLEANING HOOK AREA AND FEED DOGS CAUTION Always disconnect the machine from power supply by removing the plug from the wall-outlet. To ensure the best possible operation of your machine, it is necessary to keep the essential parts clean at all times. 1. Raise th...
Page 81 - LIMPIAR EL AREA DEL; ENTRETIEN DE VOTRE MACHINE
81 NETTOYAGE DES GRIFFES ET DU CROCHET ATTENTION Débranchez toujours la machine de l’alimentation électrique en retirant la fiche de la prise murale. Pour assurer les meilleures conditions de “travail” à votre machine, il est nécessaire de garder les pièces essentielles toujours propres. Toujours dé...
Page 82 - SATIN STITCH FOOT; OTHER INFORMATION; TWIN NEEDLE; THREADING THE TWIN NEEDLE
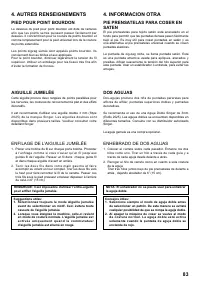
82 SATIN STITCH FOOT The Satin stitch foot is grooved on the bottom to permit dense stitching to pass under it easily. It is most useful for sewing satin stitches and as an alternative to the General Purpose Foot when sewing Stretch Stitches. Closely spaced zig-zag stitches are called satin stitches...
Page 83 - AUTRES RENSEIGNEMENTS; AIGUILLE JUMELÉE; ENFILAGE DE L’AIGUILLE JUMELÉE; DOS AGUJAS; ENHEBRADO DE DOS AGUJAS
83 PIED POUR POINT BOURDON Le dessous du pied pour point bourdon est doté de rainures afin que les points serrés puissent passer facilement par dessous. Il convient bien pour la couture de points bourdon et comme remplacement pour le pied universel lors de la couture de points extensible. Les points...
Page 84 - STRAIGHT STITCH NEEDLE POSITION
84 STRAIGHT STITCH NEEDLE POSITION The position of the needle when sewing straight stitch may be adjusted to anyone of 13 different positions with the Stitch Width Control as illustrated: Toward right Vers la droite Hacia derecha Toward left Vers la gauche Hacia izquierda Multi-function button Touch...
Page 85 - AJUSTE DE POSICION DE AGUJA PARA
85 RÉGLAGE DE LA POSITION D’ALGUILLE POUR LE POINT DROIT En point droit, il est possible de régler l’aiguille en 13 positions en touchant la touche contrôle de largeur. AJUSTE DE POSICION DE AGUJA PARA PUNTADA RECTA La posición de la aguja al coser puntada recta, puede ser ajustada a cualquiera de 1...
Page 86 - GENERAL PROBLEMS; STITCHING PROBLEMS; THREAD PROBLEMS; PERFORMANCE CHECKLIST
86 GENERAL PROBLEMS Machine does not sew. * Power switch is turned off.- Turn on the switch. * Buttonhole lever is not raised when sewing stitch patterns. – Raise buttonhole lever. * Buttonhole lever is not lowered when sewing buttonhole. – Lower buttonhole lever. Machine jams/knocks. * Thread is ca...
Page 95 - FOOT CONTROL
IMPORTANT SAFETY INSTRUCTIONS 1. This sewing machine should never be left unattended when plugged in. Always unplug this sewing machine from the electric outlet immediately after using and before cleaning. WARNING- 1. Do not allow to be used as a toy. Close attention is necessary when this sewing ma...