Philips TAM3205M2/12 - User Manual
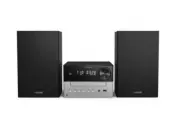
Philips TAM3205M2/12 – User Manual, read for free online in PDF format. We hope this helps you resolve any issues you may have. If you have further questions, please contact us through the contact form.


Table of Contents:
- Page 2 – Contents; Trademarks
- Page 3 – Important; Safety
- Page 4 – Notice; Compliance; Disposal of your old product and; Removing the disposable batteries; Care for your product; This apparatus includes this label:
- Page 7 – Overview of the main unit
- Page 10 – Get started; Connect speakers; To insert each speaker wire:; Connect power
- Page 11 – To insert the remote control battery:; App download
- Page 12 – Power on; Switch to standby mode; Set the clock
- Page 13 – Play from disc; CD; Play from USB; USB; Control play
- Page 14 – For MP3 disc and USB; Play from Bluetooth; To erase the program; BT PAlR
- Page 15 – Play from Auracast
- Page 16 – MODE; Listen to FM; To tune to a weak station:; FM
- Page 17 – Other features; Set the alarm timer; XX; Adjust sound; Select a preset sound; SOUND; Adjust volume level
- Page 18 – Activate/deactivate alarm timer; Set the sleep timer
- Page 19 – Specifcations; Bluetooth supported pro�es:; Factory reset
- Page 20 – Unsupported USB formats:; USB playability; Compatible USB devices:; Supported USB formats:
- Page 21 – Cannot display some �les in USB; Troubleshooting
- Page 22 – How to keep clock display on or off in
TAR1609
Series
Micro Music System
3000
Series
TAM3205M2
Register your product and get support at:
www.philips.com/support
User manual
"Loading the manual" means you need to wait until the file loads and becomes available for online reading. Some manuals are very large, and the time they take to appear depends on your internet speed.
Was this manual helpful?
About this manual
- Brand
- Philips
- Model
- TAM3205M2/12
- Document type
- User Manual
- Language(s)
- English
- Pages
- 23
- File size
- 1.4 MB
- Format
Other Manuals for Philips TAM3205M2/12
Summary
EN 1 Contents 1 Important Safety Notice Trademarks 2 2 3 4 2 Your Micro Music System What's in the box Overview of the main unit Overview of the remote control 4 4 6 7 9 8 8 1011 11 3 Get started Connect speakers Connect power Prepare the remote controlPower on Set the clock 4 5 6 Play Play from dis...
1 Important Safety Read and understand all instructions before you use this micro music system. If damage is caused by failure to follow the instructions, the warranty does not apply. CAUTION RISK OF ELECTRIC SHOCK DO NOT OPEN CAUTION: TO REDUCE THE RISK OF ELECTRIC SHOCK, DO NOT REMOVE COVER (OR BA...
Notice Any changes or modifcations made to this device that are not expressly approved by MMD Hong Kong Holding Limited may void the user's authority to operate the equipment. Hereby, TP Vision Europe B.V. declares that this product is in compliance with the essential requirements and other relevant...
Ask a question
Related manuals
Popular Philips Other


More Philips Other models
 Philips TAK4607GR/00 User Manual
 Philips TAK4607GY/00 User Manual
 Philips TAM2505/10 User Manual
 Philips TAM2805/10 User Manual
 Philips TAM3205/12 User Manual
 Philips TAM3205/37 User Manual
 Philips TAM3505/12 User Manual
 Philips TAM3505M2/12 User Manual
 Philips TAM4205/12 User Manual
 Philips TAM4505/12 User Manual
 Philips TAM6805/10 User Manual
 Philips TAM8905/10 User Manual