Page 2 - Table of Contents; For Remote Help
2 Introduction ....................................................... 2Setup .................................................................. 3Button Functions ............................................... 4Programming Your Remote .............................. 6 Direct Code Entry ................
Page 3 - Battery Installation; Battery Precautions; Setup
3 Your universal remote requires two (2) AAA batteries (not included). Alkaline batteries are recommended. Battery Installation 1. On the back of the remote, pull down on the textured surface and slide battery cover downward to remove. 2. Match the (+) and (-) marks on the batteries to the (+) and (...
Page 4 - Button Functions
4 Button Functions 7 13 14 17 19 20 21 18 16 3 4 1 8 8 9 9 11 11 2 6 5 15 10 12
Page 5 - pause
5 Button Functions 1. Power - Turns devices ON/OFF 2. TV, STR, AUD - Selects the device to control 3. Info/Options - Displays on-screen show/ content information 4. Exit - Exit on-screen menus 5. Record, play, stop, rewind, fast forward, pause 6. DVD/Blu-ray ™ open/close - open/close a player, or Li...
Page 6 - Programming Your Remote
6 Programming Your Remote Your remote is designed to control multiple audio/video devices. To use, you will need to program the remote for your devices. There are two different methods you can use to program the remote, Direct Code Entry or Auto Code Search. • The Direct Code Entry method is the rec...
Page 7 - Programming Notes; Code List; Auto Code Search
7 Programming Your Remote Converter Box, Streaming Media Player or any device category in the Code List . 4. Use the number buttons on the remote to enter the first 4-digit remote code you circled in the Code List in Step 1. The red light will turn off after entering the fourth digit. 5. Point the r...
Page 9 - VOL; Controlling Combo Devices; TV
9 Programming Your Remote store the code in the remote. Go to Step 7. • If NO , continue to press and release the VOL button until the device turns off to test the other 9 codes from Step 4. Be sure to wait approximately 3 seconds after each VOL button press to allow the device time to respond to th...
Page 10 - Using Your Remote; Primary Audio Control
10 Using Your Remote Primary Audio Control The Primary Audio Control feature allows you to select a single device that the volume buttons always control. For example, the remote can be in TV mode while the volume buttons control the volume on your audio receiver or sound bar instead of your TV. Enab...
Page 11 - Code Identification; Settings
11 Using Your Remote 1. Press and hold down the SETUP button on the remote until the red light on the remote control turns on. Release the SETUP button. The red light will remain on. 2. Press and release the desired device button ( TV, STRM, AUD ) you would like the code for. 3. Press and release th...
Page 12 - Troubleshooting
12 Remote does not operate your device. • Make sure the batteries are fresh and installed correctly. • Aim the remote directly at your device, and make sure that there are no obstructions between the remote and device. • Make sure you select the appropriate device on the remote you wish to control; ...
Page 13 - 0-Day Limited Warranty; Warranty replacement procedure
13 90-Day Limited Warranty This warrants this product to be free from manufacturing defects for a period of 90 days from the original date of consumer purchase. This warranty is limited to the repair or replacement of this product only and does not extend to consequential or incidental damage to oth...
Page 14 - FCC Statement
14 This device complies with Part 15 of the FCC rules. Operation is subject to the following two conditions: (1) this device may not cause harmful interference, and (2) this device must accept any interference received, including interference that may cause undesired operation. FCC NOTE: The manufac...
Page 17 - Manual de usuario
17 Manual de usuario Audio/Video SRP9232D/27 v2 12/17
Page 18 - Tabla de contenido; Para obtener ayuda
18 Introducción ..................................................... 18Configuración ................................................... 19Funciones de los botones ..............................20Programación del control remoto ................. 22 Entrada directa de códigos ..........................
Page 19 - Instalación de las pilas; Precauciones respecto de las pilas; Configuración
19 El control remoto universal usa dos (2) pilas AAA (no incluidas). Se recomienda usar pilas alcalinas. Instalación de las pilas 1. En la parte posterior del control remoto, presione hacia abajo sobre la superficie texturada y deslice la tapa de las pilas para quitarla. 2. Inserte dos (2) pilas AAA...
Page 20 - Funciones de los botones
20 7 13 14 17 19 20 21 18 16 3 4 1 8 8 9 9 11 11 2 6 5 15 10 12 Funciones de los botones
Page 22 - Programación del control remoto; Entrada directa de códigos
22 Programación del control remoto El control remoto está diseñado para controlar varios dispositivos de audio/video. Para usarlo, deberá programarlo para controlar los dispositivos. Existen dos formas de programar el control remoto: Entrada directa de códigos o Búsqueda automática de códigos . • La...
Page 23 - Notas de programación
23 Programación del control remoto cualquiera de los dispositivos. Por ejemplo, puede usar el botón auxiliar del control remoto para controlar un receptor de satélite, decodificador digital, reproductor multimedia en línea o cualquier categoría de dispositivos que aparezca en la lista de códigos. 4....
Page 24 - Búsqueda automática de códigos
24 Programación del control remoto 1. Encienda manualmente el dispositivo que desea controlar. NOTA : El proceso Búsqueda automática de códigos no se puede usar para dispositivos sin la capacidad de encendido/apagado. En estos casos, use el método Entrada directa de códigos. 2. Presione y mantenga p...
Page 26 - Control de dispositivos integrados
26 • La luz roja parpadeará dos veces después de probar el primero o el último código de cada conjunto de 10. 7. Use el control remoto para volver a encender el dispositivo. Pruebe los botones en el control para ver si el dispositivo responde como debería. Si los botones no accionan el dispositivo, ...
Page 27 - Uso del control remoto; Control del audio principal
27 Uso del control remoto Control del audio principal La característica de control del audio principal le permite seleccionar un solo dispositivo que siempre es controlado por los botones de volumen. Por ej., el control remoto puede estar en el modo de televisor mientras que los botones de volumen c...
Page 28 - Identificación de códigos
28 Uso del control remoto 1. Presione y mantenga presionado el botón SETUP (configuración) hasta que la luz roja del control remoto se encienda. Suelte el botón SETUP (configuración). La luz roja permanecerá encendida. 2. Presione y suelte el botón correspondiente al dispositivo ( TV, STR, AUD ) par...
Page 29 - El control remoto no funciona con; Algunas funciones de su dispositivo no; lista; Resolución de problemas
29 El control remoto no funciona con su dispositivo. • Asegúrese de que las pilas sean nuevas y estén bien colocadas. • Apunte a su dispositivo directamente con el control remoto y asegúrese de que no haya ninguna obstrucción entre el control remoto y el dispositivo. • Asegúrese de seleccionar en el...
Page 30 - Procedimiento de la garantía para la reposición; Garantía limitada de 90 días
30 Este documento garantiza que este producto está libre de defectos de fabricación durante un período de noventa (90) días desde la fecha de compra original del consumidor. Esta garantía está limitada a la reparación o el reemplazo de este producto solamente y no cubre los daños consecuentes o inci...
Page 31 - Declaración de la FCC
31 Este dispositivo cumple con el apartado 15 de la normativa de la FCC. El funcionamiento está sujeto a las dos condiciones siguientes:(1) este dispositivo no causa interferencia negativa y (2) este dispositivo debe aceptar las interferencias recibidas, incluidas las interferencias que puedan causa...
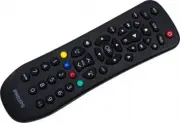


 Philips SRP1003/27 Manual
 Philips SRP2018/10 User Manual
 Philips SRP3013/10 Quick Guide
 Philips SRP3013/27 User Manual
 Philips SRP4000/10 User Manual
 Philips SRP5016/10 Quick Guide
 Philips SRT8215 Manual
 Philips SRT8215/10 User Manual
 Philips SRU160NC/05 User Manual
 Philips SRU2040 Manual
 Philips SRU3003 Manual
 Philips SRU3003/27 Manual