Page 2 - CAUTION
2 Important notes for users in theU.K. Mains plug This apparatus is fitted with an approved 13Amp plug. To change a fuse in this type of plugproceed as follows: 1 Remove fuse cover and fuse. 2 Fix new fuse which should be a BS1362 5 Amp,A.S.T.A. or BSI approved type . 3 Refit the fuse cover. If the ...
Page 4 - Norge; Italia; DICHIARAZIONE DI CONFORMITA’
4 Norge Typeskilt finnes på apparatens under side. Observer : Nettbryteren er sekundertinnkoplet. Den innebygde netdelen erderfor ikke frakoplet nettet så lengeapparatet er tilsluttet nettkontakten. For å redusere faren for brann eller elektriskstøt, skal apparatet ikke utsettes for regn ellerfuktig...
Page 5 - English; Deutsch; Italiano; Index
5 English Deutsch Italiano Bokmål Dansk Index English ------------------------------------------------ 6 Deutsch --------------------------------------------- 30 Italiano ---------------------------------------------- 54 Bokmål --------------------------------------------- 78 Dansk -----------------...
Page 6 - Contents
6 English Contents General Information Supplied accessories ............................................ 7Environmental Information ................................ 7Safety Information ................................................ 7About MP3 disc .....................................................
Page 7 - General Information; Supplied accessories; Supported formats
English 7 General Information Congratulations on your purchase and welcome to Philips! To fully benefit from the suppor t that Philips offers, register your product at www.philips.com/welcome. This product complies with the radiointerference requirements of the EuropeanCommunity. Supplied accessorie...
Page 8 - Disposal of your old product; Hearing Safety; Listen at a moderate volume.; Listen for reasonable periods of time:
8 English General Information Disposal of your old product Your product is designed and manufactured with high qualitymaterials and components,which can be recycled andreused. When this crossed-out wheeled bin symbol is attached to a product it means the product iscovered by the European Directive 2...
Page 9 - Preparations; Rear connections; Power
English 9 Preparations Rear connections The type plate is located at the rear of thesystem.For users in the U.K.: please follow theinstructions on page 2. A Power ● Before connecting the AC power cord to thewall outlet, ensure that all other connectionshave been made. WARNING!– For optimal performan...
Page 10 - Optional connection; Connecting a non-USB device
10 English Preparations C Speakers ConnectionFront Speakers Connect the speaker wires to the SPEAKERSterminals, right speaker to " R " and left speaker to " L ", coloured (marked) wire to " + " and black (unmarked) wire to " - ". 1 2 ● Fully inser t the stripped por t...
Page 11 - Before using the remote control
English 11 Preparations Before using the remote control 1 Pull out the plastic protective sheet. 2 Select the source you wish to control by pressingone of the source select keys on the remotecontrol (for example CD, TUNER). 3 Then select the desired function (for example ÉÅ , à , á ). Remove the pla...
Page 12 - Controls; Controls on the set
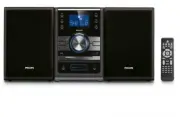
12 English Controls Controls on the set (illustrations on page 3) 1 Display screen – to view the current status of the system. 2 Eco Power/STANDBY ON y – press briefly to switch the set on or off (standby/ECO POWER); – In standby or Eco Power mode : press and hold to toggle between Standby and ECO P...
Page 13 - Remote control
English 13 Controls Remote control 1 B – switches the system to Eco Power standby/normal standby with clock display. 2 SOURCE – selects the respective sound source for DAB/FM/DISC/USB/AUX. 3 CLOCK – sets the clock function. 4 INFO./RDS – for FM, displays RDS information. 5 SCAN – star ts auto-scanni...
Page 14 - SLEEP; MUTE
14 English ( DISPLAY for CD/MP3/USB ................................. displays track information during playback. ) VOL + / - – adjusts the volume level. – adjusts the hours and minutes for the clock/timerfunction. ¡ SLEEP – selects the sleeper time. ™ 9 – stops disc playback or erases a disc/USBpro...
Page 15 - Power-saving automatic standby; Sound control; Displaying the clock; Basic Functions
English 15 ● Press and hold ECO POWER/STANDBY ON 2 for 3 seconds or more to go back to Eco Power Standby mode. Power-saving automatic standby As a power-saving feature, the system willautomatically switch to Standby mode if you donot press any buttons within 15 minutes after adisc has stopped playin...
Page 16 - Discs for playback; Text display
16 English CD/MP3-CD Operations IMPORTANT!The lens of the CD player should never betouched. X Discs for playback This system is able to play : – All pre-recorded audio CDs– All finalised audio CDR and audio CDRW discs – MP3-CDs (CD-ROMs with MP3 tracks) ● CD-ROM, CD-I, CDV, VCD, DVD or computerCDs, ...
Page 17 - Finding a passage within a track; Reviewing the programme
English 17 CD/MP3-CD Operations Finding a passage within a track 1 Press and hold down on TUNING S / T . ➜ The disc is played at high speed. 2 When you recognize the passage you want,release TUNING S / T . ➜ Normal playback continues. Selecting a desired album/track(MP3 disc only) To select a desire...
Page 18 - DAB Reception; Tuning to DAB for the first time; SOURCE; CH N; SCAN; Manual tuning
18 English DAB Reception Tuning to DAB for the first time 1 Press SOURCE on the top of the system to select DAB (or press DAB on the remote control). ➜ The system will star t full scan to search for all available Band III channels automatically. ➜ If no DAB ser vice is available, “station not availa...
Page 19 - DAB information display; Date and Time; Menu operation; MENU; Programming DAB stations; PROG; Tuning to preset DAB stations
English 19 DAB information display You can view the DAB ser vice information in the following 3 information modes. Depending onthe DAB radio station you are tuning to, someinformation modes may be unavailable. ● Press INFO./RDS repeatedly to view the following information. Channel & Frequency Di...
Page 20 - Tuner; Tuning to radio stations; Programming radio stations; Automatic programming; Manual programming
20 English Tuner Tuning to radio stations 1 Press SOURCE once or more to select FM (or FM on the remote control) . 2 Press and hold 4 / ¢ (or 5 / 6 on the remote control) until SEARCH appears ➜ The radio automatically tunes to a station with sufficient reception. Display shows SEARCH during automati...
Page 21 - RDS; Switching through RDS information; Automatic clock setting via RDS
English 21 Tuner RDS The feature RDS ( R adio D ata S ystem) is a ser vice that allows FM stations to send additionalinformation along with the regular FM radiosignal. When you are receiving an RDS station, and the station name are displayed. Switching through RDS information 1 Tune to the desired R...
Page 22 - External Sources; Using a non-USB device; Using a USB mass storage device
22 English External Sources Using a non-USB device 1 Connect the audio out terminals of the externalequipment (TV, VCR, Laser Disc player, DVDplayer or CD Recorder) to the LINE-IN terminal of your system. 2 Press SOURCE repeatedly (or AUX on the remote control) to select external equipment. Notes:– ...
Page 24 - Setting clock
24 English Setting clock There are two possible methods for setting theclock: manually or automatically by using RDS. Automatic clock setting Refer to “Setting the RDS clock”. Manual clock setting 1 In standby mode, press and hold CLOCK on the remote control. ➜ The clock digits for the hours flash. ...
Page 26 - GENERAL INFORMATION; Specifications
26 English AMPLIFIER Output power ....................................... 2 x 50 W RMS ...................................................... 100 W + 100 W MPO Signal-to-noise ratio .......................... ≥ 62 dBA (IEC) Frequency response ......... 40 – 15000 Hz, ± 3 dBImpedance loudspeakers ......
Page 27 - Maintenance; Cleaning the disc lens
English 27 Cleaning the Cabinet ● Use a soft cloth slightly moistened with a milddetergent solution. Do not use a solutioncontaining alcohol, spirits, ammonia or abrasives. Cleaning Discs ● When a disc becomes dir ty,clean it with a cleaning cloth.Wipe the disc from the centreout. ● Do not use solve...
Page 28 - Troubleshooting; Radio reception is poor.
28 English Troubleshooting WARNINGUnder no circumstances should you try to repair the system yourself, as this will invalidate thewarranty. Do not open the system as there is a risk of electric shock. If a fault occurs, first check the points listed below before taking the system for repair. If youa...
Page 30 - CLASS 1
English Deutsch Por tuguês Italiano Bokmål Dansk Italiano Svenska Dansk Suomi P olski Printed in China CLASS 1 LASER PRODUCT MCB395 PDCC-JW-0817 Meet Philips at the Internet http://www.philips.com PageBack_MCB395 2008.5.2, 17:35 76