Page 2 - Norge
3140 115 xxxxx 2 Important notes for users in theU.K. Mains plug This apparatus is fitted with an approved 13Amp plug. To change a fuse in this type of plugproceed as follows: 1 Remove fuse cover and fuse. 2 Fix new fuse which should be a BS1362 3 Amp,A.S.T.A. or BSI approved type . 3 Refit the fuse...
Page 5 - Index
3140 115 xxxxx 5 English Dansk Bokmål Index English ------------------------------------------------ 6 Dansk ----------------------------------------------- 31 Bokmål --------------------------------------------- 56 P001-P030_MCB275_05_Eng 2007.6.13, 10:27 5
Page 6 - English; Contents; Using AC power
6 English Contents General Information Supplied accessories ............................................ 7Environmental information ................................ 7Safety Information ................................................ 7About Digital Audio Broadcasting (DAB) ....... 8Hearing Safety .....
Page 7 - General Information; Supplied accessories; – mounting kit; Environmental Information; All unnecessar y packaging has been omitted. We; Safety Information; Disposal of your old product
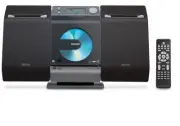
English 7 General Information Supplied accessories – 2 speaker boxes including 2 speaker cables– remote control (with 1 x CR2025 batter y)– stand – mounting kit – 1 X cer tified AC/DC adapter (Input: 100- 240V ~ 50-60Hz 0.8A MAX., Output:14V 1.8A) Environmental Information All unnecessar y packaging...
Page 8 - Hearing Safety; Listen at a moderate volume.; Set your volume control at a low setting.; Listen for reasonable periods of time:
8 English About Digital AudioBroadcasting (DAB) DAB digital radio is a new way of broadcastingradio via a network of terrestrial transmitters. Itprovides listener s with more choice andinformation delivered in cr ystal clear, crackle-freesound quality.– The technology allows the receiver to lockon t...
Page 9 - Controls; Controls on the set; In standby or Eco Power mode:
English 9 Controls Controls on the set (illustrations on page 3) 1 STANDBY-ON/ ECO POWER – press briefly to switch the set on or off (standby/ECO POWER); – In standby or Eco Power mode: press and hold to toggle between Standby and ECOPOWER mode (power-saving mode). – Red indicator: lights up red whe...
Page 10 - Remote control; ÉÅ
10 English Remote control Controls 4 ¡ ) £(*&^ % 6 9 8 5 1 3 7 ! @ ™ # $ 9 0 2 1 B – switches the system on or to Eco Powerstandby/normal standby with clock display. 2 SOURCE – selects the respective sound source for DAB/FM/DISC/USB/AUX. 3 CLOCK – sets the clock function. 4 INFO./RDS – for FM, d...
Page 11 - Controls Installation; Mounting stand onto the set; Appendix: How to mount your; Mounting MCB275 onto walls
English 11 Controls Installation Placing MCB275 With the detachable stand, MCB275 allows youto place it in two ways: on desktops with stand or on walls without stand . Mounting stand onto the set MCB275 is equipped with a stand. To mount thestand onto the set, 1 Put MCB275 on a flat and fir m surfac...
Page 12 - Installation; Rear connections; Never make or change connections with; Speaker connections; Connect the cable of the left speaker to; LEFT; Speaker
12 English Installation Rear connections Warning: – Never make or change connections with the mains supply switched on. – Install your set near the AC outlet and where the AC power plug can be reachedeasily. Speaker connections Use the supplied speakers only. Using otherspeakers can damage the set o...
Page 13 - for the devices with USB cable:; or; Connecting a USB; AUX IN
English 13 Installation Connecting an additionalappliance Connecting a USB device or memorycard By connecting a USB mass storage device(including USB flash memory, USB flash playersor memor y cards) to the Hi-Fi system, you canenjoy the device’s stored music through thepowerful speakers of Hi-Fi sys...
Page 14 - Using AC power; To disconnect the
14 English Installation Using AC power 1 Make sure all the connections have been madebefore switching on the power supply. 2 Connect the AC power adaptor to the wallsocket. This switches on the power supply. When MCB275 is switched to standby, it is stillconsuming some power. To disconnect the syste...
Page 15 - Preparation; Setting the clock; POWER; RDS: Automatic clock; Before using the remote control
English 15 Preparation Setting the clock After connecting MCB275 to the power supply,set the clock fir st. 1 Press and hold STANDBY-ON/ ECO POWER to switch the set to Standby mode. ➜ The display shows the set time. 2 In the standby mode, press and hold CLOCK on the remote control. ➜ The hours digits...
Page 16 - Basic Functions; – You can also switch on the set by pressing; Volume control; Volume adjustment; Sound control; DSC; Displaying the clock
16 English Basic Functions Switching on/off the set andselecting functions 1 To switch on, press STANDBY-ON / ECO POWER or SOURCE on the set (or y on the remote control). ➜ The set switches to the last source selected. OR On the remote control, press the source button(e.g. DAB , FM , DISC , USB, AUX...
Page 17 - CD; Discs for playback; Playing discs; SOURCE; OPEN; CD OPEN•CLOSE; READING
English 17 CD Discs for playback With this system, you can play – all pre-recorded audio CDs (CDDA) – all finalized audio CD-Rs and CD-RWs– MP3/WMA-CDs (CD-Rs/CD-RWs with MP3/WMA files) IMPORTANT!– This system is designed for regulardiscs. Therefore, do not use anyaccessories such as disc stabilizer...
Page 18 - ” will be; STOP; Selecting and searching; Selecting a different track; Programming tracks; PROG; ALB
18 English CD Helpful hints: – If you have not organized MP3/WMA files intoany albums on your disc , an album “ 00 ” will be automatically assigned for all those files. 4 Press ÉÅ to star t playback. ➜ Display shows current track number and elapsed playing time. 5 To pause playback, press ÉÅ . To re...
Page 19 - Erasing the program; – In the shuffle mode, press
English 19 CD 4 Repeat steps 2-3 to select and store all desiredtracks. ➜ FULL is displayed if you attempt to program more than 32 tracks. 5 Press ÉÅ play the program. Helpful hints: – The set will return to the stop position if no button is pressed within 90 seconds. PROG disappears. To resume prog...
Page 20 - DAB Reception; Tuning to DAB for the first time; CH; CH N; FULL SCAN; SCAN; QUICK SCAN; Manual tuning
20 English DAB Reception Tuning to DAB for the first time 1 Press SOURCE on the top of the system to select DAB (or press DAB on the remote control). ➜ The system will star t full scan to search for all available Band III channels automatically. ➜ If no DAB ser vice is available, “station not availa...
Page 21 - DAB information display; Date and Time; Menu operation; Programming DAB stations; PN; PN SAVED; Tuning to preset DAB stations
English 21 DAB information display You can view the DAB ser vice information in the following 3 information modes. Depending onthe DAB radio station you are tuning to, someinformation modes may be unavailable. ● Press INFO./RDS repeatedly to view the following information. Channel & Frequency Di...
Page 22 - Tuner; Tuning to radio stations; SEARCH; Programming radio stations; Autostore: Automatic programming; If no tuner preset number is selected, default is; Manual programming
22 English Tuner Tuning to radio stations 1 Press SOURCE once or more to select FM (or FM on the remote control) . 2 Press and hold 4 / ¢ (or 5 / 6 on the remote control) until SEARCH appears ➜ The radio automatically tunes to a station with sufficient reception. Display shows SEARCH during automati...
Page 23 - RDS; Switching through RDS information; NO PS; Automatic clock setting via RDS; The time signal broadcast from certain RDS
English 23 Tuner RDS The feature RDS ( R adio D ata S ystem) is a ser vice that allows FM stations to send additionalinformation along with the regular FM radiosignal. When you are receiving an RDS station, and the station name are displayed. Switching through RDS information 1 Tune to the desired R...
Page 24 - External Sources; Playing a USB mass storage device; – Suppor ted Music type:
24 English External Sources Using a USB mass storagedevice By connecting a USB mass storage device to theHi-Fi system, you can enjoy the device’s storedmusic through the powerful speakers of Hi-Fi system. Playing a USB mass storage device Compatible USB mass storage devices With the Hi-Fi system, yo...
Page 25 - – Make sure that the file names of MP3 files end with
English 25 External Sources How to organize your MP3/WMA files onthe USB mass storage device This Hi-Fi system will browse the MP3/WMA filesin the folder s/sub-folder s/titles order.Example: Root Title 001 Title 002 Title 003 Album 01 Title 001 Title 002 Title 003 Album 02 Title 001 Title 002 Title ...
Page 26 - Timer SLEEP; Setting the timer; TIMER ON; SLEEP; The
26 English Timer SLEEP Setting the timer The set can be used as an alarm clock, whereby the selected source (DAB, FM, DISC or USB)star ts playback at a preset time. Make sure the clock is set before using the timer. 1 Press and hold TIMER on the remote control. ➜ TIMER ON and the hours digits star t...
Page 27 - Maintenance; wire
English 27 Cleaning the Cabinet ● Use a soft cloth slightly moistened with a milddetergent solution. Do not use a solutioncontaining alcohol, spirits, ammonia or abrasives. Cleaning Discs ● When a disc becomes dir ty,clean it with a cleaning cloth.Wipe the disc from the centreout. ● Do not use solve...
Page 28 - Troubleshooting; NO DISC; Radio reception is poor.; Replace or clean the disc, see “Maintenance”.
28 English Troubleshooting WARNINGUnder no circumstances should you try to repair the system yourself, as this will invalidate thewarranty. Do not open the system as there is a risk of electric shock. If a fault occurs, first check the points listed below before taking the system for repair. If youa...
Page 30 - Appendix; Drill two 6mm diameter holes as mar ked; What else you’ll need
30 English Appendix 140 mm (5.51") 2 Drill two 6mm diameter holes as mar ked 3 Secure the dowels and screws in the holesrespectively, leaving the screws 5mm proud ofthe wall 4 To detach the stand, a. As shown, hold down the 3 PRESS buttons b. Move out the stand to detach PRESS PRESS 5 Hang the u...