Philips HD4731/70 - User Manual
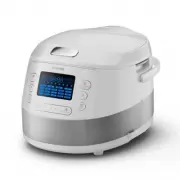
Philips HD4731/70 – User Manual, read for free online in PDF format. We hope this helps you resolve any issues you may have. If you have further questions, please contact us through the contact form.


Table of Contents:
- Page 2 – Cleaning and Maintenance; Български
- Page 3 – Čeština; Recyklace; Eesti; Teie Multicooker; Menüüde tutvustus
- Page 4 – Valmistamisaja seadistamine; Veaotsing; Hrvatski; Vaš multicooker; Pregled izbornika
- Page 5 – Postavljanje vremena kuhanja; Čišćenje i održavanje; Unutarnji dio; Recikliranje; Magyar; Többfunkciós főzőkészülék; A többfunkciós főzőkészülék
- Page 6 – Lietuviškai; Šilumos palaikymas; Gaminimo laiko nustatymas; Perdirbimas; gaminimas
- Page 7 – Latviešu; Interjers; Garantija un serviss; Polski; gotowania
- Page 8 – Recykling; Română
- Page 9 – Reciclarea; Depanarea; Русский
- Page 10 – Slovenčina; varenie MultiCooker; jedla
- Page 11 – Slovenščina; Srpski; Pregled
- Page 12 – Pregled menija; Korišćenje aparata; Pre prve upotrebe; pripremu; Dodaci
English
1 Your multicooker
Congratulations on your purchase, and welcome to Philips!
To fully benefit from the support that Philips offers, register your
product at www.philips.com/welcome.
2 What’s in the box (fig. 1)
a
Multicooker main unit
b
Power cord
c
Rice spatula
d
Soup ladle
e
Measuring cup
f
Steam basket
g
User manual
h
Recipe booklet
i
Warranty card
j
Safety leaflet
3 Overview
Product overview (fig. 2)
a
Top lid
b
Detachable inner lid
c
Inner pot
d
Control panel
e
Heating element
f
Power socket
g
Main unit
h
Cooker handle
j
Water level indications
j
Sealing ring
k
Detachable steam vent cap
l
Lid release button
Controls overview (fig. 3)
m
Keep-warm button
n
Child lock button
o
Stage cooking button
p
Preset time button
q
Decrease button
r
Increase button
s
Cooking time button
t
Menu button
u
Temperature button
v
Start/Cancel button
w
Display screen
Menus overview
Menus
Default cooking
time
Cooking time
regulating range
Rice (Rice)
30-40 min
/
Grain (Grain)
30-40 min
/
Risotto (Risotto)
35 min
/
Jam (Jam)
10 min
5 min - 2 hr
Steam (Steam)
20 min
5 min - 2 hr
Boil (Boil)
20 min
5 min - 2 hr
Soup (Soup)
1 hr
20 min-4 hr
Compote (Compote)
10 min
5-40 min
Stew (Stew)
1 hr
20 min - 10 hr
Slow cooking (Slow
cooking)
5 hr
1-15 hr
Ragout (Ragout)
2 hr
20 min - 10 hr
Fry (Fry)
15 min
5-60 min
Roast (Roast)
1 hr
/
Bake (Bake)
45 min
20 min - 2 hr
Jelly meat (Jelly meat)
6 hr
4-10 hr
Yogurt (Yogurt)
8 hr
6-12 hr
Kefir (Kefir)
8 hr
6-12 hr
Reheat (Reheat)
25 min
5-60 min
Manual (Manual)
2 hr
5 min - 10 hr
Stage cooking (Stage
cooking)
5 min
5 min - 15 hr
Menus
Preset
time
Default
cooking
temperature
Temperature
regulating
range
Rice (Rice)
1-24 hr
130-140°C
/
Grain (Grain)
1-24 hr
130-140°C
/
Risotto (Risotto)
1-24 hr
130-140°C
/
Jam (Jam)
1-24 hr
90-100°C
/
Steam (Steam)
1-24 hr
100°C
/
Boil (Boil)
1-24 hr
100°C
/
Soup (Soup)
1-24 hr
90-100°C
/
Compote (Compote) 1-24 hr
100°C
/
Stew (Stew)
1-24 hr
95°C
/
Slow cooking (Slow
cooking)
1-24 hr
80°C
/
Ragout (Ragout)
1-24 hr
90°C
/
Fry (Fry)
/
145-160°C
/
Roast (Roast)
1-24 hr
120-130°C
/
Bake (Bake)
/
130°C
40-160°C
Jelly meat (Jelly meat) 1-24 hr
90-100°C
/
Yogurt (Yogurt)
1-24 hr
40±3°C
/
Kefir (Kefir)
1-24 hr
40±3°C
/
Reheat (Reheat)
/
85°C
/
Manual (Manual)
1-24 hr
100°C
30-160°C
Stage cooking (Stage
cooking)
1-24 hr
100°C
30-160°C
1
Measure the rice/grain using the measuring cup provided
(fig.
a
).
2
Rinse rice, put the washed rice in the inner pot, and fill in water
(fig.
b
).
Note
•
For details about the ratio of rice/grain and water, refer to the recipe
booklet.
3
Press the lid release button to open the lid (fig.
c
).
4
Wipe the outside of the inner pot dry (fig.
d
), and then put it
in the multicooker (fig.
e
).
Note
•
Make sure that the inner pot is in proper contact with the heating
element.
•
Make sure that the outside of the inner pot is clean and dry, and
that there is no foreign residue on the heating element.
5
Close the lid of the multicooker (fig.
f
), and put the plug in
the power socket (fig.
g
).
6
Touch “menu” (
Menu
) to select “rice” (
Rice
) (fig.
h
) or
“grain” (
Grain
) (fig.
i
).
7
Touch and hold “start” (
Start/Cancel
) for 3 seconds to confirm
and start cooking (fig.
j
).
8
When the cooking is finished, the appliance beeps and turns
into warm keeping automatically.
Making risotto (Risotto)
1
Put the ingredients for the risotto into the inner pot.
2
Wipe the outside of the inner pot dry (fig.
d
), and then put it
in the multicooker (fig.
e
).
3
Close the lid of the multicooker (fig.
f
), and put the plug in
the power socket (fig.
g
).
4
Touch “menu” (
Menu
) to select “risotto” (
Risotto
) (fig.
k
).
5
Touch and hold “start” (
Start/Cancel
) for 3 seconds to confirm
and start cooking (fig.
j
).
6
When the cooking is finished, the appliance beeps and turns
into warm keeping automatically.
Cooking jam (Jam)
1
Put ingredients for the jam into the inner pot and stir a little bit.
2
Wipe the outside of the inner pot dry (fig.
d
), and then put it
in the multicooker (fig.
e
).
3
Close the lid of the multicooker (fig.
f
), and put the plug in
the power socket (fig.
g
).
4
Touch “menu” (
Menu
) to select “jam” (
Jam
) (fig.
l
).
»
To choose a different cooking time, refer to chapter
“Setting up the cooking time”.
5
Touch and hold “start” (
Start/Cancel
) for 3 seconds to confirm
and start cooking (fig.
j
).
6
When the cooking is finished, the appliance beeps and turns
into warm keeping automatically.
Note
•
displays on the screen before the water/liquid is brought
to boil. When the water/liquid starts boiling, the set cooking time
displays on the screen.
•
For details about the ratio of ingredients and liquid, refer to the
recipe booklet.
Steaming (Steam)
1
Pour some water into the inner pot.
Note
•
To steam vegetable, use 0.2L to 1L water depending on the types
and amount of vegetable; to steam meat, use 0.5L to 2L water
depending on the size and amount of meat.
•
Make sure that not all the steaming holes on the steam basket are
covered by the ingredients, so that hot steam could flow up from
under the steam basket.
2
Put the basket in the inner pot, put the food in a bowl, and
then put the bowl on the steam basket.
3
Wipe the outside of the inner pot dry (fig.
d
), and then put it
in the multicooker (fig.
e
).
4
Close the lid of the multicooker (fig.
f
), and put the plug in
the power socket (fig.
g
).
5
Touch “menu” (
Menu
) to select “steaming” (
Steam
) (fig.
m
).
»
To choose a different cooking time, refer to chapter
“Setting up the cooking time”.
6
Touch and hold “start” (
Start/Cancel
) for 3 seconds to confirm
and start cooking (fig.
j
).
7
When the cooking is finished, the appliance beeps and turns
into warm keeping automatically.
Note
•
When steaming food, do not immerse the steam basket in water.
•
displays on the screen before the water/liquid is brought
to boil. When the water/liquid starts boiling, the set cooking time
displays on the screen.
•
After the steaming is finished, use a kitchen glove or a cloth to
remove the bowl and steam basket, as they could be very hot.
Boiling (Boil)
1
Fill the inner pot with some water.
2
Wipe the outside of the inner pot dry (fig.
d
), and then put it
in the multicooker (fig.
e
).
3
Close the lid of the multicooker (fig.
f
), and put the plug in
the power socket (fig.
g
).
4
Touch “menu” (
Menu
) to select “boil” (
Boil
) (fig.
n
).
»
To choose a different cooking time, refer to chapter
“Setting up the cooking time”.
5
Touch and hold “start” (
Start/Cancel
) for 3 seconds to confirm
and start cooking (fig.
j
).
6
When the water is brought to boil, the multicooker beeps as
a reminder for you to open the lid and put the food in the
inner pot.
Note
•
displays on the screen before the water/liquid is brought
to boil. When the water/liquid starts boiling, the set cooking time
displays on the screen.
7
After the food is put in the inner pot, close the lid and touch
“menu” (
Menu
) to resume the cooking process.
8
When the cooking is finished, the appliance beeps and turns
into standby automatically.
Making soup (Soup)
1
Put ingredients and water/liquid for the soup into the inner pot.
2
Wipe the outside of the inner pot dry (fig.
d
), and then put it
in the multicooker (fig.
e
).
3
Close the lid of the multicooker (fig.
f
), and put the plug in
the power socket (fig.
g
).
4
Touch “menu” (
Menu
) to select “soup” (
Soup
) (fig.
o
).
»
To choose a different cooking time, refer to chapter
“Setting up the cooking time”.
5
Touch and hold “start” (
Start/Cancel
) for 3 seconds to confirm
and start cooking (fig.
j
).
6
When the cooking is finished, the appliance beeps and turns
into warm keeping automatically.
Making compote (Compote)
1
Put the ingredients for the compote in the inner pot.
2
Wipe the outside of the inner pot dry (fig.
d
), and then put it
in the multicooker (fig.
e
).
3
Close the lid of the multicooker (fig.
f
), and put the plug in
the power socket (fig.
g
).
4
Touch “menu” (
Menu
) to select “compote” (
Compote
)
(fig.
p
).
»
To choose a different cooking time, refer to chapter
“Setting up the cooking time”.
5
Touch and hold “start” (
Start/Cancel
) for 3 seconds to confirm
and start cooking (fig.
j
).
6
When the cooking is finished, the appliance beeps and turns
into warm keeping automatically.
Note
•
displays on the screen before the water/liquid is brought
to boil. When the water/liquid starts boiling, the set cooking time
displays on the screen.
Making stew (Stew) or ragout (Ragout)
1
Put the ingredients for the stew or ragout in the inner pot.
2
Wipe the outside of the inner pot dry (fig.
d
), and then put it
in the multicooker (fig.
e
).
3
Close the lid of the multicooker (fig.
f
), and put the plug in
the power socket (fig.
g
).
4
Touch “menu” (
Menu
) to select “stew” (
Stew
) (fig.
q
) or
“ragout” (
Ragout
) (fig.
r
).
»
To choose a different cooking time, refer to chapter
“Setting up the cooking time”.
5
Touch and hold “start” (
Start/Cancel
) for 3 seconds to confirm
and start cooking (fig.
j
).
6
When the cooking is finished, the appliance beeps and turns
into warm keeping automatically.
Slow cooking (Slow cooking)
1
Wipe the outside of the inner pot dry (fig.
d
), and then put it
in the multicooker (fig.
e
).
2
Put the plug in the power socket (fig.
g
).
3
Touch “menu” (
Menu
) to select “slow cooking” (
Slow
cooking
) (fig.
s
).
»
To choose a different cooking time, refer to chapter
“Setting up the cooking time”.
4
Touch and hold “start”
(Start/Cancel
) for 3 seconds to confirm
and start cooking (fig.
j
).
5
When the cooking is finished, the appliance beeps and turns
into warm keeping automatically.
Frying (Fry)
1
Wipe the outside of the inner pot dry (fig.
d
), and then put it
in the multicooker (fig.
e
).
2
Put the plug in the power socket (fig.
g
).
3
Pour some cooking oil into the inner pot.
4
Touch “menu” (
Menu
) to select “fry” (
Fry
) (fig.
t
).
5
Touch and hold “start”
(Start/Cancel
) for 3 seconds to confirm
and start cooking (fig.
j
).
6
Let the cooking oil heat up for 5 minutes, and then put the
ingredients and seasonings into the inner pot.
7
Keep the lid open and stir the ingredients constantly with a
spatula.
8
When the cooking is finished, the appliance beeps and turns
into standby automatically.
Roasting (Roast)
1
Put ingredients into the inner pot.
2
Wipe the outside of the inner pot dry (fig.
d
), and then put it
in the multicooker (fig.
e
).
3
Close the lid of the multicooker (fig.
f
), and put the plug in
the power socket (fig.
g
).
4
Touch “menu” (
Menu
) to select “roast” (
Roast
) (fig.
u
).
5
Touch and hold “start”
(Start/Cancel
) for 3 seconds to confirm
and start cooking (fig.
j
).
6
There are 2 stages of roasting. When the first stage (about
35 minutes) is over, the multicooker beeps 5 times every
30 seconds as a reminder for you to open the lid, and turn the
food over in the inner pot.
»
flashes on the screen.
7
Touch “menu” (
Menu
) to start the second stage.
»
If menu (
Menu
) is not touched within 5 minutes after the
first stage is over, the multicooker will turn into warm
keeping.
8
When the cooking is finished, the appliance beeps and turns
into standby automatically.
Baking (Bake)
1
Put the ingredients to bake in the inner pot.
2
Wipe the outside of the inner pot dry (fig.
d
), and then put it
in the multicooker (fig.
e
).
3
Close the lid of the multicooker (fig.
f
), and put the plug in
the power socket (fig.
g
).
Note
•
When baking cake or bread, keep the lid closed during cooking.
Baking cake at 130°C and by 45 minutes usually delivers best
cooking result.
•
If you bake other food with a temperature above 140°C, keep the
lid open.
4
Touch “menu” (
Menu
) to select “bake” (
Bake
) (fig.
v
).
»
To choose a different baking temperature, refer to chapter
“Setting up the cooking temperature”.
»
To choose a different cooking time, refer to chapter
“Setting up the cooking time”.
5
Touch and hold “start” (
Start/Cancel
) for 3 seconds to confirm
and start cooking (fig.
j
).
6
When the cooking is finished, the appliance beeps and turns
into warm keeping automatically.
Note
•
If the baking temperature is set below 80°C, when the cooking is
finished, the appliance turns into standby automatically.
•
When removing the inner pot from the multicooker after cooking,
use a kitchen glove or a cloth, as the inner pot could be very hot.
Making jelly meat (Jelly meat)
1
Put the ingredients for the jelly meat in the inner pot.
2
Wipe the outside of the inner pot dry (fig.
d
), and then put it
in the multicooker (fig.
e
).
3
Close the lid of the multicooker (fig.
f
), and put the plug in
the power socket (fig.
g
).
4
Touch “menu” (
Menu
) to select “jelly meat” (
Jelly meat
)
(fig.
w
).
»
To choose a different cooking time, refer to chapter
“Setting up the cooking time”.
5
Touch and hold “start” (
Start/Cancel
) for 3 seconds to confirm
and start cooking (fig.
j
).
6
When the cooking is finished, the appliance beeps and turns
into warm keeping automatically.
Note
•
displays on the screen before the water/liquid is brought
to boil. When the water/liquid starts boiling, the set cooking time
displays on the screen.
Making yogurt (Yogurt) or kefir (Kefir)
1
Mix the ingredients for the yogurt or kefir well and put them in
the inner pot.
2
Wipe the outside of the inner pot dry (fig.
d
), and then put it
in the multicooker (fig.
e
).
3
Close the lid of the multicooker (fig.
f
), and put the plug in
the power socket (fig.
g
).
4
Touch “menu” (
Menu
) to select “yogurt” (
Yogurt
) (fig.
x
) or
“kefir” (
Kefir
) (fig.
y
).
»
To choose a different cooking time, refer to chapter
“Setting up the cooking time”.
5
Touch and hold “start” (
Start/Cancel
) for 3 seconds to confirm
and start cooking (fig.
j
).
6
When the cooking is finished, the appliance beeps and turns
into standby automatically.
Reheating (Reheat)
1
Loosen the food and evenly distribute it in the inner pot.
2
Pour some water onto the food to prevent it from becoming
too dry. The quantity of the water depends on the amount of
food.
3
Wipe the outside of the inner pot dry (fig.
d
), and then put it
in the multicooker (fig.
e
).
4
Close the lid of the multicooker (fig.
f
), and put the plug in
the power socket (fig.
g
).
5
Touch “menu” (
Menu
) to select “reheat” (
Reheat
) (fig.
z
).
»
To choose a different cooking time, refer to chapter
“Setting up the cooking time”.
6
Touch and hold “start” (
Start/Cancel
) for 3 seconds to confirm
and start cooking (fig.
j
).
7
When the cooking is finished, the appliance beeps and turns
into warm keeping automatically.
Manual (Manual)
You may use the manual mode to cook food with more control over
the cooking time and temperature.
1
Put ingredients into the inner pot.
2
Wipe the outside of the inner pot dry (fig.
d
), and then put it
in the multicooker (fig.
e
).
3
Close the lid of the multicooker (fig.
f
), and put the plug in
the power socket (fig.
g
).
4
Touch “menu” (
Menu
) to select “manual” (
Manual
) (fig.
{
).
»
To choose a different baking temperature, refer to chapter
“Setting up the cooking temperature”.
»
To choose a different cooking time, refer to chapter
“Setting up the cooking time”.
5
Touch and hold “start” (
Start/Cancel
) for 3 seconds to confirm
and start cooking (fig.
j
).
Note
•
The cooking time for rice (
Rice
), grain (
Grain
), and risotto (
Risotto
)
is determined by the multicooker in accordance to the quantity of
ingredients put in the inner pot.
•
You can adjust the cooking temperature for bake (
Bake
), manual
(
Manual
) and Stage cooking (
Stage cooking
). For bake, the
temperature is available from 40°C to 160°C; for manual and Stage
cooking, the temperature is available from 30°C to 160°C.
•
After the cooking process has started, you can touch the Start/
Cancel button (
Start/Cancel
) to deactivate the current cooking
process, and the multicooker will switch to the standby mode.
4 Using the multicooker (fig. 4)
Note
•
For all menus, do not exceed the
MAX
indication on the inside of
the inner pot when putting ingredients and liquid in it, otherwise the
food may overflow during cooking.
•
The cooking time does not display straight from the beginning for
rice (
Rice
), grain (
Grain
) and risotto (
Risotto
).
displays
on the screen during most of the cooking time as the multicooker
needs to detect the water/liquid and ingredient volume in the initial
preparation stage. When the multicooker detects the actual cooking
time needed, the remaining cooking time displays on the screen.
For jam (
Jam
), steam (
Steam
), boil (
Boil
), jelly meat (
Jelly meat
),
and compote (
Compote
),
displays on the screen before the
water/liquid is brought to boil. When the water/liquid starts boiling,
the set cooking time displays on the screen.
•
Refer to the recipe booklet for more details on cooking with each
menu.
Tip
•
To select a certain menu, touch "menu" (
Menu
) repeatedly. You
can also touch "menu" (
Menu
) once, and then touch increase (
+
) or
decrease (
-
) to do so.
Before first use
1
Take out all the accessories from the inner pot, and remove the
packaging material of the inner pot.
2
Clean all parts of the multicooker thoroughly before using it for
the first time (see chapter ‘Cleaning and Maintenance’).
Note
•
Make sure all parts are completely dry before you start using the
multicooker.
Cooking rice (Rice) and grain (Grain)
Note
•
If the voltage is unstable at the area you live, it is possible that food
in the multicooker overflows.
•
After the cooking is finished, stir the rice/grain and loosen it
immediately to release excessive moisture for fluffy rice/grain.
•
Depending on the cooking conditions, the bottom portion of the
rice/grain may become slightly browned.
1/6
www.philips.com/welcome
User manual
www.philips.com/welcome
Warranty
1
3
2
http://www.philips.com/welcome
Recipe
k
a
b
c
d
e
f
g
h
i
www.philips.com/welcome
Safety Leaflet
j
j
g
f
l
h
c
a
b
d
e
i
m
o
q
n
p
v
w
u
t
r
s
2
4
5
6
3
7
8
9
11
12
13
10
3S
38
28
29
31
33
35
39
37
4
14
20
27
19
23
24
25
26
15
16
17
21
22
30
32
34
36
40
3S
41
3S
18
Question?
Contact
Philips
Specifications are subject to change without notice
© 2015 Koninklijke Philips N.V.
All rights reserved.
HD4731_UM_EEU_v2.0_151210
HD4731
Register your product and get support at
www.philips.com/welcome
Always there to help you
EN
User manual
BG
Ръководство за потребителя
CS
Příručka pro uživatele
ET Kasutusjuhend
HR
Korisnički priručnik
HU Felhasználói kézikönyv
LT
Vartotojo vadovas
LV
Lietotāja rokasgrāmata
PL
Instrukcja obsługi
RO
Manual de utilizare
RU
Руководство пользователя
SK
Príručka užívateľa
SL
Uporabniški priročnik
SR
Korisnički priručnik
"Loading the manual" means you need to wait until the file loads and becomes available for online reading. Some manuals are very large, and the time they take to appear depends on your internet speed.
Was this manual helpful?
About this manual
- Brand
- Philips
- Model
- HD4731/70
- Document type
- User Manual
- Language(s)
- English
- Pages
- 12
- File size
- 2.8 MB
- Format
Summary
6 When the cooking is finished, the appliance beeps and turns into warm keeping automatically. Note • If you select a temperature below 80°C, the multicooker automatically turns into standby after the cooking process is finished. • If you select a temperature above 140°C, the top lid must be open du...
Отвътре От вътрешната страна на горния капак и основния корпус; нагревателния елемент: • Забършете с изцедена кърпа. • Уверете се, че всички хранителни остатъци, полепнали по многофункционалния уред за готвене, са отстранени. Отвън Повърхност на горния капак и външната част на основното тяло: • Избъ...
Menüüd Eelseadistatud aeg Küpsetus - temperatuuri vaikeseade Temperatuuri reguleerimis- vahemik Röstimine (Roast) 1-24 tundi 120-130°C / Küpsetamine (Bake) / 130° C 40-160°C Sült (Jelly meat) 1-24 tundi 90-100° C / Jogurt (Yogurt) 1-24 tundi 40±3° C / Keefir (Kefir) 1-24 tundi 40±3° C / Ülessoojenda...


