Page 3 - Contents
3 English EN Contents 1 Important 4 Safety 4 Notice 5 2 Your product 7 Introduction 7 What's in the box 7 Over view of the main unit 8 Over view of the remote control 9 3 Get started 10 Placement 10 Prepare the remote control 10 Connect power 11 Store DAB stations 11 Set clock 11 Turn on 12 4 Play 1...
Page 4 - Important; Safety; Important Safety Instructions
4 EN 1 Important Safety This 'bolt of lightning' indicates uninsulated material within your unit may cause an electrical shock. For the safety of ever yone in your household, please do not remove product covering. The 'exclamation point' calls attention to features for which you should read the encl...
Page 5 - Hearing safety; Notice
5 English EN • Remove batteries when the unit is not used for a long time. • Batteries (batter y pack or batteries installed) shall not be exposed to excessive heat such as sunshine, fire or the like. o Apparatus shall not be exposed to dripping or splashing. p Do not place any sources of danger on ...
Page 7 - Your product; Introduction
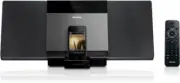
7 English EN This apparatus includes this label: 2 Your product Congratulations on your purchase, and welcome to Philips! To fully benefit from the suppor t that Philips offers, register your product at www.philips.com/welcome. Introduction With this unit, you can enjoy audio from discs, iPod/iPhone...
Page 8 - Overview of the main unit
8 EN Overview of the main unit a • Turn on the unit, switch to standby mode, or switch to Eco Power standby. b SOURCE • Select a source: CD, DAB radio, FM radio, iPod/iPhone/iPad, USB, or MP3 link. c / • Skip to the previous/next track. • Search within a track. • Tune to a radio station. d /OK • Sta...
Page 9 - Overview of the remote
9 English EN Overview of the remote control DAB PRESET/A BUM PROG/ CLOCK SET SLEEP/ TIMER DSC DBB FM VOL 3 4 5 6 7 8 9 1 0 2 C D DOCK DISPLAY RDS OK MENU USB MP3 LINK a b c e fg p o d h i j m n kl sr q MODE/ SCAN a • Turn on the unit, switch to standby mode, or switch to Eco Power standby. b • Mute ...
Page 10 - Get started; Placement; Mount on a wall; Prepare the remote control
10 EN • Search and store DAB/FM radio stations. o /MENU • Stop play. • Access the iPod/iPhone menu, or the DAB menu. p DOCK • Select iPod/iPhone/iPad source. q OK • Confirm a selection. r PRESET/ALBUM / • Skip to the previous/next album. • Select a preset radio station. • Navigate the iPod/iPhone/iP...
Page 11 - Connect power; Store DAB stations; Set clock
11 English EN Note • If you are not going to use the remote control for a long time, remove the batteries. • Do not use old and new or different types of batteries in combination. • Batteries contain chemical substances, so they should be disposed of properly. Connect power Caution • Risk of product...
Page 12 - Switch to standby; Play from USB
12 EN Turn on1 Press . » The unit switches to the last selected source. Switch to standby 1 When the unit is turned on, press to switch the unit to standby. • In standby, press and hold to switch from normal standby to Eco power standby or vice versa. » In normal standby, the clock (if set) appears ...
Page 13 - Skip to a track; Repeat and shuffle play; Program tracks
13 English EN Skip to a track For CD: 1 Press / to select another track. • To select a track directly, you can also press a key on the numerical keypad. For MP3 disc and USB: 1 Press to select an album or folder. 2 Press / to select previous/next track or file. Search within a track1 During play, pr...
Page 14 - Adjust sound; Listen to radio; Listen to DAB radio; Tune to a DAB station
14 EN 5 Adjust sound Adjust volume1 During play, press VOL +/- to increase/ decrease the volume. Select a preset sound effect1 During play, press DSC repeatedly to select a preset sound setting. Enhance bass1 During play, press DBB to turn dynamic bass enhancement on or off. » If DBB is activated, D...
Page 15 - Program DAB stations manually; Select a preset DAB station
15 English EN 2 Press OK to confirm the selection. » The radio immediately tunes to the selected station. Note • Position the antenna as far as possible from TV, VCR, or other radiation source. • For optimal reception, fully extend and adjust the position of the antenna. Program DAB stations manuall...
Page 16 - Listen to FM radio; Tune to a FM station; Program FM stations automatically; Select a preset FM station
16 EN 2 Download the software update to your PC, and then connect the unit to the PC via the USB connector. 3 In DAB mode, press MENU . 4 Select [SYSTEM] (system) > [UPGRADE] (upgrade), and then follow the instructions displayed to go to the upgrade stage. • To select an option, press / ; to conf...
Page 17 - Install the rubber pad
17 English EN 7 Play iPod/ iPhone/iPad You can enjoy audio from iPod/iPhone/iPad through this unit. Compatible iPod/iPhone/iPad The unit suppor ts the following iPod, iPhone and iPad models. Made for : iPod touch (1st, 2nd, 3rd, and 4th generation) iPod nano (1st, 2nd, 3rd, 4th, 5th, and 6th generat...
Page 18 - Other features; Set the alarm timer; Set the sleep timer
18 EN 8 Other features Set the alarm timer This unit can be used as an alarm clock. The disc/radio/USB/docked product is activated to play at a preset time. 1 Make sure that you have set the clock correctly. 2 Press to switch the unit to standby. • Make sure that the clock is displayed (see "Tur...
Page 19 - Product; Specifications; Amplifier; USB playability information
19 English EN 9 Product information Note • Product information is subject to change without prior notice. Specifications Amplifier Rated Output Power 2 x 20W RMS Frequency Response 60 Hz - 16 kHz, ±3 dB Signal to Noise Ratio >65dBA MP3 link input 500mv, 20kohm Tuner Tuning Range FM:87.5 - 108 MHz...
Page 20 - 0 Troubleshooting
20 EN • DRM protected WMA files (*.wav, *.m4a, *.m4p, *.mp4, *.aac) • WMA files in Lossless format Supported MP3 disc formats • ISO9660, Joliet • Maximum title number : 999 (depending on file name length) • Maximum album number : 99 • Suppor ted sampling frequencies: 32 kHz, 44.1kHz, 48 kHz • Suppor...