Page 2 - Canada; Class B digital apparatus complies with Canadian ICES-003.
Canada English: This digital apparatus does not exceed the Class B limits for radio noise emissions from digital apparatus as set out in the Radio Interference Regulations of the Canadian Depar tment of Communications.This Class B digital apparatus complies with Canadian ICES-003. Français: Cet appa...
Page 3 - Contents
3 English EN Contents 1 Important 6 Safety 6Notice 7 2 Your kitchen clock radio 8 Introduction 8What’s in the box 8 Over view of the main unit 9 Over view of the remote control 10 3 Get started 11 Mounting the set under your kitchen cabinet 11Install remote control batter y 11 Connect power 12 Set t...
Page 5 - PHILIPS LIMITED WARRANTY
5 English EN PHILIPS LIMITED WARRANTY ONE (1) YEAR WARRANTY COVERAGE: PHILIPS warranty obligation is limited to the terms set forthbelow. WHO IS COVERED: Philips warrants the product to the original purchaser or the per-son receiving the product as a gift against defects in materials andworkmanship ...
Page 6 - Important; Safety
6 l Unplug this apparatus during lightning storms or when unused for long periods of time. m Refer all servicing to qualified service personnel. Servicing is required when the apparatus has been damaged in any way, such as power-supply cord or plug is damaged, liquid has been spilled or objects have ...
Page 7 - Notice
7 Disposal of your old product and batteries Your product is designed and manufactured with high quality materials and components, which can be recycled and reused.Never dispose of your product with other household waste. Please inform yourself about the local rules on the separate collection of ele...
Page 8 - Introduction
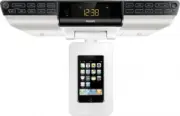
8 2 Your kitchen clock radio Congratulations on your purchase, and welcome to Philips! To fully benefit from the suppor t that Philips offers, register your product at www.philips.com/welcome. Introduction With this unit, you can: enjoy audio from iPod players or iPhone • listen to FM/AM radio statio...
Page 9 - Overview of the main unit; c d e
9 k / Select a preset radio station. • l TIMER / VOL Turn timer on/off. • Adjust volume. • m PRESET 1/6 2/7 3/8 4/9 5/10 Select preset radio stations. • n DSC Select a preset sound set ting. • o DBB Turn on/off dynamic bass • enhancement. p Star t or pause iPod/iPhone play. • q / Skip to previous/ne...
Page 11 - Mounting the set; Install remote control battery; started; Preparation
11 Mounting the set For full details on how to use the Mounting Kit, please refer to the printed instructions in the Quick Start Guide and Template . Warning Never plug in the AC power cord to the • power outlet before installation is completed.Do not use a conver ter or ex tension cord. • Install t...
Page 12 - Set time and date; Turn on; Switch to standby; Connect power
12 Set time and date 1 Dock the iPod / iPhone on the unit. 2 Open the iPod / iPhone. Time and date information on the » iPod / iPhone transfers to the unit automatically. To set time and date manually: 1 In standby mode, press and hold CLOCK for 2 seconds. The hour digits begins to blink. » 2 Rotate...
Page 13 - Charge the iPod/iPhone; Tune to a radio station; Play from iPod/iPhone; Compatible iPod/iPhone
13 1 Lif t up the iPhone/iPod dock under the bot tom plate. 2 Place the iPhone/iPod into the dock . Remove the iPod/iPhone 1 Pull the iPod/iPhone out of the dock . Listen to the iPod/iPhone 1 Ensure that the iPod/iPhone is loaded correctly. 2 Press iPod to select iPod/iPhone source. The connected iP...
Page 14 - Select a preset radio station
14 3 Press / repeatedly to tune to a radio station. 4 Press PROG . The number begins to blink. » 5 Press PRESET +/- or / repeatedly to select a preset number. 6 Press PROG to confirm. 7 Repeat the above steps to program more stations. Tip To over write a progr ammed station, progr am • another statio...
Page 15 - Adjust the volume level; Mute sound; Select a preset sound effect; Enhance bass
15 5 Adjust sound Adjust the volume level 1 Rotate VOL or press VOL +/- to increase/decrease the volume level. Mute sound 1 During play, press MUTE to mute/unmute sound. Select a preset sound effect 1 During play, press DSC repeatedly to select: [POP] (pop) • [ JA Z Z] ( jazz) • [CL ASSIC] (classic)...
Page 16 - Adjust display brightness; Other; Set a kitchen timer; Activate and deactivate alarm timer; View the alarm settings
16 Caution If you do not stop the alar m ring, the alar m will • ring of f and the timer star ts counting up. Adjust display brightness 1 Press BRIGHTNESS repeatedly to select different levels of display brightness. 6 Other features Set a kitchen timer This unit can be used as an alarm clock. 1 At a...
Page 17 - Specifications
17 Speakers Speaker Impedance 3 W, 4 ohm Speaker Driver 2. 5” Sensitivity >84dB/m/ W General information AC power 10 0 -240V, 50/60Hz Operation Power Consumption 8 W Standby Power Consumption 1 W Dimensions - Main Unit ( W x H x D) 368 x 99 x 293 mmWeight - With Packing - Main Unit 2.7 kg1.8 kg 7...
Page 18 - Troubleshooting
18 8 Troubleshooting Warning Never remove the casing of this appar atus. • To keep the warranty valid, never tr y to repair the system yourself. If you encounter problems when using this apparatus, check the following points before requesting ser vice. If the problem remains unsolved, go to the Phil...