Philips AZ318B/12 - User Manual
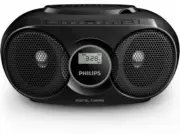
Philips AZ318B/12 – User Manual, read for free online in PDF format. We hope this helps you resolve any issues you may have. If you have further questions, please contact us through the contact form.


Table of Contents:
- Page 3 – Contents
- Page 4 – Safety
- Page 5 – Notice
- Page 6 – Introduction
- Page 7 – Overview of the main unit
- Page 8 – Get started; Connect power; AC power; Battery power
- Page 9 – Turn on; Turn off
- Page 10 – Play; Play disc; Play from USB devices; Listen to FM radio
- Page 11 – Store radio stations automatically; Program radio stations manually; Play from an external device; Adjust volume
- Page 12 – Play options; Control play; Program tracks
- Page 13 – Product; Disc
- Page 14 – Maintenance
- Page 15 – Troubleshooting
www.philips.com/support
Always there to help you
Register your product and get support at
Question?
Contact
Philips
User manual
AZ318
"Loading the manual" means you need to wait until the file loads and becomes available for online reading. Some manuals are very large, and the time they take to appear depends on your internet speed.
Was this manual helpful?
About this manual
- Brand
- Philips
- Model
- AZ318B/12
- Document type
- User Manual
- Language(s)
- English
- Pages
- 16
- File size
- 1.8 MB
- Format
Other Manuals for Philips AZ318B/12
Summary
Contents 1 Safety 1 2 Notice 2 3 Your CD Soundmachine 3 Introduction 3 What's in the box 3 Over view of the main unit 4 4 Get started 5 Connect power 5 Turn on 6 Turn off 6 5 Play 7 Play disc 7 Play from USB devices 7 Listen to FM radio 7 Play from an external device 8 Adjust volume 8 Turn Dynamic B...
1 EN 1 Safety This 'bolt of lightning' indicates uninsulated material within your unit may cause an electrical shock. For the safety of ever yone in your household, please do not remove product covering. The 'exclamation point' calls attention to features for which you should read the enclosed liter...
2 En gli sh EN 2 Notice Any changes or made to this device that are not expressly approved by MMD Hong Kong Holding Limited may void the user’s authority to operate the equipment. Hereby, MMD Hong Kong Holding Limited declares that this product is in compliance with the essential requirements and ot...


