Philips AT928/41 - User Manual
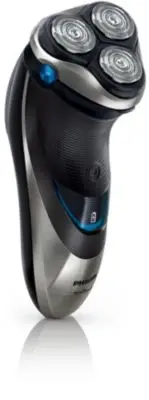
Philips AT928/41 – User Manual, read for free online in PDF format. We hope this helps you resolve any issues you may have. If you have further questions, please contact us through the contact form.


Table of Contents:
- Page 2 – ENGLISH 4; Congratulations on your purchase and
- Page 3 – ENGLISH
- Page 4 – Table of Contents
- Page 5 – How the Unique Philips Norelco Lift and Cut; Features
- Page 6 – LED Multi-Purpose Display; Before First Use; Important; Charging
- Page 7 – Charging with a Cord; Charging in Charging Stand
- Page 8 – Recharging; Recharge when the batter y symbol blinks orange.; Quick Charge; When you charge the empty battery, the; Put It To The Test & Shaving Tips; How To Shave With An Electric Razor
- Page 9 – Wet Shaving; Trimming
- Page 10 – Cleaning; Be careful not to hit the shaving unit against
- Page 11 – Extra-thorough Cleaning Method
- Page 12 – NOTE: If the shaving unit does not close smoothly,; After Each Use: Trimmer; Replacing the Razor Heads
- Page 13 – Storage
- Page 14 – Battery Removal; Be careful, the batter y strips are ver y sharp.
- Page 15 – Accessories; Replacement Heads
AT928
Rechargeable Cordless
Tripleheader Razor
Always here to help you
Question?
Contact
Philips
Norelco
Question?
Contact
Philips
Norelco
Register your product and get support at
www.norelco.com/register
"Loading the manual" means you need to wait until the file loads and becomes available for online reading. Some manuals are very large, and the time they take to appear depends on your internet speed.
Was this manual helpful?
About this manual
- Brand
- Philips
- Model
- AT928/41
- Document type
- User Manual
- Language(s)
- English
- Pages
- 15
- File size
- 3.1 MB
- Format
Summary
2 ENGLISH 4 AT928 Congratulations on your purchase and welcome to Philips Norelco!To fully benefit from the support that Philips Norelco offers, register your product at www.norelco.com/register
4. Keep the razor, cord, charging stand and charging plug away from heated surfaces. 5. Never drop or insert any object into any opening. 6. Do not charge or plug in razor/charging stand outdoors or operate where aerosol (spray) products are being used or where oxygen is being administered. 7. Do no...
7 Table of Contents Features ........................................................ 8-9LED Multi-Purpose Display .................10-11Before First Use ........................................... 11Charging ...................................................11-13Recharging ...........................