Philips 37PF9986/12 - User Manual
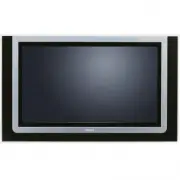
Philips 37PF9986/12 – User Manual, read for free online in PDF format. We hope this helps you resolve any issues you may have. If you have further questions, please contact us through the contact form.


Table of Contents:
- Page 2 – Information for users in the UK; Please take note of the section 'Tips' at the end of this booklet.
- Page 3 – Contents; End of life directives; Care of the screen
- Page 4 – MENU; key on top of the TV, only; Exit; Exit; and press the; MENU; TV; Setup; Keys on top of the TV
- Page 5 – Standby; OK; to remove immediately.; Remark: in DVI mode only some keys are valid.; OK; ®oÒ‡π†; AMP DVD/R TV SAT AUX; Use of the remote control RC4302
- Page 6 – Note: With signals via the; DVI; connector less picture formats are selectable.; Auto format
- Page 7 – key to; install install programmes; EasyLink; Select the menu language and country
- Page 8 – through every step; Manual installation; Store TV channels
- Page 9 – Give Name; Space; Reshuffle; Select Favourite TV channels
- Page 10 – General; TV Setup
- Page 11 – OSD; Programme title
- Page 12 – Demo; Decoder; Centre input - Centre in volume
- Page 13 – key on the remote control to summon the main menu.; Press the; Sound Ambilight Features; Picture menu; TV menu
- Page 14 – Smart sound; - Some menu items are only available in case of a Cinema Link
- Page 15 – On timer; Note: To check your timer settings, press the; Features menu
- Page 16 – Dual screen; PIP; key down will cycle the TV through the various; Display options; Scan PIP3 or PIP 6; Note: When the PIP menu times out, press the; key to make it reappear.; Position; On-Screen information
- Page 18 – Teletext Guide; page ball; B B C C E E F A X; subpages
- Page 19 – Basic functions; Acquisition and updating of; information; Note: it may be necessar y to put the TV in standby mode when all; returning from holiday.
- Page 20 – Teletext
- Page 21 – Teletext menu; - It is not possible to display a timed page when in
- Page 22 – can handle CVBS and RGB; or; VCR; Connect Peripheral Equipment; Decoder and Recorder; Other equipment
- Page 23 – Multi channel Surround receiver; Centre Input On; Camera or Camcorder; Do not connect cable; Headphone; Headphone volume; Side connections; Subwoofer; Connect extra subwoofer
- Page 24 – Side; Record with your recorder with EasyLink; Recorder or DVD with EasyLink; Recorder; To select connected equipment
- Page 25 – key is pressed and held for more than 2 seconds, the RC5/RC6; Audio- and video equipment keys
- Page 26 – • In case of weak or bad signal, consult your dealer.; See Acquisition and updating of; Tips
- Page 27 – Remote control
- Page 31 – DIGITAL AUDIO OUT; English; on the remote control for at; Preparation and Operation; The message; CINEMALINK ON; is displayed on the audio receiver and on the TV. Now the; IN; Configuration of the Cinema Link peripherals
- Page 32 – Receiver menu; Receiver; Sound menu; Loudness; Loudness On; D effect; Activating Cinema Link
- Page 33 – Night mode; (only functional with Dolby Digital sound broadcasting input); Audio only; Surround menu; Adjustment of the volume level of the loudspeakers; Speakers menu; Size of the speakers; - If Subwoofer present is set to No, Front speaker size can only be set; Distance to the speakers
- Page 34 – Start; Automatic installation; Band
"Loading the manual" means you need to wait until the file loads and becomes available for online reading. Some manuals are very large, and the time they take to appear depends on your internet speed.
Was this manual helpful?
About this manual
- Brand
- Philips
- Model
- 37PF9986/12
- Document type
- User Manual
- Language(s)
- English
- Pages
- 36
- File size
- 1.5 MB
- Format
Summary
Information for users in the UK (Not applicable outside the UK) Positioning the TV For the best results, choose a position where light does not fall directly on the screen, and at somedistance away from radiators or other sources of heat. Leave a space of at least 5 cm all aroundthe TV for ventilati...
1 Contents EasyLink features are based on the “one touch operation” approach. This meansthat a sequence of actions are executed at the same time in both the televisionand the recorder, provided both are fitted with the EasyLink function andconnected with the eurocable supplied with your recorder. R ...
2 & Wall mounting instructions/Table stand According to the type of TV you’ve purchased awall mount bracket and/or stand may besupplied. How to mount the supplied standand/or wall mount bracket, see the suppliedseparate leaflet. Make sure that the wall mountis being fixed securely enough so that...
Ask a question
Related manuals
Popular Philips Other


More Philips Other models
 Philips 34M2C5501A/00 User Manual
 Philips 34M2C6500/00 User Manual
 Philips 34M2C8600/00 User Manual
 Philips 34PT9421/69R Manual
 Philips 37PF9631D/37 User Manual
 Philips 37PF9731D/10 User Manual
 Philips 37PFL3507H/12 Quick Guide
 Philips 37PFL4007H/12 Quick Guide
 Philips 37PFL4606H/12 Quick Guide
 Philips 37PFL5322/12 Quick Guide
 Philips 37PFL5405H/12 Quick Guide
 Philips 37PFL5604H/12 User Manual