Philips 34M2C8600/00 - User Manual
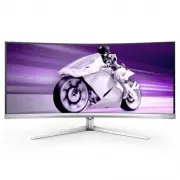
Philips 34M2C8600/00 – User Manual, read for free online in PDF format. We hope this helps you resolve any issues you may have. If you have further questions, please contact us through the contact form.


Table of Contents:
- Page 2 – Table of Contents; Safety precautions and; Power Delivery and Smart; Philips’ Panel Monitors Pixel
- Page 5 – Notational Descriptions
- Page 7 – monitor; Package contents; *Different according to region
- Page 9 – Operating the monitor
- Page 10 – Description of the On-Screen Display
- Page 13 – Swivel; Height adjustment; Remove the Base Assembly
- Page 14 – MultiClient Integrated KVM
- Page 15 – Use DP and HDMI as input then use
- Page 18 – Image Optimization
- Page 19 – • HDR Game: Ideal setting to optimize; Note
- Page 22 – Premium Pro; AMD Radeon R9 Fury X
- Page 23 – Ambiglow; How to enable Ambiglow
- Page 24 – Rearrange your displays.
- Page 25 – Screen maintenance; • Screen Saver
- Page 26 – Compulsory execution message; • Auto Warning; A reminder message that pops up after 4 hours
- Page 27 – LED Indicator; Status
- Page 28 – Ideal working posture
- Page 29 – Technical Specifications; Connectivity
- Page 34 – Power Management; Power Management Definition
- Page 35 – Philips’ Panel Monitors; Sub pixels; Pixels and Sub pixels
- Page 39 – FAQs; Troubleshooting; Common Problems
34M2C8600
Register your product and get support at www.philips.com/welcome
EN
User manual
1
Customer care and warranty
Troubleshooting and FAQs
"Loading the manual" means you need to wait until the file loads and becomes available for online reading. Some manuals are very large, and the time they take to appear depends on your internet speed.
Was this manual helpful?
About this manual
- Brand
- Philips
- Model
- 34M2C8600/00
- Document type
- User Manual
- Language(s)
- English
- Pages
- 44
- File size
- 6.4 MB
- Format
Other Manuals for Philips 34M2C8600/00
Summary
Table of Contents 1. Important ...................................... 1 1.1 Safety precautions and maintenance ..................................1 1.2 Notational Descriptions ..............3 1.3 Disposal of product and packing material ............................................4 2. Setting up the ...
3 • “Burn-in”, “after-imaging”, or “ghost imaging” is a well-known phenomenon in QD OLED panel technology. In most cases, the “burn-in”, “after-imaging” or “ghost imaging” will disappear gradually over some time after the power has been switched off. Warning It is highly recommended that you always ...
5 2. Setting up the monitor 2.1 Installation 1 Package contents *DP *HDMI * USB A-B *USB C-C/A *USB C-C *USB C-A Screw M4 x 4 VESA Bracket Quick start 34M2C8600 Register your product and get support at www.philips.com/welcome Power *Different according to region 2 Install the base 1. To well protect...
Ask a question
Related manuals
Popular Philips Other


More Philips Other models
 Philips 34E1C5600HE/01 User Manual
 Philips 34M1C5500VA/00 User Manual
 Philips 34M2C3500L/00 User Manual
 Philips 34M2C3500L/01 Installation Manual
 Philips 34M2C5501A/00 User Manual
 Philips 34M2C6500/00 User Manual
 Philips 34PT9421/69R Manual
 Philips 37PF9631D/37 User Manual
 Philips 37PF9731D/10 User Manual
 Philips 37PF9986/12 User Manual
 Philips 37PFL3507H/12 Quick Guide
 Philips 37PFL4007H/12 Quick Guide