Philips 276E9QJAB/00 - User Manual
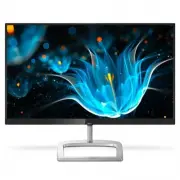
Philips 276E9QJAB/00 – User Manual, read for free online in PDF format. We hope this helps you resolve any issues you may have. If you have further questions, please contact us through the contact form.


Table of Contents:
- Page 2 – Table of Contents; Safety precautions and
- Page 3 – Warnings
- Page 4 – Maintenance
- Page 5 – Notational Descriptions; Notes, Cautions and Warnings
- Page 7 – Setting up the monitor; monitor; Package contents; Note
- Page 8 – Connecting to your PC
- Page 9 – Operating the monitor; Front view product description
- Page 10 – The OSD Menu; Resolution notification
- Page 11 – Remove the Base Assembly; Place the monitor face down on a
- Page 12 – How to ena; Image Optimization
- Page 13 – Toggle to the left to launch the
- Page 16 – Technical Specifications; Connectivity
- Page 17 – Stand
- Page 18 – Power
- Page 19 – Weight
- Page 20 – Maximum Resolution
- Page 22 – Customer care and warranty; Customer care and; Philips’ Flat Panel Monitors; subpixel; Pixels and Sub pixels
- Page 25 – Philips Customer Care Center number listed below.
- Page 26 – FAQs; Common Problems
E Line
276E9
EN
User
manual
1
Customer care and warranty
Troubleshooting & FAQs
"Loading the manual" means you need to wait until the file loads and becomes available for online reading. Some manuals are very large, and the time they take to appear depends on your internet speed.
Was this manual helpful?
About this manual
- Brand
- Philips
- Model
- 276E9QJAB/00
- Document type
- User Manual
- Language(s)
- English
- Pages
- 31
- File size
- 2.4 MB
- Format
Other Manuals for Philips 276E9QJAB/00
Summary
Table of Contents 1. Important ....................................... 1 1.1 Safety precautions and maintenance .................................. 1 1.2 Notational Descriptions ............. 31.3 Disposal of product and packing material ........................................... 4 2. Setting up the...
1 1. Important 1. Important This electronic user’s guide is intended for anyone who uses the Philips monitor. Take time to read this user's manual before you use your monitor. It contains important information and notes regarding the operation of your monitor. The Philips guarantee applies provided ...
2 1. Important monitor damage will not be covered under warranty. • Do not knock or drop the monitor during operation or transportation. • Excessive usage of monitor can cause eye discomfort, it’s better to take shorter breaks more often at your workstation than longer breaks and less often; for exa...
Ask a question
Related manuals
Popular Philips Other


More Philips Other models
 Philips 275S9JML/01 User Manual
 Philips 275V8LA/00 User Manual
 Philips 275V8LA/01 User Manual
 Philips 276B1JH/00 User Manual
 Philips 276B9/00 User Manual
 Philips 276C8/00 User Manual
 Philips 278E1A/00 User Manual
 Philips 278E8QJAB/00 User Manual
 Philips 279C9/00 User Manual
 Philips 279C9/01 User Manual
 Philips 279M1RV/00 User Manual
 Philips 279P1/00 User Manual