Page 3 - Table of Contents; Before Operation; Maintenance
– 1 – Table of Contents Before Operation Safety Instructions .......................................................................................................................2-3Installation and General Instructions ..................................................................................
Page 4 - Important Safety Instructions; READ CAREFULLY AND KEEP FOR FUTURE REFERENCE; Precautions to be taken when; Important Instructions
– 2 – Important Safety Instructions READ CAREFULLY AND KEEP FOR FUTURE REFERENCE Precautions to be taken when using Microwave Ovens for Heating foodstuffs INSPECTION FOR DAMAGE. A microwave oven should only be used if an inspection con fi rms all of the following conditions:1. The grille is not dama...
Page 5 - Circuits; WARNING
– 3 – Important Safety Instructions Installation and General Instructions Circuits Your microwave ovens should be operated on a separate circuit from other appliances. The voltage used must be the same as speci fi ed on this microwave oven. Failure to do this may cause the power board fuse to blow, ...
Page 6 - Placement of Oven; Food; Installation and General Instructions
– 4 – 13. When using the COMBINATION mode, never place any aluminum or metal container directly on the wire rack. Always insert a heat-proof, glass plate or dish between the wire rack and the aluminum container. This will prevent sparking that may damage the oven. 14. It is recommended not to use th...
Page 7 - Re; How to Test a Container for Safe
– 5 – Microwaves and How They Work Cookware and Utensils Guide Microwaves are a form of high frequency radio waves similar to those used by a radio, including AM, FM and CB. They are similar to a television where the radio waves are converted to a picture on the screen. However, microwaves are much ...
Page 8 - Cookware and Utensils Guide; Plastics; Jars and Bottles; Straw, Wicker and Wood
– 6 – Cookware and Utensils Guide (continued) Plastics Plastic dishes, cups and some freezer containers should be used with care in a microwave oven. Choose plastic containers carefully, as some plastic containers may become soft, melt and may scorch. The majority of plastic dishes, even those desig...
Page 9 - Feature Diagram
– 7 – Feature Diagram Glass Tray 1. Do not operate the oven without the Roller Ring and Glass Tray in place.2. Only use the Glass Tray speci fi cally designed for this oven. Do not substitute another Glass Tray. 3. If Glass Tray is hot, allow to cool before cleaning or placing in water.4. Do not coo...
Page 10 - Dial Features; Display Window
– 8 – Dial Features TIME CHOICE Push then rotate the dial. Rotate the dial clockwise to increase the cooking time and rotate the dial counter-clockwise to decrease the cooking time. WEIGHT CHOICE Push then rotate the dial. Rotate the dial clockwise to increase the weight and rotate the dial counter-...
Page 11 - Control Panel; Beep Sound
– 9 – Control Panel Beep Sound When pad is pressed correctly, a beep sound will be heard. If a pad is pressed and no beep is heard, the unit does not or cannot accept the instruction. The oven will beep twice between programmed stages. At the end of any complete programme, the oven will beep fi ve t...
Page 12 - Let’s Start To Use Your Oven!; Plug in; Open Door; Set Time; Press
– 10 – Let’s Start To Use Your Oven! 1 Plug in Plug into a properly earthed electrical outlet. 2 Open Door Open the door and place container with food in a dish on Glass Tray in the oven. Then close the door. 3 Select Power Level eg. P7Press Micro Power Pad four times. (see page 12 for Micro Power c...
Page 14 - Micro Power and Time; Select Power Level
– 12 – To Cook/Reheat/Defrost by Micro Power and Time 1 Select Power Level Press Micro Power pad until your desired power level appears in the Display Window. (see chart below) Note: When selecting P10 on the fi rst stage, you can start from step 2. 2 Set Cooking Time Select the cooking time by usin...
Page 15 - To Defrost; To Defrost using Inverter Turbo Defrost; Set Weight; To Defrost by Micro Power and Time Setting
– 13 – To Defrost To Defrost using Inverter Turbo Defrost This feature allows you to defrost meat, poultry and seafood automatically by just setting the weight of the food. 1 Set Weight The shape and size of the food will determine the maximum weight the oven can accommodate. The recommended maximum...
Page 16 - Defrosting Tips and Techniques; Preparation for Freezing:; Defrosting Technique:; FOOD
– 14 – Defrosting Tips and Techniques Preparation for Freezing: 1. Heavy-duty plastic wraps, bags and freezer wrap are suitable.2. Freeze meats, poultry and fi sh in packages with only 1 or 2 layers of food. To aid in separating layers, place two pieces of wax paper between them. 3. REMOVE ALL AIR a...
Page 17 - To Cook by; Grill and Time; Select Grill Setting; Set Cooking Time
– 15 – To Cook by Grill and Time There are three grill setting modes. (1-High, 2-Medium, 3-Low) Directions for Grill Cooking: There are three power levels for grill. When grilling, heat is radiated from the two heater. The oven door must be kept closed to prevent cooking odours from spreading in the...
Page 18 - Combination and Time; Select Combination Setting
– 16 – To Cook by Combination and Time There are three Combination setting modes. There is no need to set the Micro Power level and Grill Level. Directions for Combinations Cooking: The combination means that it is possible to combine the microwave and grill function for thawing, cooking, and heatin...
Page 19 - To Cook Using
– 17 – To Cook Using Sensor Cook Sensor Cook allows you to cook foods without selecting times and power levels. The sensor detects the heat and humidity generated by the food and cooks your food automatically. Place food into an appropriate sized dish for the volume of food you are cooking. Cover se...
Page 20 - Sensor Reheat
– 18 – To Cook Using Sensor Reheat Consult the following Recipe Chapters for SensorCooking Instructions for Each Category on your oven. For best results on Sensor Reheat, follow these recommendations: 1. Food being reheated should weigh between 125 g and 1.0 k g . For foods weighing less than 125 g ...
Page 21 - Select Desired Menu number; Select Desired Weight
– 19 – To Cook Using Auto Combi This feature allows you to cook or reheat most of your favourite foods by setting the weight only. The oven determines the Microwave power level and/or Combination setting, then the cooking time automatically. Select the category of food and then just enter the weight...
Page 22 - To Use Inverter Melt&Soften
– 20 – To Use Inverter Melt&Soften This feature allows you to melt/soften food at the touch of a button. There is no need to select the power level or cooking time as the microwave does this for you. 1 Select Desired Menu number Press the Inverter Melt&Soften Pad until the desired menu numbe...
Page 25 - To Use Timer; To Use as a Kitchen Timer
– 23 – To Use Timer This feature allows you to program standing after cooking is completed and to program the oven as a minute or 10 seconds timer or program delay start. To Use as a Kitchen Timer To Set Standing Time To Set Delay Start NOTES : 1. If oven door is opened during the Standing Time, Del...
Page 26 - Before Requesting Service; THESE THINGS ARE NORMAL; PROBLEM
– 24 – Before Requesting Service THESE THINGS ARE NORMAL The oven causes interference with my TV. Some radio and TV interference might occur when you cook with the microwave oven. This interference is similar to the interference caused by small appliances such as mixers, vacuums, hair dryers, etc. I...
Page 27 - Care of your Microwave Oven; Technical Speci
– 25 – Care of your Microwave Oven Note: Do not use harsh abrasive cleaners or sharp metal scrapers to clean the oven door glass since they can scratch the surface, which may result in shattering of the glass. A steam cleaner is not to be used. BEFORE CLEANING: Unplug at socket of the oven. If impos...
Page 28 - Panasonic Warranty
– 26 – Panasonic Warranty F00039X90QP_OI.indd 26 F00039X90QP_OI.indd 26 2012-6-11 13:46:46 2012-6-11 13:46:46
Page 29 - Quick Guide to Operation
– 27 – Quick Guide to Operation Feature How to Operate To Set Clock ( page 11) Press Twice Press once Set time of day. (Max 12:59) To Set/Cancel Child Safety Lock ( page 11) To set Press 3 times. Display To cancel Press 3 times. Display To Cook/Reheat/ Defrost by Micro Power and Time Setting ( page ...
Page 32 - Techniques for Preparation
– 30 – Microwave Recipe T echniques Techniques for Preparation Covering Covering food minimizes the microwave cooking time. Because microwave cooking is done with time and not direct heat, the rate of evaporation cannot be easily controlled. However, this can be corrected by using different material...
Page 33 - Menu Planning for Microwave Cooking; Increasing & Decreasing Recipes; Cooking for One
– 31 – Microwave Recipe T echniques Menu Planning for Microwave Cooking How to Keep Everything Hot at The Same Time Plan your meals so that the food will not all need last minute cooking or attention at the same time. The special features of microwave cookery make it easy to serve meals with everyth...
Page 34 - Converting Recipes from Other Sources; Reheat
– 32 – Reheat Converting Recipes from Other Sources One of the most common uses for a microwave oven is to reheat food. Your Panasonic microwave allows you to either reheat by placing food into the oven and you choose the micro power level and length of heating time or you may reheat automatically b...
Page 35 - Reheating by Micro Power - Frozen Pre-cooked Foods
– 33 – Reheat Reheating by Micro Power - Frozen Pre-cooked Foods FROZEN ITEM (Pre-cooked) POWER TIME (in minutes) SPECIAL INSTRUCTIONS BREAD & BAKED PRODUCT Bread 1 slice 1 loaf 6 rolls P7P7 P6 10 - 20 sec 1 - 3 1 - 2 Do not let bread get hot, or it will become rubbery and dry out. Remove whole ...
Page 37 - Soups and Snacks
– 35 – Soups and Snacks P UMPKIN S OUP Serves: 4 Ingredients: 1 k g pumpkin, chopped and peeled 1 onion, diced 2 cups chicken stock 1 teaspoon curry powder pepper Method: Place pumpkin and onion in 2-litre casserole dish. Cover and cook on P10 for 12 minutes. Add chicken stock, curry powder and pepp...
Page 40 - Directions for Cooking Fish and Shell
– 38 – Fish and Shell fi sh Directions for Cooking Fish and Shell fi sh by Micro Power Clean fi sh before starting the recipe. Arrange fi sh in a single layer, overlap thin fi llet ends to prevent overcooking. Prawns and scallops should be placed in a single layer. Cover dish with plastic wrap. Cook...
Page 43 - Poultry and Eggs; Cooking Poultry by Micro Power; Cooking Poultry Pieces by Micro Power
– 41 – Poultry and Eggs Season as desired, but salt after cooking. Browning sauce mixed with equal parts of butter will enhance the appearance.Poultry must be unstuffed. Tie legs together with cotton string. Place on a microwave rack set in a rectangular dish. Place poultry breast-side down: turn ov...
Page 44 - Poultry Chart for Combination Cooking
– 42 – Poultry and Eggs If desired, brush chicken with butter, margarine, oil or sauce before and during grilling. Basting helps prevent chicken from drying out.Place chicken skin-side down on rack onto the oven tray.Cook for times recommended in the chart. Halfway through cooking, turn chicken skin...
Page 45 - Cooking Eggs by Micro Power
– 43 – Poultry and Eggs C OOKING C HICKEN P IECES BY S ENSOR C OOK (400 g - 1.0 k g ) • Suitable for cooking chicken pieces, such as wings, thighs, legs, breast fi llets. • Chicken pieces should be completely thawed before cooking. • Marinate chicken pieces before cooking for added fl avour and colo...
Page 50 - Meat; Cooking Tender Cuts of Meat using Micro Power
– 48 – Meat For best results, select roasts that are uniform in shape.Place meat on a microwave rack in a suitable dish. Beef rib roast should be placed cut-side down. Other bone-in roasts should be placed fat-side down. Boneless roasts should be placed fat-side up. Halfway through cooking, turn roa...
Page 51 - Directions for Cooking Meats by Combination
– 49 – Meat Season roast as desired, but add salt after cooking. Salt can be used for cooking Pork crackling. Beef, Pork and Lamb Roasts: Place fat-side down on wire rack with the glass tray underneath to catch drips. Place pork rib roasts, rib tips down on wire rack. Shield thin ends, cut edges and...
Page 52 - General Guide to Curries for Sensor Cook
– 50 – Meat C OOKING C URRIES BY S ENSOR C OOK (250 g - 750 g ) (Weight of only meat) • See chart below for quantities to use.• Cut meat and vegetables into even size pieces.• Place curry paste, meat, onion and hard vegetable into a suitable size casserole dish, do not use plastic dishes. Cover secu...
Page 57 - egetables and Legumes; Cooking Fresh Vegetables by Micro Power
– 55 – V egetables and Legumes Place vegetables in a casserole dish. Add 2 to 3 tablespoons of water per 500 g of vegetables. Add salt to water or add after cooking. Do not place salt directly on vegetables. Cover dish with glass lid or plastic wrap. Cook on P10 according to time recommended in the ...
Page 58 - Cooking Frozen Vegetables by Micro Power; Cooking Dried Beans and Peas by Micro Power
– 56 – V egetables and Legumes Remove vegetables from package and place in an appropriate sized container. Vegetables frozen in a pouch should be placed on a dish and the top pierced. Cook on P10 according to directions given in chart. Vegetables should be cooked covered with Cooking Frozen Vegetabl...
Page 64 - Rice, Pasta and Noodles; Cooking Rice by Micro power
– 62 – Rice, Pasta and Noodles Cooking Rice by Micro power Follow directions in chart for recommended dish size, amounts of water and cooking time. Add rice to water. Add salt and butter according to package directions. Cook on P10 for time recommended in chart. Allow to stand, covered, before servi...
Page 66 - General Quantities For Cooking Risotto
– 64 – Rice, Pasta and Noodles C OOKING R ISOTTO BY S ENSOR C OOK ( 1 / 2 cup - 3 cup) • Suitable for cooking many basic risotto recipes and variations. • Onions and garlic should be pre-cooked with 1 tablespoon of oil before adding rice and stock. • Follow general directions in chart below for quan...
Page 67 - Cooking Pasta by Micro Power
– 65 – Rice, Pasta and Noodles Cooking Pasta by Micro Power Follow directions in chart for recommended dish size, amount of water and cooking time. Boil water, with 1 teaspoon salt and 1 tablespoon oil. Add pasta and cook for time recommended in chart. Cook on P10. Test pasta for desired cooking bef...
Page 69 - Cooking Dried Noodles by Micro Power
– 67 – Rice, Pasta and Noodles Cooking Dried Noodles by Micro Power Follow directions in chart recommended dish size, amount of water and cooking time. Add 1 tablespoon of oil to water to prevent noodles from sticking together. Add noodles and cook for time recommended in chart. Cook noodles on P10....
Page 72 - Cakes, Desserts and Slices
– 70 – Cakes, Desserts and Slices B UTTERSCOTCH P UDDING Serves: 4 to 6 Ingredients: 1 (400 g ) can sweetened condensed milk 30 g butter 1 teaspoon vanilla essence 1 ⁄ 2 cup milk 3 ⁄ 4 cup self raising fl our, sifted 1 cup brown sugar 1 ⁄ 2 cup hot tap water Method: Place condensed milk in a 3-litre...
Page 77 - Sauces and Extras; Cooking Fruit by Micro Power
– 75 – Sauces and Extras C INNAMON P OACHED P EARS Serves: 4 Ingredients: 1 ⁄ 2 cup water 1 ⁄ 2 cup caster sugar 1 ⁄ 2 teaspoon cinnamon 4 pears, peeled and sliced Method: Combine water, caster sugar and cinnamon in a 1-litre jug. Cook on P10 for 2 minutes. Place the pears in a 2-litre dish. Pour ov...
Page 80 - Operating Instruction and Cook Book; Grill Microwave Oven
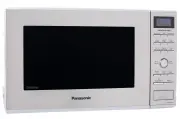
© Panasonic Appliances Microwave Oven (Shanghai) Co., Ltd. 2012 F00039X90QP PA0612-0 Printed in China Please read these instructions carefully before using this product, and save this manual for future use. Model NO. NN-GD682S Operating Instruction and Cook Book Grill Microwave Oven Household Use On...