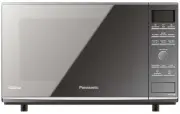
Panasonic NN-CF874BQPQ - Manuals
User Manual Panasonic NN-CF874BQPQ
Summary
– 1 – Table of Contents Before Operation Safety Instructions .......................................................................................................................2-3Installation and General Instructions ..................................................................................
– 2 – Important Safety Instructions READ CAREFULLY AND KEEP FOR FUTURE REFERENCE Precautions to be taken when using Microwave Ovens for Heating foodstuffs INSPECTION FOR DAMAGE. A microwave oven should only be used if an inspection con ¿ rms all of the following conditions:1. The grille is not damag...
– 3 – Important Safety Instructions Installation and General Instructions Circuits Your microwave ovens should be operated on a separate circuit from other appliances. The voltage used must be the same as speci ¿ ed on this microwave oven. Failure to do this may cause the power board fuse to blow, a...
– 4 – 11. If the base of the oven is hot, allow to cool before cleaning or placing in water. 12. When using the COMBINATION mode, never place any aluminum or metal container directly on the wire shelf. Always insert a heat-proof, glass plate or dish between the wire shelf and the aluminum container....
– 5 – Microwaves and How They Work Microwaves are a form of high frequency radio waves similar to those used by a radio, including AM, FM and CB. They are similar to a television where the radio waves are converted to a picture on the screen. However, microwaves are much shorter than radio waves; ap...
– 6 – Cookware and Utensils Guide It is important to use the correct container when cooking in a microwave oven. The following will help you make the right selection. How to Test a Container for Safe Microwave Oven Use TO TEST A CONTAINER FOR SAFE MICROWAVE OVEN USE: Fill a 1-cup glass measure with ...
– 7 – Cookware and Utensil Chart Microwave Grill Convection Combination Aluminium foil for shielding yes yes for shielding Ceramic Plate yes yes yes yes Browning Dish no no no no Brown paper bags no no no no Dinnerware oven/microwave safenon-oven/microwave safe yesyes yes no yes no yes no Disposable...
– 8 – Feature Diagram Flat Table If the À at table is hot, allow cooling down before cleaning Do not directly place the food on the À at table. Place it on a container or container rack special for the microwave oven. Shelf Positions Door Hinge Never put the ¿ nger in. Caution Label Caution Label Do...
– 9 – Feature Diagram (continued) Air Vents Exhaust (Do not remove) Oven Light: Oven Light will turn on during cooking and also when door is opened. NOTE: The above illustration is for reference only. Rear View Drip tray 1. Fit the drip tray by holding with both hands and clicking onto the front leg...
– 10 – Control Panel Start key One touch allows oven to begin functioning. If door is opened or Stop/Reset key is touched once during oven operation, Start key must be touched again to restart oven. Beep Sound When key is touched correctly, a beep sound will be heard. If a key is touched and no beep...
– 11 – Slider bar Features TIME SETTING To set cooking time or clock. POWER LEVEL/TEMPERATURE SETTING To set power level or temperature. WEIGHT SETTING To set weight of food for turbo defrost and auto menu. MENU SETTING To set sensor menu or auto menu. MORE/LESS SETTING To set more/less for sensor m...
– 12 – Let’s Start To Use Your Oven! 1 Plug in Plug into a properly earthed electrical outlet. “WELCOME TO PANASONIC MICROWAVE OVEN COOKING” appears in the Display Window. (This will immediately cease when any key is pressed.) 2 Open Door Open the door and place container with food on Flat Table in ...
– 13 – To assist you in programming your oven, the following operation will appear in the Display Window. When you become familiar with your oven, the Operation Guide can be turned off. To turn off: Tap Timer/Clock four times. Colon or time of day appears in the display window. Display window To tur...
– 14 – To Use Child Safety Lock This feature allows you to prevent operation of the oven by a young child; however, the door will open.You can set Child Safety Lock when colon or time of day is displayed. To set Colon or time of day is displayed Press 3 times. Display Window or To cancel Colon or ti...
– 15 – To Cook/Reheat/Defrost on Micro Power by Time Setting This feature allows you to set the desired power and time for cooking by yourself. 1 Touch once Touch to select "Micro Power". 2 Tap “+”/“-” or swipe the slider bar to select Micro Power level 3 Touch once Touch the Set key to veri...
– 16 – Turbo Defrost This feature allows you to defrost meat, poultry and seafood automatically by just setting the weight of the food. 1 Touch once Touch to select "Turbo Defrost". 2 Tap “+”/“-” or swipe the slider bar to set defrost weight The shape and size of the food will determine the ...
– 17 – Defrosting Tips and Techniques Preparation for Freezing: 1. Heavy-duty plastic wraps, bags and freezer wrap are suitable.2. Freeze meats, poultry and ¿ sh in packages with only 1 or 2 layers of food. To aid in separating layers, place two pieces of wax paper between them. 3. REMOVE ALL AIR an...
– 18 – To Cook on Grill by Time Setting There are three power levels for grill. When grilling, heat is radiated from two heaters. It is especially suitable for thin slices of meat and seafood as well as bread and meals. Most foods require turning halfway during cooking. When turning food, open oven ...
– 20 – To Cook on Convection by Time Setting The oven can be used as a conventional oven using the CONVECTION mode which incorporates a heating element with a fan. For best results always place food in a preheated oven. The grill will come on when the oven is preheating. Without Preheating: 1 Touch ...
– 22 – To Cook on Combination by Time Setting There are three power levels for combination. It's a good way for roasting foods by combining microwave and grill effectively. It's suitable for roasting poultry, meat and seafood. This function can ensure the foods even cooking and keep the crispness of...
– 24 – To Cook using the Recipe Store This feature allows you to pre-program your oven for regular reheating or cooking tasks. You are able to preprogram your oven for a speci ¿ c power level and time that is convenient for you. You are able to preprogram three memory tasks. To Set a Recipe Program:...
– 25 – To Cook Food Using Sensor Reheat/Cook Sensor Cook/Reheat allows you to cook foods without selecting times and power levels. The sensor detects the heat and humidity generated by the food and cooks your food automatically.Place food into an appropriate sized dish for the volume of food you are...
– 28 – To Cook Food Using Auto Cook This feature allows you to cook most of your favourite foods by setting the weight only. The oven determines the Microwave power level and/or Combination setting, then the cooking time automatically. Select the category of food and then just enter the weight. Do n...
– 29 – For Menu with preheat, please operate as follows: 1 Touch Once The menu appears in the Display Window. 2 Select desired menu Tapping “+”/“-” or swipe the slider bar until the desired menu appears in the Display Window. 3 Touch once Touch the Set key to verify the selection. 4 Select desired w...
– 32 – 20. Fresh Crispy Top (uses convection only) Use for heating and crisping the top of foods like pasta bake, macaroni cheese, cottage pie and lasagna. All foods must be pre-cooked and cold. Transfer crispy top to a similar sized heat proof container. Select Auto menu Fresh Crispy Top then, sele...
– 33 – To Use Inverter Melt & Soften This feature allows you to melt/soften food. There is no need to select the power level or cooking time as the microwave does this for you. 1 Touch Once The menu appears in the Display Window. 2 Select desired menu Tapping “+”/“-” or swipe the slider bar unti...
– 34 – To Use Timer This feature allows you to program standing after cooking is completed and to program the oven as a minute or 10 seconds timer or program delay start. To Use as a Kitchen Timer To Set Standing Time To Set Delay Start NOTES : 1. If oven door is opened during the Standing Time, Del...
– 35 – Care of your Microwave Oven Turn the oven off and remove the power plug from the wall socket before cleaning. Notes: 1. When using the Grill, Convection or cooking in the Combination mode, some foods may inevitably splatter grease on to the oven walls. If the oven is not cleaned, occasionally...
– 36 – PROBLEM POSSIBLE CAUSE REMEDY Demonstration mode is designed for retail store display. Cooking and other functions will not operate during the demonstration mode. If it seems there is a problem with the oven, contact an authorized Service Centre. Oven will not turn on. The oven is not plugged...
– 37 – Before Requesting Service (continued) THESE THINGS ARE NORMAL The oven causes interference with my TV. Some radio and TV interference might occur when you cook with the microwave oven. This interference is similar to the interference caused by small appliances such as mixers, vacuums, hair dr...
– 38 – Panasonic Warranty F0003BH22QP_OI.indd 38 2014/5/27 9:13:52
– 39 – Quick Guide to Operation Feature How to Operate To Set Clock ( page 13) Tap twice Touch once Set time of day. To Set/Cancel Child Safety Lock ( page 14) To set 3 times. Display To set 3 times. Display To Cook/Reheat/ Defrost by Micro Power and Time Setting ( page 15) Once Select power level S...
– 45 – Breakfast Basics B ACON Serves: 1 to 2 Ingredients: 2 rashers bacon Method: Place rashers between two sheets of paper towel on a dinner plate. Cook on 1000 W for 1½ to 2 minutes. B ACON AND E GG IN A C UP Serves: 1 Ingredients: 2 slices bacon 1 × 60 g egg 1 tablespoon grated cheddar cheese Me...
– 47 – Soups, Snacks and Starters P EA AND H AM S OUP Serves: 6 Ingredients: 2½ cups green split peas 850 g smoked ham hock 1 medium onion, chopped 1 tablespoon fresh thyme leaves 1 bay leaf 6 cups chicken stock ½ cup frozen peas Method: Wash split peas and place in a 2-litre bowl with 1-litre of wa...
– 55 – Fish and Shell ¿ sh S OY & H ONEY S ALMON Serves: 4 Ingredients: 4 salmon ¿ llets, each 100-150 g (4-6 oz) Marinade 15 ml (1 tbsp) honey 30 ml (2 tbsp) dark soy sauce 15 ml (1 tbsp) sherry 1 garlic clove, crushed 5 ml (1 tsp) fresh root ginger, grated Method: Mix the marinade ingredients ...
– 59 – Poultry Cooking Season as desired, but salt after cooking. Browning sauce (e.g. soy, Worcestershire) mixed with equal parts of butter will enhance the appearance. Poultry may be stuffed or unstuffed. Tie legs together with cotton string. Place on microwave rack set in a rectangular dish. Plac...
– 60 – Poultry Wash poultry and pat dry. Season poultry as desired. Whole poultry may be roasted stuffed or unstuffed. Whole Roasting Chickens (1.0 kg to 2.8 kg ): Place chicken on wire rack set on glass tray. Shield drumsticks with a strip of foil for the ¿ rst 30 minutes of cooking. (Foil should n...
– 61 – Poultry Arrange pieces skin-side up, and evenly spread in a shallow dish. Directions for Cooking Poultry Pieces by Microwave Cover with wax paper, or paper towel. Multiply the weight by the minimum time recommended in the chart. G REEN P EPPER C HICKEN Serves: 4 Ingredients: 20 g butter 500 g...
– 67 – Main Fare Meats For best results, select roasts that are uniform in shape.Place meat on a microwave suitable rack in a rectangular dish. Beef rib roast should be placed cut- side down. Other bone-in roasts should be placed fat-side down. Boneless roasts should be placed fat-side up. Halfway t...
– 68 – Main Fare Meats Less-tender cuts of meat such as pot roasts should be cooked in liquid. Use ½ to 1 cup of soup, broth, etc per 500 g of meat. Use an oven cooking bag or covered casserole when cooking less-tender cuts of meat. Select a covered casserole deep enough so that the meat does not to...
– 69 – Main Fare Meats Season roast as desired, but add salt after cooking. Salt can be used for cooking Pork crackling. Beef, Pork and Lamb Roasts : Place fat-side down on wire shelf with the glass shelf underneath to catch drips. Place pork rib roasts, rib tips down on wire shelf. Shield thin ends...
– 78 – V e getable V arieties Fresh Vegetables Place vegetables in a casserole dish. Add 2 to 3 tablespoons of water per 500 g of vegetables. Add salt to water or add after cooking. Do not place salt directly on vegetables. Cover dish with glass lid or plastic wrap.Cook on 1000 W according to time r...
– 85 – Rice, Pasta and Cereal Directions for Cooking Rice and Other Grains by Microwave Follow directions in chart on page 86 for recommended dish size, amounts of water and cooking time. Add grain to cold water. Add salt and butter according to package directions. Directions for Cooking Pasta by Mi...
– 90 – Cakes, Slices and Biscuits C HOCOLATE C HEESECAKE C Serves: 6 Ingredients: 100 g butter 250 g digestive biscuits, crushed 150 g plain chocolate 30 ml milk 450 g soft cheese 100 g soft brown sugar 2 large eggs 5 ml vanilla essence Method: To Cook by Convection: Place butter in bowl on the base...
– 96 – Desserts and Pastries A PPLE J ALOUSIE C Makes: 2 slices Ingredients: 3 cooking apples, peeled and sliced thinly ¼ teaspoon cinnamon pinch nutmeg 2 sheets ready rolled puff pastry 1 egg, lightly beaten ½ cup caster sugar Method: Place apples, cinnamon and sugar into a 2-litre casserole dish. ...
Panasonic Microwaves Manuals
-
Panasonic NE-1054F
User Manual
-
Panasonic NE-1054F
Manual
-
Panasonic NN-CD58JSQPQ
User Manual
-
Panasonic NN-CD87KS
User Manual
-
Panasonic NN-CD87KS
Manual
-
Panasonic NN-CD87KSQPQ
User Manual
-
Panasonic NNCD997S
User Manual
-
Panasonic NNCF770M
User Manual
-
Panasonic NN-CF770M
User Manual
-
Panasonic NN-CS894SQPQ
User Manual
-
Panasonic NN-CS89LBQPQ
User Manual
-
Panasonic NN-CT56MBQPQ
User Manual
-
Panasonic NNDS592B
User Manual
-
Panasonic NN-DS596BQPQ
User Manual
-
Panasonic NN-DS59NBQPQ
User Manual
-
Panasonic NNGD682S
User Manual
-
Panasonic NN-GM230
User Manual
-
Panasonic NN-GM231W
User Manual
-
Panasonic NN-GM342W
User Manual
-
Panasonic NN-GM342WZPE
User Manual