Panasonic NA-FS95G3WAU - User Manual
Panasonic NA-FS95G3WAU Washing Machine – User Manual, read for free online in PDF format. We hope this helps you resolve any issues you may have. If you have further questions, please contact us through the contact form.


Table of Contents:
- Page 2 – Safety Precautions; WARNING
- Page 3 – CAUTION
- Page 4 – Name of Parts/Accessories; Control panel
- Page 5 – About the display area
- Page 6 – Installation
- Page 9 – Cautions for use
- Page 10 – Washing; Press
- Page 11 – Customise the settings; Timer Delay function
- Page 12 – Cycle Guide; Cotton
- Page 14 – Getting the Laundry Ready; ECONAVI
- Page 16 – Washing Delicate Clothes
- Page 17 – Washing Blankets
- Page 19 – Air Dry
- Page 20 – About Detergent
- Page 21 – How to add detergent; Press; Liquid detergent; Liquid bleach
- Page 22 – Maintenance
- Page 24 – Troubleshooting
- Page 26 – Error Codes
- Page 27 – Domestic Use Only; Specifications
- Page 28 – Panasonic Corporation
Before Use
Basic
Operations
Advanced
Operations
Reference
Thank you for purchasing this Panasonic product.
Please read these instructions carefully before using
this product, and save this manual for future use.
This product is intended for household use and is
not intended for commercial use. Refer to the
warranty for details.
Operating Instructions
Washing Machine
Maintenance ................................... 22
Troubleshooting .............................. 24
Error Codes ..................................... 26
Specifications .................................. 27
Safety Precautions ............................ 2
Name of Parts/Accessories ............... 4
Installation ......................................... 6
Washing .......................................... 10
Cycle Guide .................................... 12
Getting the Laundry Ready ............. 14
Cotton-Eco Cycle ............................ 15
Washing Delicate Clothes ............... 16
Washing Blankets ........................... 17
Wash/Rinse/Spin Individually .......... 18
Air Dry ............................................. 19
About Detergent .............................. 20
Contents
Model No.
NA-FS95G3WAU/NA-FS85G3WAU
NA-FS95G3WNZ/NA-FS85G3WNZ
(Domestic use)
1$)6B*BHQJLQGG
"Loading the manual" means you need to wait until the file loads and becomes available for online reading. Some manuals are very large, and the time they take to appear depends on your internet speed.
Summary
2 Safety Precautions These must be observed. The following information describes the precautions that must be observed to prevent human injury or damage to property. The following expressions are used to describe and classify the degree of injury or ■ damage that occurs with incorrect use. WARNING C...
3 WARNING Power plug and cord Do not perform the following: (This may cause fire or electric shock.) Do not scratch, modify, bend forcibly, ● twist, pull, place heavy items upon, bundle or place near hot devices.Do not connect or disconnect the power ● plug with a wet hand.Do not pull the power cord...
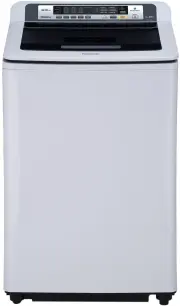
4 Name of Parts/Accessories Wash/Rinse/Spin (P.11, 18) You can select the desired combination of these cycles. Press repeatedly until the desired cycles light up. Cycle Selection (P.12) You can select a cycle that suits the amount or type of clothes or the level of dirt and stains. Press the [Progra...