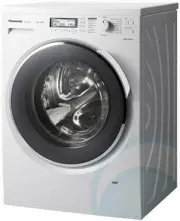
Page 2 - Appliance designation
2 - Read Before Using Consider the Environment Disposing of packaging The packaging used to protect the washing machine from damage during transportation is all recyclable. For information on recycling, contact your local authority. Disposing of Waste Electrical & Electronic Equipment Informatio...
Page 3 - Contents
Read Before Using - 3 Contents Read Before Using Consider the Environment . . . . . . . . 2 SAFETY PRECAUTIONS . . . . . . . . 4 Checking Your Washing Machine . . 6 Your washing machine . . . . . . . . . . . . .6 Accessories. . . . . . . . . . . . . . . . . . . . . .6 Before You Start Washing . . . ...
Page 5 - Safety warnings; Symbols used; Information on disposal; General safety precautions
Read Before Using - 5 SAFETY PRECAUTIONS To Prevent Injury The installation of the appliance should - be done by the manufacturer’s dealer or service agent. If the installation, test run and inspection of the appliance are not carried out following the installation method outlined in these instructi...
Page 6 - Safety warnings; Instructions for use; Before using for the first time
6 - Read Before Using Checking Your Washing Machine Your washing machine Caution Do NOT bend the mains lead when the appliance is running. Accessories Make sure that all the accessories are supplied with the appliance. Elbow (see page 39) For fixing the water-drain hose Spanner (see pages 36-37) End...
Page 8 - Using for the first time; Transport lock; Appliance description; Construction; II
8 - Read Before Using Using the Buttons and Dial Buttons and dial Cotton Rinse Plus Colours Easy-care Delicates Wool Silk/Lingerie Outdoor Quick 50Rapid 15SportswearShirtsBeddingSkin-care Memory Cotton Off Start/Pause On Cold Wash Option Help Time r / min Child Lock Co tton 4 0 C :4 5 2 00 1 2 2 6 6...
Page 9 - Operating and display elements; Operating panel; TouchDisplay; Buttons
Read Before Using - 9 Using the Buttons and Dial Help button 6. Press this button to display a description - of the currently selected programme. Press the button again to return to - the Main screen, or press an optional function button to move to its respective function screen. Selection buttons 7...
Page 10 - Programme overview; Whites and coloureds programmes; cold
10 - Read Before Using Adding Detergent and Other Chemicals Detergent compartment The following detergents and additives may be added to this compartment: Detergent - Water softening agent - Stain remover - Tub cleaning detergent or bleach - If you use multiple chemicals in this compartment for wash...
Page 11 - Textile programmes; Programmes
Read Before Using - 11 Adding Detergent and Other Chemicals Then, add detergent and start washing again. To prevent powdered detergent from remaining in the drawer, perform the following: Dry the inside of the drawer with a cloth. - Make sure that the detergent is not - lumpy when you add it as this...
Page 12 - Programmes for normally soiled cotton load; Extra programmes
12 - Washing Instructions Washing Open the door and put the laundry 1. into the drum. For details about preparing and sorting the laundry, see pages 7, 14, and 15. Caution Make sure that no laundry gets caught in the door when it gets closed. Moreover, make sure that bulky items fit completely insid...
Page 13 - Additional functions
Washing Instructions - 13 Washing Select optional functions. 4. For details and setting procedures for - each function, see pages 20-24.For more details about available - functions and settings for each programme, see pages 16-17. Add detergent to the detergent 5. drawer. (See pages 10-11.) Press th...
Page 15 - EcoManagement; Button
Washing Instructions - 15 Selecting the Programme Programme Description 140VX3 Max load 148VX3 Max load Mixed Mixed load for washing various kinds of clothes such as cotton, linen, synthetic fibres. 10 k g ― Cold Wash Washing for lightly soiled cotton and linen blends with cold water keeping the cle...
Page 16 - Operating the appliance; Preparations
16 - Washing Instructions Details of Programmes Programme Available programme Auto setting Manual setting Option functions 140VX3 148VX3 Temperature Number of rinses Spin-dry revolutions Approximate time Temperature Spin-dry revolutions Eco/ Speed Extra Rinse Prewash Easy Ironing Stain Solution 140V...
Page 17 - Adding washing detergent
Washing Instructions - 17 Details of Programmes Programme Available programme Auto setting Manual setting Option functions 140VX3 148VX3 Temperature Number of rinses Spin-dry revolutions Approximate time Temperature Spin-dry revolutions Eco/ Speed Extra Rinse Prewash Easy Ironing Stain Solution 140V...
Page 18 - Operating the appliance; Detergent dosage; ▸ Close the appliance door.; ▸ Touch the button for the desired pro-
18 - Washing Instructions Washing Delicates Wool, Silk/Lingerie, and Delicates programmes The drum spins gently in these programmes.For details about washing instructions, see pages 12-13. Delicate laundry loads Wool programme: 2 k - g or less Delicates programme: 5 k - g or less (140VX3), 4 k g or ...
Page 20 - Selecting additional functions; Delayed start; Selecting programme end time
20 - Washing Instructions Optional Functions: Option Depending on the programme, a combination of different functions can be programmed for the wash. You can also change settings, for example, operation sound and language. Note Some functions cannot be used with certain programmes. (See pages 16- 17...
Page 21 - Selecting programme start time; OptiTime; Separate rinsing/spinning
Washing Instructions - 21 Optional Functions: Option Press the 4. or button until the desired selection is selected, and then press the button, the Option button, or do not perform any operation for 7 seconds. The selection is set and the display returns to the Option screen. Perform any of the foll...
Page 22 - Washing with multi-component detergent; Correcting entry; Clearing entries in the current view; Aborting a programme
22 - Washing Instructions Optional Functions: Option Easy Ironing This function makes ironing easier by spinning your laundry more gently (at 800 r/min or less). 2 10 Extra Rinse O f f Eas y Ironin g Stain Solution O f f O f f After washing has finished, the laundry - is rotated intermittently for u...
Page 23 - With childproof lock activated; Selecting programme; Drum illumination
Washing Instructions - 23 Optional Functions: Option Mode You can select a single process, or combine several processes by selecting Mode functions. Mode Buzzer O f f O f f OPeration Sound 6 10 Note You cannot select individual washing functions in the Rapid 15 programme. Function Description Rinse ...
Page 24 - Unloading the washing before time
24 - Washing Instructions Optional Functions: Others Temperature, Spin speed, and Time Press the button of the desired 1. function. The screen for the respective function displays. 12 00 14 00 1000 r / min Press 2. or button until the desired value is selected. Perform any of the following actions 3...
Page 25 - Each time after use
Washing Instructions - 25 After Starting Washing Required time Times depend on the programmes and temperature settings that have been selected. Actual times may differ slightly from - those shown.The displayed times include the time - needed for the water to fill up and to drain out, thus they vary ...
Page 26 - Displaying estimate during programme selection; Displaying last programme; Displaying total and average consumption; Favourites; Defining favourites
26 - Maintenance Maintenance Cleaning the outside of the appliance Clean the outside of the appliance with a soft cloth and mild detergent, for example, kitchen detergent, and soapy water. Warning Do NOT splash water over the - appliance.Do NOT use cream cleansers, - thinners, nor products containin...
Page 27 - Changing favourites; Deleting favourites; Starting favourites
Maintenance - 27 Maintenance Cleaning the door seal and window After each wash, perform the following: Remove any objects from the door seal. - Wipe the window and seal to remove lint - and stains. Cleaning the drain filter We recommend cleaning the drain filter once a month. The filter will have li...
Page 28 - User settings; Customizing user settings; Button tone
28 - Maintenance Maintenance Cleaning the water-supply filter Clean the filter if water is not supplied properly. Turn the tap off. 1. Switch on the appliance. 2. Select the Cotton programme, and 3. then press the Start button. After 1 minute, switch off the 4. appliance. Water has drained out of th...
Page 31 - Demo mode; Switching on
Troubleshooting - 31 Fault Checklist Problem Cause Detergent and foam There is no foam or hardly any foam. The amount of foam varies, depending on the - temperature, level and softness of the water. You may have put powdered detergent directly into the - drum; you must put it in the detergent drawer...
Page 32 - Switching off; Care and maintenance; Cleaning intervals; Appliance part; Cleaning the detergent dispenser drawer; Cleaning the detergent compartments
32 - Troubleshooting Fault Checklist Problem Cause Others The electricity supply cuts out while the appliance is on. The appliance stops, and will not start by itself when the - power comes back on. You have to select a programme and start it again. A circuit breaker trips the electricity supply. Th...
Page 33 - Cleaning the water inlet filter; Test the water inlet for leaks following maintenance work.; Emergency draining
Troubleshooting - 33 Error Display U11 Unable to drain What to do Check the drain hose for any of following problems. It clogs up. - Its tip is immersed in water. - It extends further than 3 m. - The water is frozen. - Clean the drain filter if it clogs up. (See page 27.) After correcting the proble...
Page 35 - Opening the appliance door in the event of a power failure
Installation Instructions - 35 Choosing the Right Location Installing a built-in washing machine You need a space at least 60 cm wide. - At least 2 mm of clearance on the sides, and 3 mm of clearance above and behind the appliance are required.The counter above the appliance - must be firmly fixed t...
Page 36 - Error messages; Display
36 - Installation Instructions Moving and Installing Removing the anchor bolts Four anchor bolts keep the interior of the appliance in place while the appliance is being moved. Remove them before installation, using the spanner that is supplied with the appliance. Follow the following instructions. ...
Page 38 - Other possible problems
38 - Installation Instructions Connecting Hoses and Power Supply Water-supply hose Caution Do NOT connect the water-supply - hose to a combination tap.Do NOT twist, squash, modify, or - cut the hose. Optimum mains water pressure is 0.03 - - 1.0 MPa. If the water pressure exceeds this value, install ...
Page 40 - Unsatisfactory wash results
40 - Installation Instructions Checking After Installation Installation checklist 3 2 4 6 5 7 1 5 6 5 6 5) Adjustable stands Are they bolted securely to the appliance? 6) Stand cushions Are they standing flat? If the appliance is not level, there may be abnormal sounds when water is drained out. 7) ...
Page 42 - Spare parts
42 - Installation Instructions Power and Water Consumption Programme Temperature Eco function is selected Load Power consumption Water consumption Time (mins) Cotton 40°C No 10 k g 1.05 kWh 80 L 2:04 8 k g 0.84 kWh 63 L 1:49 40°C *1 Yes 5 k g 0.71 kWh 50 L 2:45 4 k g 0.62 kWh 40 L 2:30 60°C *1 Yes 1...
Page 43 - Technical data; Note for testing institutes
Installation Instructions - 43 Specifications NA - 140VX3 NA - 148VX3 Rated voltage 220 - 240 V Rated frequency 50 Hz Maximum energy rated power input 2000 - 2350 W Heating energy rated power input 2000 W (230 V) Product weight 74 k g Maximum mass of dry cloth 10 k g 8 k g Product dimensions 596 mm ...


 Panasonic 2 Manual
 Panasonic 2SB1218A Manual
 Panasonic 2SD1819A Manual
 Panasonic 3.0 Manual
 Panasonic 3CCD Manual
 Panasonic 7 Manual
 Panasonic 12-808 Manual
 Panasonic 32J330E User Manual
 Panasonic 35 Manual
 Panasonic 42HD Manual
 Panasonic 42HL57 Manual
 Panasonic 470 Manual
 Panasonic 650w Manual
 Panasonic 850 Manual
 Panasonic 970 Manual
 Panasonic 990 Manual
 Panasonic 1080p Manual
 Panasonic 1200 Manual