Page 2 - - Read Before Using; Consider the Environment
2 - Read Before Using Consider the Environment Disposing of packaging The packaging used to protect the washing machine from damage during transportation is all recyclable. For information on recycling, contact your local authority. Disposing of Waste Electrical & Electronic Equipment Informatio...
Page 3 - Read Before Using - 3; Contents; Read Before Using; Adding Detergent and Other; Washing Instructions; Washing Bedding and Outdoor; Maintenance; Troubleshooting; Connecting Hoses and Power
Read Before Using - 3 Contents Read Before Using Consider the Environment . . . . . . . . 2 SAFETY PRECAUTIONS . . . . . . . . 4 Checking Your Washing Machine . . 6 Your washing machine . . . . . . . . . . . . .6 Accessories. . . . . . . . . . . . . . . . . . . . . .6 Before You Start Washing . . . ...
Page 4 - - Read Before Using; SAFETY PRECAUTIONS; WARNING
4 - Read Before Using SAFETY PRECAUTIONS Please read and follow these safety precautions. WARNING This describes issues which could cause death or serious injury. General Use This appliance is not intended for use - by persons (including children) with reduced physical, sensory or mental capabilitie...
Page 5 - Read Before Using - 5; CAUTION
Read Before Using - 5 SAFETY PRECAUTIONS To Prevent Injury The installation of the appliance should - be done by the manufacturer’s dealer or service agent. If the installation, test run and inspection of the appliance are not carried out following the installation method outlined in these instructi...
Page 6 - - Read Before Using; Checking Your Washing Machine; Your washing machine; Accessories
6 - Read Before Using Checking Your Washing Machine Your washing machine Caution Do NOT bend the mains lead when the appliance is running. Accessories Make sure that all the accessories are supplied with the appliance. Elbow (see page 35) For fixing the water-drain hose Spanner (see pages 32-33) End...
Page 7 - Read Before Using - 7; Before You Start Washing; Checking before use
Read Before Using - 7 Before You Start Washing Checking before use For the appliance’s initial operation or after a prolonged period of non-operation, perform the following procedures: Secure the water-supply hose. 1. Open the tap. 2. Connect the power. 3. Make sure that the water-drain hose 4. is p...
Page 8 - - Read Before Using; Using the Buttons
8 - Read Before Using Using the Buttons Power buttons 1. If you do not press the Start button - within 10 minutes after the appliance has been switched on, the appliance automatically switches itself off.The display below appears for 3 - seconds after the appliance has been switched off. You cannot ...
Page 9 - Read Before Using - 9; Unlocking the door
Read Before Using - 9 Using the Buttons 9 10 Process indicator 9. This indicator shows the current process - of the programme. The process consists of wash , rinse , spin , and drain . The light goes off when the wash is - finished. Remaining time indicator 10. This indicator shows the approximate -...
Page 10 - 0 - Read Before Using; Adding Detergent and Other Chemicals; Detergent compartment
10 - Read Before Using Adding Detergent and Other Chemicals Detergent compartment The following detergents and additives may be added to this compartment: Detergent - Water softening agent - Stain remover - Tub cleaning detergent or bleach - If you use multiple chemicals in this compartment for wash...
Page 11 - Read Before Using - 11; Softener compartment
Read Before Using - 11 Adding Detergent and Other Chemicals Then, add detergent and start washing again. To prevent powdered detergent from remaining in the drawer, perform the following: Dry the inside of the drawer with a cloth. - Make sure that the detergent is not - lumpy when you add it as this...
Page 12 - 2 - Washing Instructions; Washing; Setting washing
12 - Washing Instructions Washing Open the door and put the laundry 1. into the drum. For details about preparing and sorting the laundry, see pages 7, 14, and 15. Caution Make sure that no laundry gets - caught in the door.Do NOT overload the drum. - This may cause excessive vibration or damage to ...
Page 13 - Washing Instructions - 13; Required time
Washing Instructions - 13 Washing Caution After a high temperature wash, be careful to not burn yourself when handling the laundry or touching the inside of the drum.Note If the detergent is not completely - removed from the laundry by using the basic programme, use the Extra Rinse function.With the...
Page 14 - 4 - Washing Instructions; Selecting the Programme
14 - Washing Instructions Selecting the Programme Programme Description 140VG3 Max load 148VG3 Max load Cotton Daily washing for cotton, linen and cotton blend items (For examples, T-shirts, underwear, towels, tablecloths) 10 k g 8 k g Cotton Rinse Plus Washing takes longer overall but rinsing is mo...
Page 15 - Washing Instructions - 15
Washing Instructions - 15 Selecting the Programme Programme Description 140VG3 Max load 148VG3 Max load Mixed For items with mixed fabrics, for example, cotton, linen and synthetic fibres 10 k g ― Cold Wash For lightly soiled cottons, and linen blends. 10 k g 8 k g Memory Programme based on the Cott...
Page 16 - 6 - Washing Instructions; Details of Programmes
16 - Washing Instructions Details of Programmes Programme Available programme Auto setting Manual setting Additional functions 140VG3 148VG3 Temperature Number of rinses Spin-dry revolutions Approximate time Temperature Spin-dry revolutions Eco Speed Extra Rinse Prewash Easy Ironing 140VG3 148VG3 14...
Page 17 - Washing Instructions - 17
Washing Instructions - 17 Details of Programmes Programme Available programme Auto setting Manual setting Additional functions 140VG3 148VG3 Temperature Number of rinses Spin-dry revolutions Approximate time Temperature Spin-dry revolutions Eco Speed Extra Rinse Prewash Easy Ironing 140VG3 148VG3 14...
Page 18 - 8 - Washing Instructions; Washing Delicates; Delicates programmes; Tips for washing delicates
18 - Washing Instructions Washing Delicates Wool, Silk/Lingerie, and Delicates programmes The drum spins gently in these programmes.For details about washing instructions, see pages 12-13. Delicate laundry loads Wool programme: 2 k - g or less Delicates programme: 5 k - g or less (140VG3), 4 k g or ...
Page 19 - Washing Instructions - 19; Washing Bedding and Outdoor Wear; Bedding programme; Outdoor programme
Washing Instructions - 19 Washing Bedding and Outdoor Wear Bedding programme Make su - re that the label of each item to be washed shows either the wash or handwash symbol ( , ). W - ash only one blanket at a time. Washable 10 - 0% synthetic fibre blankets – up to 3 k g 100% synthetic fibre futons a...
Page 20 - 0 - Washing Instructions; Optional Functions; Individual washing functions
20 - Washing Instructions Optional Functions Individual washing functions (Process selection) You can select a single process, or combine several processes by selecting individual washing functions. Note You cannot select individual washing functions in the Rapid 15 programme. Press the Mode button ...
Page 21 - Washing Instructions - 21; Preset timer
Washing Instructions - 21 Optional Functions You can activate or deactivate the Extra Rinse and Easy Ironing functions during a washing process but not after it has finished. Some additional functions cannot be used with certain programmes. (See pages 16- 17.) Preset timer You can use the timer to p...
Page 22 - Cleaning the drum; Cleaning the detergent
22 - Maintenance Maintenance Cleaning the outside of the appliance Clean the outside of the appliance with a soft cloth and mild detergent, for example, kitchen detergent, and soapy water. Warning Do NOT splash water over the - appliance.Do NOT use cream cleansers, - thinners, nor products containin...
Page 23 - Cleaning the door seal and
Maintenance - 23 Maintenance Cleaning the door seal and window After each wash, perform the following: Remove any objects from the door seal. - Wipe the window and seal to remove lint - and stains. Cleaning the drain filter We recommend cleaning the drain filter every 1 month. Filter will have lint ...
Page 24 - Cleaning the water-supply
24 - Maintenance Maintenance Cleaning the water-supply filter Clean the filter if water is not supplied properly. Turn the tap off. 1. Switch on the appliance. 2. Select the Cotton programme, and 3. then press the Start button. After 1 minute, switch off the 4. appliance. Water has drained out of th...
Page 25 - Fault Checklist
Troubleshooting - 25 Fault Checklist Problem Cause W ashing machine Buttons do not work. The programme, temperature and process settings cannot - be changed while washing is in progress (the rinse or spin settings can be changed).Child safety lock may be activated. (See page 21.) - Door does not ope...
Page 29 - Error Display
Troubleshooting - 29 Error Display Unable to drain What to do Check the drain hose for any of following problems. It clogs up. - Its tip is immersed in water. - It extends further than 3 m. - The water is frozen. - Clean the drain filter if it clogs up. (See page 23.) After correcting the problem, o...
Page 30 - 0 - Installation Instructions; Choosing the Right Location; Carrying the appliance
30 - Installation Instructions Choosing the Right Location Carrying the appliance The appliance must be carried by 2 or more people. Start by tilting the appliance backwards. One person should stand behind it, holding the rear of the top panel. The other person should grip the bottom stands in the f...
Page 31 - Installation Instructions - 31; Installing a built-in washing
Installation Instructions - 31 Choosing the Right Location Installing a built-in washing machine You need a space at least 60 cm wide. - At least 2 mm of clearance on the sides, and 3 mm of clearance above and behind the appliance are required.The counter above the appliance - must be firmly fixed t...
Page 32 - 2 - Installation Instructions; Moving and Installing; Removing the anchor bolts
32 - Installation Instructions Moving and Installing Removing the anchor bolts Four anchor bolts keep the interior of the appliance in place while the appliance is being moved. Remove them before installation, using the spanner that is supplied with the appliance. Follow the following instructions. ...
Page 33 - Installation Instructions - 33; Levelling the appliance
Installation Instructions - 33 Moving and Installing Installing the anchor bolts Unscrew and remove the cover caps. 1. Pull the bolts out until their tips are 2. level with the tips of the sleeves. Have someone else hold the top of the drum and pull it forward. Insert the transportation guards. 3. T...
Page 34 - 4 - Installation Instructions; Connecting Hoses and Power Supply; Hoses and cable lengths
34 - Installation Instructions Connecting Hoses and Power Supply Water-supply hose Caution Do NOT connect the water-supply - hose to a combination tap.Do NOT twist, squash, modify, or - cut the hose. Optimum mains water pressure is 0.03 - - 1.0 MPa. If the water pressure exceeds this value, install ...
Page 35 - Installation Instructions - 35; Connecting to the power
Installation Instructions - 35 Connecting Hoses and Power Supply Leak-proof System The appliance is installed with the system that is designed to prevent water leaks. The system includes the following components. 1) Leak sensor This sensor will cease operation of the appliance if it detects any leak...
Page 36 - 6 - Installation Instructions; Checking After Installation; Installation checklist
36 - Installation Instructions Checking After Installation Installation checklist 3 2 4 6 5 7 1 5 6 5 6 5) Adjustable stands Are they bolted securely to the appliance? 6) Stand cushions Are they standing flat? If the appliance is not level, there may be abnormal sounds when water is drained out. 7) ...
Page 37 - Installation Instructions - 37; Test run after installation
Installation Instructions - 37 Checking After Installation Test run after installation Check for water leakage, abnormal noise, and proper drainage. Perform the following procedures WITHOUT laundry in the drum. Turn on the tap. 1. Close the door. 2. Please spin after moved this washing 3. machine. P...
Page 38 - 8 - Installation Instructions; Power and Water Consumption
38 - Installation Instructions Power and Water Consumption Programme Temperature Additional function Load Power consumption Water consumption Time (mins) Cotton 40°C ― 10 k g 1.05 kWh 80 L 2:04 8 k g 0.84 kWh 63 L 1:49 40°C 1) Eco 5 k g 0.71 kWh 50 L 2:45 4 k g 0.62 kWh 40 L 2:30 60°C 1) Eco 10 k g ...
Page 39 - Installation Instructions - 39; Specifications
Installation Instructions - 39 Specifications NA - 140VG3 NA - 148VG3 Rated voltage 220 - 240 V Rated frequency 50 Hz Maximum energy rated power input 2000 - 2350 W Heating energy rated power input 2000 W (230 V) Product weight 74 k g Maximum mass of dry cloth 10 k g 8 k g Product dimensions 596 mm ...
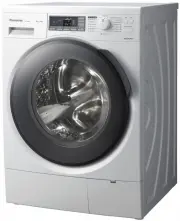


 Panasonic NA-120VG6WAU
User Manual
Panasonic NA-120VG6WAU
User Manual
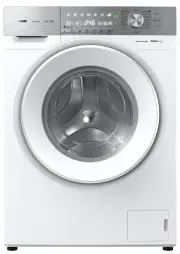
 Panasonic NA-140VG4WAU
User Manual
Panasonic NA-140VG4WAU
User Manual
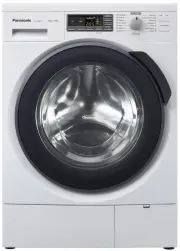
 Panasonic NA-140VS4WAU
User Manual
Panasonic NA-140VS4WAU
User Manual
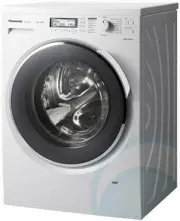 Panasonic NA-140VX3WAU
User Manual
Panasonic NA-140VX3WAU
User Manual
 Panasonic NA-148VG4WAU
User Manual
Panasonic NA-148VG4WAU
User Manual
 Panasonic NA-F85A1WAU
User Manual
Panasonic NA-F85A1WAU
User Manual
 Panasonic NA-F95A1WAU
User Manual
Panasonic NA-F95A1WAU
User Manual
 Panasonic NA-FS85G3WAU
User Manual
Panasonic NA-FS85G3WAU
User Manual
 Panasonic NA-FS95G3WAU
User Manual
Panasonic NA-FS95G3WAU
User Manual