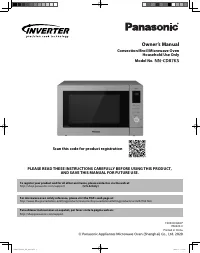
Page 2 - Table of Contents; Safety Information; Operation
Table of Contents Safety Information Precautions ......................................................................................................................................................................1 Important Safety Instructions ........................................................
Page 3 - your safety and the safety of others are very important.; PRECAUTIONS TO AvOID; Microwave oven Safety; danGeR
1 © Panasonic home Appliances Microwave Oven (Shanghai) Co., Ltd. 2011. your safety and the safety of others are very important. We have provided important safety messages in this manual and on your appliance. Always read and obey allsafety messages. PRECAUTIONS TO AvOID POSSIbLE EXPOSURE TO EXCESSI...
Page 4 - ImPORTANT SAfETy INSTRUCTIONS; Thank you for purchasing a Panasonic Microwave Oven.; WaRninG
2 ImPORTANT SAfETy INSTRUCTIONS —To reduce the risk of burns, electric shock, fire, injury to persons, or exposure to excessive microwave energy: 1. Read all instructions before using this appliance.2. Read and follow the specific “PReCAuTIOnS TO AVOID POSSIBLe eXPOSuRe TO eXCeSSIVe MICROWAVe eneRGY...
Page 5 - glass Tray; SAvE THESE INSTRUCTIONS
3 ImPORTANT SAfETy INSTRUCTIONS (continued) TO AvOID THE RISK Of SHOCK: DO NOT remove top or outer panel from oven. Repairs must be done only by a qualified service person. TO REDUCE THE RISK Of EXPOSURE TO mICROWAvE ENERgy: DO NOT tamper with, or make any adjustments or repairs to Door, Control Pan...
Page 6 - INSTALLATION AND gROUNDINg INSTRUCTIONS; Examine your Oven; Installation; grounding Instructions
4 INSTALLATION AND gROUNDINg INSTRUCTIONS Examine your Oven unpack oven, remove all packing material and examine the oven for any damage such as dents, broken door latchesor cracks in the door. notify dealer immediately if oven is damaged. DO NOT install if oven is damaged. Installation 1. This oven...
Page 7 - Wiring Requirements; Indoor venting
5 INSTALLATION AND gROUNDINg INSTRUCTIONS (continued) Wiring Requirements 1. The oven must be operated on a SePARATe CIRCuIT. no other appliance should share the circuit with the microwave oven. If it does, the branch circuit fuse may blow or the circuit breaker may trip. 2. The oven must be plugged...
Page 8 - Safety Precautions
6 Follow These Safety Precautions When Cooking in Your Oven. ImPORTANT Proper cooking depends upon the power, the time setting and quantity of food. If you use a smaller portion than recommended but cook at the time for the recommended portion, fire could result. 1) HOmE CANNINg / STERILIZINg / DRyI...
Page 9 - Cookware guide; CONTAINER TEST
7 Cookware guide ITEm mICROWAvE COmmENTS Yes for Small strips of foil can be molded around thin parts of meat or poultry to Aluminum Foil Shielding prevent overcooking. Arcing can occur if foil is too close to oven wall or only door and damage to your oven will result.Browning dishes are designed fo...
Page 10 - Oven Components Diagram
8 Oven Components Diagram q See-through Oven Window w Waveguide Cover (do not remove) e Oven Light (Oven Light can be replaced, see page 28) r glass Tray (Turntable) t Oven Air vent (Vent Grille is removable and can be cleaned, see page 27) y Control Panel u Sensor menu Dial i Time/Weight Dial o Doo...
Page 11 - Control Panel
9 Control Panel (1) Display Window: The Display includes a clock and indicators to tell you time of day, cooking time settings and cooking functions selected. (2) Popcorn button: Touch this button to pop a bag of packaged microwave popcorn. ( * page 14) (3) Sensor Reheat button: Touch this button to...
Page 13 - Child Safety Lock; function features
11 Child Safety Lock This feature prevents the electronic operation of the oven until cancelled. It does not lock the door. NOTE: 1. You can set Child Lock feature when the display shows a colon or time of day. 2. You cannot set Child Lock feature when setting Language Choice, LB/KG Choice or Beep C...
Page 14 - Setting the Clock; Setting Turntable On/Off
12 Setting the Clock Example: To set 11:25 a.m. or p.m. 1. • Press Time/Clock twice. Colon flashes. 2. • Set time of day by using Time Select Dial. Time appears in the display window;colon continues flashing. 3. • Press Timer/Clock once. Colon stops flashing; time of day is entered. NOTES: 1. ...
Page 16 - Popcorn feature
14 for Popcorn: By using the more/Less Button, the programs can be adjusted to cook popcorn for a longer or shorter time if desired. 1 tap = More (Adds Approx. 3% time)2 taps = More (Adds Approx. 6% time)3 taps = Less (Subtracts Approx. 3% time)4 taps = Less (Subtracts Approx. 6% time)5 taps = Origi...
Page 17 - Inverter Turbo Defrost feature; Defrosting Tips & Techniques
15 Conversion Chart: Follow the chart to convert ounces or hundredths of a poundinto tenths of a pound. To use Inverter Turbo Defrost, enter theweight of the food in lbs. (1.0) and tenths of a lb. (0.1). If apiece of meat weighs 1.95 lbs. or 1 lb. 14 oz., enter 1.9 lbs. Inverter Turbo Defrost featur...
Page 20 - Sensor Cook Chart
18 Sensor Cook Chart Recipe Serving/Weight Hints 1. Potatoes 1 - 4 potatoes Pierce each potato with a fork 6 times spacing around surface. (170 - 225 g) Place potato or potatoes around the edge of paper-towel-lined (6 - 8 oz. each) glass tray (Turntable), at least 2.5 cm (1-inch) apart. Do not cover...
Page 21 - microwave Recipes; OmELET; CASSEROLE
19 microwave Recipes OmELET Basic omelet 1 tablespoon butter or margarine 2 eggs 2 tablespoons milksalt and ground black pepper, if desired heat butter in a microwave safe 22.5 cm (9-inch) pie plate, 30seconds at P10, or until melted. Turn the plate to coat the bot-tom with butter. Meanwhile, combin...
Page 22 - Timer feature; To Use as a Kitchen Timer:
20 Timer feature Example: To count down 5 minutes. 1. • Press Timer/Clock once. 2. • Set time, using Time Select Dial to 5 minutes. 3. • Press Start . Time will count down without oven operating. NOTE: 1. When each stage finishes, a two-beep signal sounds. At the end of the program, the oven will ...
Page 24 - microwave Shortcuts
22 microwave Shortcuts fOOD POWER TImE DIRECTIONS (in mins.) To separate refrigerated P10 (hIGh) 30 sec. Remove wrapper and place in microwave safe dish. After bacon , heating, use a plastic spatula to separate slices. 450 g (1 pound) To soften brown Sugar P10 (hIGh) 20 - 30 sec. Place brown sugar i...
Page 27 - Cooking Techniques
25 Cooking Techniques (continued) Covering As with conventional cooking, moisture evaporates duringmicrowave cooking. Casserole lids or plastic wrap are used fora tighter seal. When using plastic wrap, vent the plastic wrapby folding back part of the plastic wrap from the edge of thedish to allow st...
Page 28 - Care and Cleaning of your microwave Oven; SATION mAy CAUSE RUSTINg OR ARCINg AND DAmAgE TO THE OvEN. AfTER USE,
26 Care and Cleaning of your microwave Oven AfTER CLEANINg: Be sure to place the Roller Ring and the Glass Tray in theproper position and press Stop/Reset Button to clear theDisplay. Inside of the oven: Wipe with a damp cloth after using,mild detergent may be used if need-ed. Do not use harsh deterg...
Page 31 - before Requesting Service; These things are normal:; PRObLEm
29 before Requesting Service These things are normal: The oven causes interference Some radio and TV interference might occur when you cook with the microwave oven. with my TV. This interference is similar to the interference caused by small appliances such asmixers, vacuums, blow dryers, etc. It do...
Page 32 - Warranty
30 Warranty Panasonic Canada Inc. 5770 Ambler Drive, Mississauga, Ontario L4W 2T3 PANASONIC PRODUCT – LImITED WARRANTy Panasonic Canada Inc. warrants this product to be free from defects in material and workmanship under normal use and for a period as statedbelow from the date of original purchase a...
Page 33 - quick guide to Operation
31 quick guide to Operation feature To Set Clock ( * page 12) To Set Light Hi-Warm/ Hi-Cool/Low/off ( * page 12) To Set Turntable on/off ( * page 12) To Set Fan High/Low/off ( * page 12) How to Operate Press twice. Press once. hi-Warm Press once. To turn on for one minute Press twice. To turn on for...
Page 34 - User’s Record; Specifications
32 The serial number of this product may be found on theleft side of the control panel. You should note the modelnumber and the serial number of this oven in the spaceprovided and retain this book as a permanent record ofyour purchase for future reference. model No. ______________________________ Se...
Page 35 - Notes
33 Notes IP3696_39X00CP_Eng_25_110810:IP3677_38Q04CP_00_110608.qxd 2011-8-10 Jerry 上上16:07 Page 33