Milwaukee 5546-21 - User Manual
Milwaukee 5546-21 Hammer Drill – User Manual, read for free online in PDF format. We hope this helps you resolve any issues you may have. If you have further questions, please contact us through the contact form.


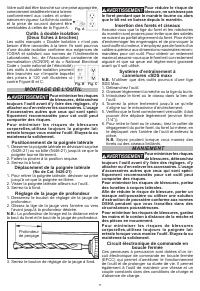
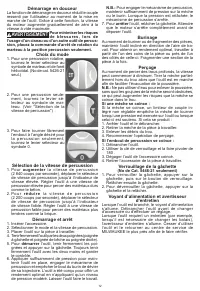

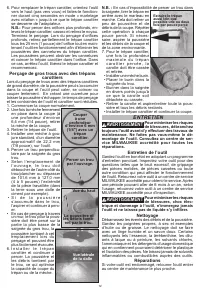


Table of Contents:
- Page 2 – WARNING
- Page 3 – Maintain labels and nameplates.; SPECIFICATIONS; BPM; EXTENSION CORDS; READ AND SAVE ALL INSTRUCTIONS
- Page 4 – Setting the Depth Gauge; Installing Drill Bits and Chisels; OPERATION; Electronic Feedback Control Circuit; GROUNDING; ASSEMBLY; Adjusting the Side Handle Position
- Page 5 – only accessories, the action selector must be set
- Page 6 – Cold Hammering; Use MILWAUKEE core bits. Do not; Using Rotary Percussion Core Bits; Dust and debris
- Page 7 – NOTE; MAINTENANCE; To reduce the risk of injury, always; Maintaining Tools; To reduce the risk of personal in-; Cleaning; ACCESSORIES; Use only recommended accesso-; SERVICE - UNITED STATES
- Page 8 – AVERTISSEMENT
- Page 9 – poussière peuvent nuire vos poumons.
- Page 10 – PICTOGRAPHIE; CORDONS DE RALLONGE; Directives pour l’emploi des; pour les cordons de rallonge*; LISEZ ATTENTIVEMENT CES; DESCRIPTION FONCTIONNELLE; est incorrectement rac-; Outils mis à la terre (Trois fiches à broches)
- Page 11 – Insertion des forets et ciseaux; MANIEMENT; les mains et le cordon à distance de la mèche et
- Page 12 – marteau à la position percussion seulement.; Choix du mode; augmenter; Burinage; Si une mèche se coince :
- Page 13 – Utiliser les trépans carott; Utilisation des trépans carottiers à
- Page 14 – Vue latérale; ENTRETIEN; Entretien de l’outil; Nettoyage
- Page 15 – L’usage d’accessoires; Pour une liste complète des accessoires, visiter le; ADVERTENCIA; Lea todas las advertencias de; • Mantenga el área de trabajo limpia y bien ilu; Las áreas desordenadas u oscuras son
- Page 18 – TIERRA; rectamente. Consulte con un electricista certi-; Herramientas con conexión a tierra; EXTENSIONES ELECTRICAS; Guías para el uso de cables de extensión; LEA Y GUARDE TODAS LAS
- Page 19 – ENSAMBLAJE; Agarre del mango lateral; Sistema de arrastre SDS; OPERACION
- Page 20 – Para reducir el riesgo de le-; Seleccion de funciones; Si una broca se atasca:; mantenimiento
- Page 21 – Martillado en frío; Utilice las brocas sacamu; Uso de las brocas sacabocados de; MILWAUKEE
- Page 22 – con una broca; Vista lateral; MANTENIMIENTO; la herramienta antes de darle cualquier manten; Mantenimiento de las herramientas; siones, descarga eléctrica o; Limpieza; ACCESORIOS; Utilice sólo los accesorios
- Page 23 – SOPORTE DE SERVICIO; CENTRO DE ATENCION A CLIENTES; Av. Presidente Masarik 29 Piso 7; PÓLIZA DE GARANTÍA - VALIDA
- Page 24 – MILWAUKEE TOOL
Cat. No. / No de cat.
5426-21
5446-21
OPERATOR'S MANUAL
MANUEL de L'UTILISATEUR
MANUAL del OPERADOR
WARNING
To reduce the risk of injury, user must read and understand operator's manual.
AVERTISSEMENT
Afin de réduire le risque de blessures, l'utilisateur doit lire et bien
comprendre le manuel.
ADVERTENCIA
Para reducir el riesgo de lesiones, el usuario debe leer y entender el manual.
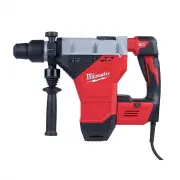
SDS MAX ROTARY HAMMERS AND DEMOLITION HAMMERS
MARTEAUX ROTATIFS ET MARTEAU DE DÉMOLISSEUR
ROTOMARTILLOS Y MARTILLOS PERFORADORES DE
DEMOLICIÓN
"Loading the manual" means you need to wait until the file loads and becomes available for online reading. Some manuals are very large, and the time they take to appear depends on your internet speed.
Summary
2 GENERAL POWER TOOL SAFETY WARNINGS WARNING Read all safety warnings, instruc- tions, illustrations and specifica - tions provided with this power tool. Failure to follow all instructions listed below may result in electric shock, fire and/or serious injury. Save all warnings and instructions for f...
3 make exposed metal parts of the power tool “live” and could give the operator an electric shock. • Keep hands away from all cutting edges and moving parts. • WARNING To reduce the risk of injury, wear a dust mask or use an OSHA com- pliant dust extraction solution when working in dusty situations....
4 Setting the Depth Gauge 1. Press in the clamp lever. 2. Slide the depth gauge rod backward or forward until it is set for the desired depth. NOTE: The drilling depth is the distance between the tip of the bit and the tip of the depth gauge rod. Drilling Depth 3. Release the clamp lever. WARNING To...