Page 2 - Contents; Warnings and safety notes
Contents 2 Warnings and safety notes ......................................................................................... 5 Sustainability and environmental protection .......................................................... 14 Caring for the environment .........................................
Page 3 - Adjusting settings
Contents 3 Storing food in the fridge zone ..................................................................................... 25 Different storage zones ............................................................................................ 25 Storing food correctly.............................
Page 4 - Installation
Contents 4 Installation ...................................................................................................................... 42 Installation site ............................................................................................................... 42 Climate range ..........
Page 5 - Correct application
Warnings and safety notes 5 This refrigeration appliance complies with current safetyrequirements. Inappropriate use can, however, lead to personalinjury and material damage. Please read the operating and installation instructions carefullybefore using the refrigeration appliance for the first time....
Page 6 - Safety with children
Warnings and safety notes 6 This refrigeration appliance is not suitable for storing and keeping cool medicines, blood plasma, laboratory preparations or similarsubstances or products that are subject to the Medical DeviceDirective. Incorrect use of the refrigeration appliance for suchpurposes may...
Page 7 - Warning: fire hazard/flammable materials. This symbol is on the
Warnings and safety notes 7 Warning: fire hazard/flammable materials. This symbol is on the compressor and indicates flammable materials. Do not remove thissticker.The refrigerant inside the appliance (details on the data plate) isenvironmentally friendly but flammable.The use of this refrigerant ...
Page 9 - Proper installation
Warnings and safety notes 9 While the appliance is under warranty, repairs should only be undertaken by a Miele authorised service technician. Otherwise thewarranty is invalidated. Faulty components must only be replaced with genuine Miele original spare parts. Miele can only guarantee the safet...
Page 10 - Accessories and spare parts
Warnings and safety notes 10 Risk of fire and explosion. Do not store explosive materials in the refrigeration appliance or any products containing propellants (e.g.spray cans). Electrical components can cause flammable mixes ofgases to ignite. Danger of explosion. Do not operate any electrical ...
Page 11 - Transporting the appliance; Always transport the appliance in an upright position and in its
Warnings and safety notes 11 Transporting the appliance Always transport the appliance in an upright position and in its original transport packaging to avoid damage in transit. Danger of injury and damage to the appliance. The refrigeration appliance is very heavy and must be transported by two...
Page 12 - Disposing of your old appliance; Symbol on the compressor (depending on model)
Warnings and safety notes 12 Disposing of your old appliance Children playing could become trapped in the appliance and could suffocate. - Remove the appliance doors.- Remove the drawers.- Leave the adjustable shelves in the refrigeration appliance so children cannot climb inside. - If your old re...
Page 13 - The oil in the compressor can be fatal if swallowed or if it
Warnings and safety notes 13 The oil in the compressor can be fatal if swallowed or if it penetrates the airways.
Page 14 - Sustainability and environmental protection; Caring for the environment; Disposing of the packaging material
Sustainability and environmental protection 14 Caring for the environment Disposing of the packaging material The packaging material is used forhandling and protects the appliancefrom transport damage. The packagingmaterial used is selected from materialswhich are environmentally friendly fordisposa...
Page 15 - Installation site
Sustainability and environmental protection 15 How to save energy ... Installation site The refrigeration appliance has to cool more often at higherambient temperatures and consumes more energy in the process.Therefore: - Install the refrigeration appliance in a well-ventilated room. - Do not instal...
Page 16 - Familiarisation; Guide to the appliance
Familiarisation 16 Guide to the appliance a Display b Interior lighting c Fan d Adjustable divider rods in the pull-outs e Pull-out with glass shelf f Pull-out unit with adjustable door g Condensate channel and drain hole h Bottle shelf i Ventilation grille
Page 17 - Start display; OK
Familiarisation 17 Start display The display can be scratched by pointed or sharp objects, e.g. pens.Only touch the display with your fingertips. It is possible that the display will not react to finger contact if your fingers arecold. 5 °C 1 2 3 4 a Temperature display for fridge zone b Setti...
Page 18 - Settings mode
Familiarisation 18 Settings mode Holiday mode The Holiday mode function is useful when you go on holiday and, forexample, you do not wish to switch offthe fridge zone completely or do notneed a high degree of cooling (see“Adjusting settings”). When Holiday mode is switched on, the fridge...
Page 20 - Safety
Familiarisation 20 Demo mode allows the refrigerationappliance to be presented in theshowroom without the cooling systembeing switched on. This setting is notneeded for domestic use. Factory defaults You can reset the refrigerationappliance‘s settings to their factorydefaults here (see “Adjusting...
Page 21 - hours before; Adjusting the interior fittings
Familiarisation 21 refrigeration appliance will work at fullpower and lower the temperature.Select this function for the rapid chillingof large amounts of fresh food or drink. When the SuperCool function is switched on, the appliance may makemore noise than usual. The SuperCool function should...
Page 23 - Commissioning; Before using for the first time; Connecting the refrigeration appliance
Commissioning 23 Before using for the first time Remove all packaging material andprotective film. Clean the inside of the appliance andthe accessories (see “Cleaning andcare”). Connecting the refrigeration appliance Connect the refrigeration appliance tothe electricity supply as described in“...
Page 24 - Operation; Setting the temperature; Temperature range; Switching on SuperCool; Switching off SuperCool
Operation 24 Setting the temperature We recommend a temperature of 4 °C in the fridge zone. Touch the temperature display on thedisplay. Swipe left or right until thetemperature you want is shown in themiddle. Tap on the temperature you want toconfirm. The temperature display will thenchange b...
Page 25 - Storing food in the fridge zone; Different storage zones
Operation 25 Storing food in the fridge zone Risk of explosion due to flammable mixes of gases.Electrical components can causeflammable mixes of gases to ignite.Do not store explosive materials inthe refrigeration appliance or anyproducts containing propellants (e.g.spray cans). The spray cans inq...
Page 26 - Store food in such a way that it; Storing food correctly
Operation 26 Tip: Store food in such a way that it does not touch the rear wall of thefridge zone. Otherwise it could freeze tothe rear wall. Storing food correctly Ensure that food stored in the fridgezone is covered or wrapped properly . This will prevent food odours fromaffecting other foods, sto...
Page 27 - Clean the VeggieBox before storing food in it.
Operation 27 Observe the following tips if you find that food you have stored does not keepwell (e.g. food becomes limp or wilts after only being stored for a short time): Only place fresh food in the appliance. The initial condition of the food is crucialto maintaining freshness. Clean the Vegg...
Page 30 - Resetting the network configuration
Adjusting settings 30 Tap . Tap to activate the WiFi connection. will appear in the display. To leave this Settings level, tap . When the WiFi connection is active, will light up on the display. Resetting the network configuration Tap . Swipe left or right until is shown in ...
Page 31 - Changing the temperature unit °C/°F
Adjusting settings 31 Select the brightness you want byswiping the segment bar to the left orright (level 1–7). Confirm the setting you want bytapping the segment bar. To leave this Settings level, tap . Changing the temperature unit °C/°F Tap . Swipe left or right until °C or °F is ...
Page 32 - Cleaning and care; Cleaning agents; do not use the following:
Cleaning and care 32 The data plate located inside theinterior cabinet of the refrigerationappliance must not be removed. Itcontains information which is requiredin the event of a fault. Do not let water get into theelectronic unit or the lighting. Risk of damage due to moisture ingress.The steam ...
Page 33 - interior
Cleaning and care 33 Remove the pull-out (see “Adjustingthe interior fittings”). Place the pull-out on a worktopcovered with a soft material (e.g. a teatowel). Dismantle the pull-out for cleaning. 1. Holding the divider rods on the right and left, pull them carefully up andoff to remove them. ...
Page 34 - Cleaning the door seal
Cleaning and care 34 - All drawers and compartment lids (these vary depending on model) - The flexible bottle rack (available as an optional accessory) - Organisation box (available as an optional accessory) The following components are dishwasher-safe : Risk of damage due to high dishwasher tempe...
Page 35 - Troubleshooting; Problem
Troubleshooting 35 Many malfunctions and faults can be easily remedied. You can save time andmoney in many cases, as you do not need to contact Customer Service. More information to help you remedy faults yourself can be found atwww.miele.co.uk/support/customer-assistance . To prevent unnecessary lo...
Page 36 - Other problems; orange; Display warnings
Troubleshooting 36 Problem Cause and remedy Switch off the SuperCool function earlier to save energy. Other problems Problem Cause and remedy There is no audible alarmeven though the appli-ance door has beenopen for a long time. This is not a fault. The alarm has been switched off inSettings mo...
Page 37 - Message
Troubleshooting 37 Message Cause and remedy is lit up on thedisplay and theappliance cannotbe used. The Cleaning mode function is still switched on. Switch the Cleaning mode function off again bytapping on on the start display. Tap again. When Cleaning mode is switched off, the symbo...
Page 38 - Interior lighting
Troubleshooting 38 Message Cause and remedy lights up red inthe display and afault code F withnumbers may ap-pear. An alarm isalso sounding. There is a fault. Tap on the display to switch the alarm off. Contact the Miele Customer Service Department. To report the fault, you need the fault co...
Page 40 - Customer Service Department; Contact in the event of a fault; Warranty
Customer Service Department 40 Information to help you rectify faultsyourself and about Miele spare partscan be found at www.miele.com/service. Contact in the event of a fault In the event of a fault which you cannotremedy yourself, please contact yourMiele dealer or Miele Customer Service. You can ...
Page 41 - Optional accessories; Multi-purpose microfibre cloth
Optional accessories 41 Multi-purpose microfibre cloth The microfibre cloth is suitable forremoving fingerprints and light soilingfrom surfaces such as stainless steel,glass, plastic and chrome without theuse of chemicals. MicroCloth Kit The MicroCloth Kit contains a universalcloth, a glass cloth an...
Page 43 - Climate range; Ventilation
Installation 43 - Other appliances must also not be plugged into a socket located directlybehind the refrigeration appliance. - When installing the refrigeration appliance, make sure that the mainsconnection cable does not gettrapped or damaged. - Do not position or operate multi- socket adapters, d...
Page 44 - Weight of the furniture door; If the furniture door panel is too
Installation 44 This refrigeration appliance can,however, be installed next to certainmodels that are equipped withintegrated heating in their side panel, aslong as they are installed in separatebuilding-in niches. Please contact your dealer for specificinformation about which combinationswill work ...
Page 45 - Building-in dimensions; All dimensions are given in mm.
Installation *INSTALLATION* 45 Building-in dimensions Niche/side view All dimensions are given in mm. The refrigeration appliance will function correctly if the specified ventilationopenings are kept clear. +4 ≤10kg 560 ≥150cm² 560 400 18 60 55 +54 21
Page 46 - Connections
Installation *INSTALLATION* 46 Connections All dimensions are given in mm. 3 +60 ≥150cm² a View from the front b Mains connection cable, length = 2200 mm A longer mains connection cable is available to order from the Miele CustomerService Department. c No connection sockets in this area
Page 47 - Installing the appliance; Store the enclosed metal rod in a; Preparing the refrigeration appliance
Installation *INSTALLATION* 47 Installing the appliance To install the refrigeration appliance,you will need the following tools: Tip: Store the enclosed metal rod in a safe place. It is required for adjustingthe rear appliance feet. Preparing the refrigeration appliance Position the refrigeration...
Page 48 - Positioning the refrigeration appliance; Risk of damaging the mains
Installation *INSTALLATION* 48 2. Secured at the side Both ends of the bracket must bebent. Fit the bracket in the opening in theappliance lid. Bend the bracket at the perforatedposition. Remove the bracket from the openingand insert the straight end of thebracket. Now bend this end of the b...
Page 49 - Aligning the refrigeration appliance
Installation *INSTALLATION* 49 If the refrigeration appliance ispushed too far into the niche, theappliance door may not closeproperly once the furniture panel hasbeen fitted. This can cause ice tobuild up, condensate to accumulateand lead to faults in the appliance.These can all lead to increaseden...
Page 50 - , but do not fix it in; Without a continuous plinth facing:; Pull the plinth panel; With a continuous plinth facing:; right up against
Installation *INSTALLATION* 50 Replace the plinth panel with theventilation grille , but do not fix it in place yet. Without a continuous plinth facing: Pull the plinth panel forwards until the ventilation slots are in alignmentwith adjacent cabinet plinth panels. Hold the plinth panel s...
Page 51 - Fitting the furniture door; Push the fitting aids
Installation *INSTALLATION* 51 2. Secured at the side Screw the refrigeration appliance intothe niche on the right and left withone screw in each case. Fitting the furniture door If fitted in a run of units make sure thatthe top edge of the furniture door is atthe same height as neighbouring unitd...
Page 52 - inside
Installation *INSTALLATION* 52 Tip: Push up the fitting aids with the furniture front until they are the sameheight as the doors of adjacent kitchenunits. Undo the nuts and take the fixing bracket off together with the fitting aids . Using a pencil, lightly mark a linedown the centre of ...
Page 54 - Adjusting the door seal; not
Installation *INSTALLATION* 54 appliance door as well as under the appliance door . By moving the furniture door, create a gap of 2 mmbetween the furniture door and thefront edge of the niche. Alignaccording to the adjacent furnituredoors. Close the door, check it is securedcorrectly, and al...
Page 55 - Remove the screw; Aligning the door
Installation *INSTALLATION* 55 The adjustment options are located onthe right-hand and left-hand sidesunderneath the bottle shelf on theinside of the door. Adjusting the angle of incline of thedoor Always make the adjustment on bothsides (right and left). Lift up the pull-out unit compartment. R...
Page 56 - After aligning the appliance door
Installation *INSTALLATION* 56 Height adjustment (y) Remove the screws completely. They are no longer required. Loosen the screws by 1 to 2 turns. Turn the adjusting screw : - Clockwise = door moves up max. 4 mm - Anticlockwise = door moves down max. 2 mm Then firmly tighten all screws...
Page 57 - Electrical connection; Risk of fire from overheating.
Installation *INSTALLATION* 57 Electrical connection The refrigeration appliance must only beconnected to an earthed socket usingthe mains connection cable supplied.The socket must be easily accessibleafter the refrigeration appliance hasbeen installed. If the socket is not easilyaccessible, ensure ...
Page 58 - EU Conformity declaration
EU Conformity declaration 58 Miele hereby declares that thisrefrigerator complies with Directive2014/53/EU. The complete text of the EU declarationof conformity is available from one ofthe following internet addresses: - Products, Download from www.miele.ie - For service, information, operating inst...
Page 59 - UK Conformity declaration; manuals and enter the name of the product or the serial number; Statement of Compliance; Paul Wright
UK Conformity declaration 59 Miele hereby declares that this refrigerator complies with UK Radio EquipmentRegulations 2017, as amended. The complete text of the UK declaration of conformity is available from one of thefollowing internet addresses: - Products, Download from www.miele.co.uk- For servi...
Page 60 - Copyrights and licences
Copyrights and licences 60 For the purpose of operating and controlling the communication module, Mieleuses proprietary or third-party software that is not covered by open sourcelicensing terms. This software/these software components are protected bycopyright. The copyrights held by Miele and third...
Page 63 - United Kingdom
United Kingdom Miele Co. Ltd., Fairacres, Marcham Road, Abingdon, Oxon, OX14 1TWTel: 0330 160 6600, Internet: www.miele.co.uk, E-mail: [email protected] Australia Miele Australia Pty. Ltd.ACN 005 635 398ABN 96 005 635 398Level 4, 141 Camberwell RoadHawthorn East, VIC 3123Tel: 1300 464 353E-mail: [em...
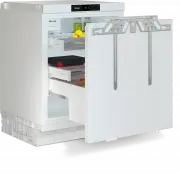


 Miele WWD380 WCS PWash&Steam&9kg User Manual
 Miele W 1614 Manual
 Miele G 5266 SCVi SFP Active Plus User Manual
 Miele Classic C1 Turbo Team PowerLine - SBAN0 User Manual
![Miele PDR 307 [EL]](https://manualsarea.com/img/product/thumbs/48/ba/fd/bafde84806e8abc8b420f34eaf8fcd6e.webp) Miele PDR 307 [EL] User Manual
Miele PDR 307 [EL] User Manual Miele F 1911 Vi Manual
![Miele PDR 908 [EL MAR 3N AC 400V 50-60Hz]](https://manualsarea.com/img/product/thumbs/48/05/b7/05b705998b251f92b271e908423e1ecb.webp) Miele PDR 908 [EL MAR 3N AC 400V 50-60Hz] Installation Manual
Miele PDR 908 [EL MAR 3N AC 400V 50-60Hz] Installation Manual Miele K 9757 iD Manual
 Miele KMTS 5704-3 User Manual
 Miele KMTY User Manual
 Miele KS 4383 DD User Manual
 Miele KS 7793 D User Manual
 Miele KU 7015 D User Manual
 Miele KU 7016 D User Manual
 Miele KWT 1601 Vi Manual
 Miele KWT 1611 SF Manual
 Miele KWT 2612 Vi User Manual
 Miele KWT 2672 ViS User Manual
 Miele KWT 4584 E User Manual