Maytag MVWP585GW - Manual
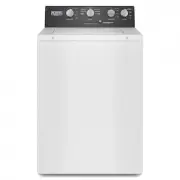
Maytag MVWP585GW Washing Machine – Manual, read for free online in PDF format. We hope this helps you resolve any issues you may have. If you have further questions, please contact us through the contact form.
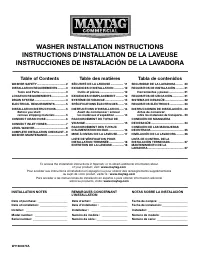


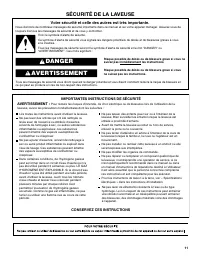
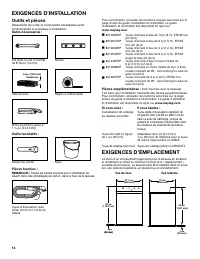
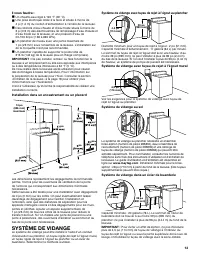
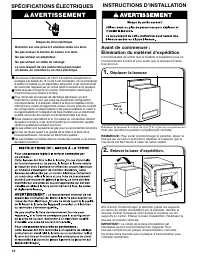
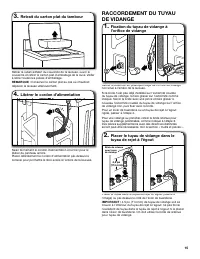
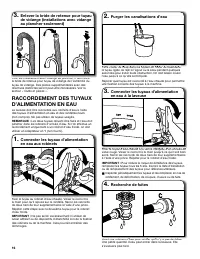
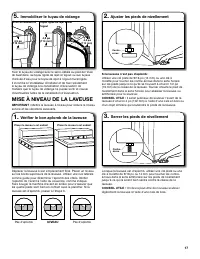
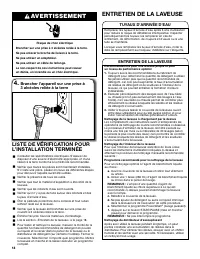


Table of Contents:
- Page 2 – WASHER SAFETY; IMPORTANT SAFETY INSTRUCTIONS
- Page 3 – Tools and Parts
- Page 4 – Recessed area or closet installation; DRAIN SYSTEM; Wall standpipe drain system
- Page 5 – INSTALLATION INSTRUCTIONS; remove shipping materials; ELECTRICAL REQUIREMENTS; Move washer; WARNING
- Page 6 – CONNECT DRAIN HOSE; Remove packing tray from tub; Attach drain hose to drain port
- Page 7 – CONNECT INLET HOSES; Remove drain hose form
- Page 8 – LEVEL WASHER; Check levelness of washer; Secure drain hose; Tighten leveling feet; Adjust leveling feet
- Page 9 – Plug into a grounded 3 prong outlet; WASHER MAINTENANCE; WATER INLET HOSES
- Page 11 – SÉCURITÉ DE LA LAVEUSE; CONSERVEZ CES INSTRUCTIONS; Votre sécurité et celle des autres est très importante.; AVERTISSEMENT
- Page 12 – EXIGENCES D’EMPLACEMENT; Pièces supplémentaires :; EXIGENCES D’INSTALLATION; Outils et pièces
- Page 13 – Installation dans un encastrement ou un placard; SYSTÈME DE VIDANGE; Système de vidange avec tuyau de rejet à l’égout mural
- Page 14 – INSTRUCTIONS D’INSTALLATION; Avant de commencer :; SPÉCIFICATIONS ÉLECTRIQUES; Déplacer la laveuse
- Page 17 – MISE À NIVEAU DE LA LAVEUSE; Vérifi er le bon aplomb de la laveuse; Immobiliser le tuyau de vidange; Serrer les pieds de nivellement; Ajuster les pieds de nivellement
- Page 18 – Brancher l’appareil sur une prise à; ENTRETIEN DE LA LAVEUSE; TUYAUX D’ARRIVÉE D’EAU
- Page 19 – ENTRETIEN POUR ENTREPOSAGE HIVERNAL; NON-UTILISATION ET ENTRETIEN; TRANSPORT DE LA LAVEUSE
- Page 20 – SEGURIDAD DE LA LAVADORA; PARA SU SEGURIDAD; GUARDE ESTAS INSTRUCCIONES; Su seguridad y la seguridad de los demás es muy importante.; ADVERTENCIA
- Page 21 – REQUISITOS DE LA UBICACIÓN; Piezas alternativas:; REQUISITOS DE INSTALACIÓN; Herramientas y piezas; Herramientas necesarias:
- Page 22 – SISTEMA DE DESAGÜE
- Page 23 – INSTRUCCIONES DE INSTALACIÓN; retire los materiales de transporte; REQUISITOS ELÉCTRICOS; Mueva la lavadora; INSTRUCCIONES PARA LA CONEXIÓN
- Page 26 – NIVELACIÓN DE LA LAVADORA; Revise la nivelación de la lavadora; Asegure la manguera de desagüe; Apriete las patas niveladoras
- Page 27 – Enchufe en un tomacorriente de; CUIDADO DE LA LAVADORA; MANGUERAS DE ENTRADA DE AGUA; MANTENIMIENTO DE LA
- Page 29 – NOTAS
WASHER INSTALLATION INSTRUCTIONS
INSTRUCTIONS D’INSTALLATION DE LA LAVEUSE
INSTRUCCIONES DE INSTALACIÓN DE LA LAVADORA
Table of Contents
Table des matières
Tabla de contenidos
WASHER SAFETY ................................... 2
INSTALLATION REQUIREMENTS .......... 3
Tools and Parts ................................ 3
LOCATION REQUIREMENTS ................. 3
DRAIN SYSTEM ...................................... 4
ELECTRICAL REQUIREMENTS ............. 5
INSTALLATION INSTRUCTIONS ............ 5
Before you start:
remove shipping materials ............. 5
CONNECT DRAIN HOSE ........................ 6
CONNECT INLET HOSES ....................... 7
LEVEL WASHER ...................................... 8
COMPLETE INSTALLATION CHECKLIST .. 9
WASHER MAINTENANCE ...................... 9
SÉCURITÉ DE LA LAVEUSE ............... 11
EXIGENCES D’INSTALLATION ............ 12
Outils et pièces .............................. 12
EXIGENCES D’EMPLACEMENT .......... 12
SYSTÈME DE VIDANGE ....................... 13
SPÉCIFICATIONS ÉLECTRIQUES ....... 14
INSTRUCTIONS D’INSTALLATION ...... 14
Avant de commencer : enlever
les matériaux d’expédition ........... 14
RACCORDEMENT DU TUYAU DE
VIDANGE ............................................... 15
RACCORDEMENT DES TUYAUX
D’ALIMENTATION EN EAU ................... 16
MISE À NIVEAU DE LA LAVEUSE ........ 17
LISTE DE VÉRIFICATION POUR
INSTALLATION TERMINÉE .................. 18
ENTRETIEN DE LA LAVEUSE .............. 18
SEGURIDAD DE LA LAVADORA ......... 20
REQUISITOS DE INSTALACIÓN .......... 21
Herramientas y piezas .................. 21
REQUISITOS DE UBICACIÓN .............. 21
SISTEMA DE DESAGÜE ....................... 22
REQUISITOS ELÉCTRICOS ................. 23
INSTRUCCIONES DE INSTALACIÓN .. 23
Antes de comenzar:
retire los materiales de transporte .. 23
CONEXIÓN DE MANGUERA
DE DESAGÜE ........................................ 24
CONEXIÓN DE LAS MANGUERAS
DE ENTRADA ........................................ 25
NIVELACIÓN DE LA LAVADORA ......... 26
LISTA DE CONTROL DE LA
INSTALACIÓN TERMINADA ................. 27
MANTENIMIENTO DE LA
LAVADORA ............................................ 27
W11600470A
INSTALLATION NOTES
Date of purchase:
________________
Date of installation:
_______________
Installer:
_______________________
Model number:
__________________
Serial number:
___________________
Date d’achat :
___________________
Date d’installation :
_______________
Installateur :
____________________
Numéro de modèle :
______________
Numéro de série :
_________________
Fecha de compra:
________________
Fecha de instalación:
______________
Instalador:
______________________
Número de modelo:
_______________
Número de serie:
_________________
To access the installation instructions in Spanish, or to obtain additional information about
of your product, visit:
www.maytag.com
Pour accéder aux instructions d’installation en espagnol ou pour obtenir des renseignements supplémentaires
au sujet de votre produit, visiter le :
www.maytag.com
Para acceder a las instrucciones de instalación en español o para obtener información adicional
sobre su producto, visite:
www.maytag.com
REMARQUES CONCERNANT
L’INSTALLATION
NOTAS SOBRE LA INSTALACIÓN
"Loading the manual" means you need to wait until the file loads and becomes available for online reading. Some manuals are very large, and the time they take to appear depends on your internet speed.
Other Manuals for Maytag MVWP585GW
Summary
2 WASHER SAFETY FOR YOUR SAFETY Do not store or use gasoline or other flammable vapours and liquids in the vicinity of this or any other appliance. IMPORTANT SAFETY INSTRUCTIONS SAVE THESE INSTRUCTIONS WARNING: To reduce the risk of fire, electric shock, or injury to persons when using your applianc...
3 Optional tools: Parts supplied: NOTE: All parts supplied for installation are in cardboard insert in the top of the washer. LOCATION REQUIREMENTS Select proper location for your washer to improve performance and minimize noise and possible “washer walk.” Install your washer in a basement, laundry ...
4 You will need: ■ A water heater set to 120°F (49°C). ■ A grounded electrical outlet located within 4 ft (1.2 m) of power cord on back of washer. ■ Hot and cold water faucets located within 3 ft (0.9 m) of hot and cold water fill valves on washer, and water pressure of 20–100 psi (138–690 kPa). ■ A...