Page 2 - A very safe appliance; Warning
2 You cannot operate your oven with the door open due to the safety interlocks built into the doormechanism. These safety interlocks automatically switch off any cooking activity when the door is opened;which in the case of a microwave oven could result in harmful exposure to microwave energy. It is...
Page 3 - CONTENTS
3 PRECAUTIONS 2 CONTENTS 3 UNPACKING & INSTALLING 4 FEATURE DIAGRAM 6 CONTROL PANEL 6 OPERATING INSTRUCTIONS 7 SETTING CLOCK 7 MORE/LESS 7 CONTENTS TIMED COOKING 8 2 STAGE TIMED COOKING 8 MICROWAVE POWER LEVELS 8 CHILD LOCK 9 SENSOR COOK OPERATION INSTRUCTION 9 SENSOR COOK 9 SENSOR COOK MENU INS...
Page 4 - UNPACKING & INSTALLING; KEEP MOISTURE; THIS OVEN SHOULD NOT BE USED FOR COMMERCIAL
4 UNPACKING & INSTALLING Place your oven on a flat, level surface but make sure there is at least 20 cm of space on the top, rear and sides so there is air flow for ventilation. Exhaust outlets are located in the back and side of your oven. Blocking the outlets can damage your oven. KEEP MOISTUR...
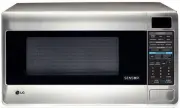
Page 6 - FEATURE DIAGRAM
6 NOTE: A beep sounds when a pad on the control panel is touched to indicate setting has been entered. FEATURE DIAGRAM CONTROL PANEL Remove your Microwave Oven and all material from the shipping carton. Your oven will be packed with the following materials: Glass Turntable .........................1...
Page 7 - OPERATING INSTRUCTIONS; Example: Set 2 minutes of cooking on high; QUICK START; or for a shorter time; SETTING CLOCK
MORE/LESS By using the ( ) + or ( ) - keys, KEEP MOISTURE AUTO COOK, AUTO REHEAT, TIMED COOK program can be adjusted to cook food for a longer. or shorter time Pressing ( ) + will add 10 seconds to the cooking time each time you press it. Pressing ( ) - will subtract 10 seconds of cooking time each ...
Page 8 - MICROWAVE POWER LEVELS; TIMED COOKING; MICROWAVE POWER LEVEL CHART; STAGE TIMED COOKING
8 OPERATING INSTRUCTIONS (CONT’D) MICROWAVE POWER LEVELS Your microwave oven is equipped with elevenpower levels to give you maximum flexibility andcontrol over cooking. The table below will give yousome idea of which foods are prepared at each ofthe various power levels.* The chart below shows the ...
Page 9 - CHILD LOCK; SENSOR COOK; To cancel the child lock; To cook VEGETABLES/JACKET POTATO
9 OPERATING INSTRUCTIONS (CONT’D) CHILD LOCK This is a unique safety feature that preventsunwanted oven operation such as used bychildren. Once the CHILD LOCK is set, nocooking can take place. If the CHILD LOCK was already set and youtouched another cooking pad, the word LOCKED shows in the display....
Page 10 - SENSOR COOK MENU INSTRUCTIONS - VEGETABLE
10 Menu Code 1 Instructions SENSOR COOK MENU INSTRUCTIONS - VEGETABLE Wash & pat potatoes dry with paper towel. Pierceeach potato 3 times with a fork. Place potatoesaround the outer edge of the turntable.After cooking potatoes should still be firm. Wrap infoil and stand. Jacket Potato Potatoes(w...
Page 11 - SENSOR COOK MENU INSTRUCTIONS - RICE / PASTA
11 Menu Code 1 Instructions SENSOR COOK MENU INSTRUCTIONS - RICE / PASTA White Rice 1 / 2 - 2 cups Rice : Room Water : Room 3 - 5 Wash the rice under cold water until the water runsclear. Place the rice and water in a microwave-saferice cooker or 3-litre bowl. Cover with lid or doublelayer of plasti...
Page 12 - SENSOR COOK MENU INSTRUCTIONS - DESSERT
12 Menu Code Instructions SENSOR COOK MENU INSTRUCTIONS - DESSERT 2 1. Place the butter in a basin and melt on full for about 1- 1 1 / 2 minutes. 2. Mix together the sugar, cocoa and flour. Beat together the egg and milk. Stir into the flourmixture, together with the butter, walnuts andraisins. 3. S...
Page 13 - SENSOR REHEAT; SENSOR REHEAT MENU INSTRUCTIONS
13 SENSOR REHEAT This feature allows you to reheat precooked room-temperature or refrigerated foods withoutselecting cooking times and power levels. Thisfeature has 6 categories : dinner plate, rice, soup,casserole, risotto, pizza. 1. Touch STOP/CLEAR. 2. Touch DINNER PLATE pad. DINNER PLATE scrolls...
Page 14 - AUTO COOK
14 OPERATING INSTRUCTIONS (CONT’D) Menu Code Instructions SENSOR REHEAT MENU INSTRUCTIONS 5 Place the cooked risotto into a microwave- safe,heatproof dish.Cover with a lid or double layer ofplastic wrap loosely.After reheating stir well beforeserving. Note : If reheating risotto from the fridge add ...
Page 15 - AUTO COOK MENU INSTRUCTIONS
15 Menu Code 1 Instructions AUTO COOK MENU INSTRUCTIONS Corned Beef 1.0 - 2.0 kg Refrigerated 15 - 20 2 Fruity Beef topside beef125 ml fruit chutney 1 tbs oil1 tbs Worcestershire Sauce 1 tbs curry powder2 tbs mustard powder1 tbs sweet sherry Sauce 1 1 / 2 cups stuffing mix Water to mix Seasoning Pre...
Page 18 - AUTO REHEAT; AUTO REHEAT MENU INSTRUCTIONS
18 OPERATING INSTRUCTIONS (CONT’D) AUTO REHEAT Your oven’s menu has been preprogrammed to automatically reheat food. Tell the oven what you wantand how many items there are. Then let your microwave oven reheat your selections. Be sure to close the door before selecting categories. 1. Touch STOP/CLEA...
Page 19 - QUICK DEFROST; QUICK DEFROST MENU INSTRUCTIONS
19 QUICK DEFROST Three Quick Defrost sequences are preset in theoven. The Quick Defrost feature provides you withthe express defrosting method for 500g frozenfoods. The oven automatically sets the defrostingtime for each food. NOTE: The oven will beep during the DEFROST CYCLE.At this time open the d...
Page 20 - To reheat Chilled Pizza; KEEP MOISTURE MENU INSTRUCTIONS; Reheat; Standing Time
20 KEEP MOISTURE 1. Touch STOP/CLEAR. 2. Touch KEEP MOISTURE. then SELECT MENU 1 TO 8 - - SEE COOKINGGUIDE scrolls in the display. 3. Touch number 1. CHILLED PIZZAENTER WEIGHT s crolls in the display. 4. Touch number [4]. TOUCH START scrolls in the display. 5. Touch START. 1 4 To reheat Chilled Pizz...
Page 22 - AUTO DEFROST; Minced Meat; select Meat menu, enter the
22 AUTO DEFROST Three defrost sequences are preset in the oven.The defrost feature provides you with the bestdefrosting method for frozen foods. The cookingguide will show you which defrost sequence isrecommended for the food you are defrosting. With the Auto Defrost feature, the ovenautomatically s...
Page 23 - AUTO DEFROST MENU INSTRUCTIONS
23 OPERATING INSTRUCTIONS (CONT’D) Menu Code Instructions AUTO DEFROST MENU INSTRUCTIONS 1 Remove the meat completely from it’s wrapping.Place the mince onto a microwave- safe rack over aplate or shallow dish. During the program the ovenwill beep and display turn food over. At this pointremove the m...
Page 25 - COOKING TIPS
25 OPERATING INSTRUCTIONS (CONT’D) Meat 1. No special techniques are required. Meatshould be prepared as with conventionalcooking. Season if desired. Always thoroughlydefrost meat before cooking. 2. Place the meat on a microwave roasting rack ormicrowave-proof plate and place on theturntable. 3. Coo...
Page 26 - Fish
26 OPERATING INSTRUCTIONS (CONT’D) COOKING TIPS (continued) Fish 1. Arrange fish in a large shallow non-metallic dish or casserole. 2. Cover with pierced microwave plastic wrap or casserole lid. 3. Place the dish on the turntable. 4. Cook according to the instructions in the Fresh Fish Cooking Chart...
Page 29 - MICROWAVE-SAFE UTENSILS; CAUTION
29 MICROWAVE-SAFE UTENSILS Never use metal or metal trimmed utensils in your microwave oven Microwaves cannot penetrate metal. They willbounce off any metal object in the oven andcause arcing, an alarming phenomenon thatresembles lightning.Most heat resistant non metallic cooking utensilsare safe fo...
Page 30 - FOOD CHARACTERISTICS & MICROWAVE COOKING
30 FOOD CHARACTERISTICS & MICROWAVE COOKING Keeping an eye on things The recipes in this book have been formulatedwith great care, but your success in preparingthem depends on how much attention you pay tothe food as it cooks. Always watch your foodwhile it cooks. Your microwave oven is equipped...
Page 31 - To Clean Your Oven
31 FOOD CHARACTERISTICS & MICROWAVE COOKING Stirring Stirring is one of the most important of all microwaving techniques. In conventional cooking, food is stirred for the purpose of blending. Microwaved food, however, is stirred in order to spread and redistribute heat. Always stir from the outs...
Page 32 - SAFETY PRECAUTIONS; WARNING; subsequent DAMAGE to the OVEN.
SAFETY PRECAUTIONS 32 WARNING Please ensure cooking times are correctly set as over cooking may result in FIRE and subsequent DAMAGE to the OVEN. 1 Do not attempt to tamper with, or make any adjustments or repairs to the door, control panel, safety interlock switches or any other part of the oven. R...
Page 34 - This appliance must be earthed; MODEL
3 4 TECHNICAL SPECIFICATIONS PLUG WIRING INFORMATION The wires in this mains lead are colored in accordance with the following codes BLUE ~ Neutral BROWN ~ Live GREEN & YELLOW ~ Earth Warning This appliance must be earthed *IEC 60705 RATING STANDARD Specifications subject to change without prior...
Page 36 - Printed in China; LGEAP