Page 3 - ENGLISH; READ ALL INSTRUCTIONS BEFORE USE; WARNING; Your safety and the safety of others is very important.; DANGER
3 ENGLISH IMPORTANT SAFETY INSTRUCTIONS READ ALL INSTRUCTIONS BEFORE USE W WARNING For your safety, the information in this manual must be followed to minimize the risk of fire, explosion, or electric shock, or to prevent property damage, injury to persons, or death. Your safety and the safety of ot...
Page 4 - NPWJOH; TJNJMBSMZUFYUVSFESVCCFSMJLFNBUFSJBMT; POUPQPGUIFESZFSEVSJOHPQFSBUJPO
4 IMPORTANT SAFETY INSTRUCTIONS READ ALL INSTRUCTIONS BEFORE USE W WARNING For your safety, the information in this manual must be followed to minimize the risk of fire, explosion, or electric shock, or to prevent property damage, injury to persons, or death. #"4*$4"'&5:13&$"65*0...
Page 7 - QSPOHGSPNUIFQPXFSDPSE
7 ENGLISH IMPORTANT SAFETY INSTRUCTIONS READ ALL INSTRUCTIONS BEFORE USE W WARNING For your safety, the information in this manual must be followed to minimize the risk of fire, explosion, or electric shock, or to prevent property damage, injury to persons, or death. 4"'&5:*/4536$5*0/4'03$0/...
Page 8 - EASY-ACCESS REVERSIBLE DOOR
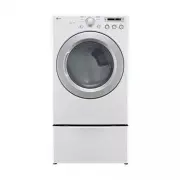
8 SPECIAL FEATURES EASY-TO-USE CONTROL PANEL Rotate the cycle selector knob to select the desired dry cycle. Add cycle options or adjust settings with the touch of a button. EASY-ACCESS REVERSIBLE DOOR The wide-opening door provides easy access for loading and unloading. The door hinge can be revers...
Page 9 - INTRODUCING YOUR DRYER; Accessories; Pedestal; NOTE; Optional accessories
9 ENGLISH INTRODUCING YOUR DRYER INTRODUCING YOUR DRYER PART AND ACCESSORIES Parts Accessories Pedestal (sold separately) Stacking kit (sold separately) NOTE t$POUBDU-($VTUPNFS4FSWJDFBU JO$BOBEBJGBOZBDDFTTPSJFTBSFNJTTJOHt'PSZPVSTBGFUZBOEGPSFYUFOEFEQSPEVDUMJGFVTFPOMZBVUIPSJ[FEDPNQPOFOUT5IFNBOVGBDUVSF...
Page 10 - Control panel features; Operation
10 INTRODUCING YOUR DRYER Control panel features Following are instructions for starting and using your new dryer. Please refer to specific sections of this manual for more detailed information. W WARNING To reduce the risk of fire, electric shock, or injury to persons, read this entire manual, incl...
Page 11 - Display
11 ENGLISH INTRODUCING YOUR DRYER Display The display shows the settings, estimated time remaining, options, and status messages for your dryer. When the dryer is turned on, the light in the display will illuminate. %JTQMBZBOEJDPOT %FTDSJQUJPO &45*."5&%5*.&3&."*/*/( ü - When ...
Page 12 - Preview installation order
12 INSTALLATION INSTRUCTIONS Preview installation order INSTALLATION INSTRUCTIONS Test run Installation test (Refer to page 29) Press and hold Checking and choosing the proper location Leveling the dryer Connecting electric dryers Venting the dryer Plugging in the power cord and grounding Connecting...
Page 13 - Installation location requirements; Clearances; INSTALLATION SPACING FOR RECESSED AREA OR CLOSET INSTALLATION; FOUJOHUIFESZFS; $POOFDUJOHFMFDUSJDESZFST
13 ENGLISH INSTALLATION INSTRUCTIONS Installation location requirements W WARNING 3FBEBMMJOTUBMMBUJPOJOTUSVDUJPOTDPNQMFUFMZCFGPSFJOTUBMMJOHBOEPQFSBUJOHZPVSESZFS It is important that you review this entire manual before installing and using your dryer. Detailed instructions concerning electrical conn...
Page 14 - Installation with optional pedestal base or stacking kit; RECOMMENDED INSTALLATION SPACING FOR CABINET INSTALLATION; CLOSET VENTILATION REQUIREMENTS
14 INSTALLATION INSTRUCTIONS Installation with optional pedestal base or stacking kit RECOMMENDED INSTALLATION SPACING FOR CABINET INSTALLATION t For cabinet installation with a door, minimum ventilation openings in the top of the cabinet are required. *Required spacing **For side or bottom venting,...
Page 15 - Leveling the dryer; t5PSFEVDFUIFSJTLPGJOKVSZUPQFSTPOTBEIFSFUPBMMJOEVTUSZ
15 ENGLISH Leveling the dryer W WARNING t5PSFEVDFUIFSJTLPGJOKVSZUPQFSTPOTBEIFSFUPBMMJOEVTUSZ SFDPNNFOEFETBGFUZQSPDFEVSFTJODMVEJOHUIFVTFPGMPOHTMFFWFEHMPWFTBOETBGFUZHMBTTFT Failure to follow this warning can cause serious injury or death. t5IFBQQMJBODFTBSFIFBWZ5XPPSNPSFQFPQMFBSFSFRVJSFE XIFOJOTUBMMJOH...
Page 16 - Reversing the door; t5PBWPJEEBNBHFUPUIFESZFSPSUIFEPPSTVQQPSUUIF; CAUTION
16 0QFOUIFESZFSEPPS :PVXJMMCFSFNPWJOHUIFTDSFXTTIPXOCFMPX POMFGUPOSJHIU 3. Remove the two decorative screws on the left using a screwdriver. Reversing the door 3FNPWFUIFUXPMBUDITDSFXTBOEUIFMBUDI )PMEUIFIJOHFJOQMBDFXIJMFSFNPWJOHUIFUXPIJOHFTDSFXT (to prevent the door from dropping). 3FNPWFUIFEPPSGSPNUI...
Page 18 - Installing the side vent kit; OPTION 1: SIDE VENTING; t6TFBIFBWZNFUBMWFOU
18 Installing the side vent kit Your new dryer is shipped to vent to the rear. It can also be configured to vent to the bottom or side (right-side venting is not available on gas models). An adapter kit, part number &&-# , may be purchased from your LG retailer. This kit contains the necessa...
Page 19 - Venting the dryer; BOEDMFBOCFGPSFJOTUBMMJOHUIFESZFS
19 ENGLISH Venting the dryer W WARNING To reduce the risk of fire, electric shock, or injury to persons when using this appliance, follow basic precautions, including the following: t%POPUDSVTIPSDPMMBQTFEVDUXPSL Failure to follow these instructions can result in fire or death. t%POPUBMMPXEVDUXPSLUPS...
Page 20 - ROUTING AND CONNECTING DUCTWORK; Ductwork
20 INSTALLATION INSTRUCTIONS Venting the dryer (cont.) %FEVDUGU NGPSFBDIBEEJUJPOBMFMCPX*UJTOPUSFDPNNFOEFEUPVTFNPSFUIBOGPVS¡FMCPXT ROUTING AND CONNECTING DUCTWORK Follow the guidelines below to maximize drying performance and reduce lint buildup and condensation in the ductwork. Ductwork and fittings...
Page 21 - Connecting gas dryers; Electrical requirements for gas models only
21 ENGLISH Connecting gas dryers W WARNING To reduce the risk of fire, electric shock, or injury to persons when using this appliance, follow basic precautions, including the following: Electrical requirements for gas models only W WARNING To reduce the risk of fire, electric shock, or injury to per...
Page 22 - JOTUBMMFSTFSWJDFBHFODZPSUIFHBTTVQQMJFS; Connecting the gas supply
22 Connecting gas dryers (cont.) W WARNING To reduce the risk of fire, electric shock, or injury to persons when using this appliance, follow basic precautions, including the following: t*OTUBMMBUJPOBOETFSWJDFNVTUCFQFSGPSNFECZBRVBMJGJFE JOTUBMMFSTFSWJDFBHFODZPSUIFHBTTVQQMJFS Failure to follow this w...
Page 23 - Connecting electric dryers; Electrical requirements for electric models only; t%POPUNPEJGZUIFQMVHBOEJOUFSOBMXJSFQSPWJEFEXJUIUIF
23 ENGLISH Connecting electric dryers W WARNING To help prevent fire, electric shock, serious injury, or death, the wiring and grounding must conform to the latest edition of the /BUJPOBM&MFDUSJDBM$PEF"/4*/'1"BOEBMMBQQMJDBCMFMPDBM regulations. Please contact a qualified electrician to ch...
Page 24 - USA only; Four-wire connection for electric dryers:; NJOJNVNDPQQFS; t$POOFDUUIFQPXFSDPSEUPUIFUFSNJOBMCMPDL$POOFDU
24 INSTALLATION INSTRUCTIONS Connecting electric dryers (cont.) USA only Four-wire connection for electric dryers: Power cord t"XJSFDPOOFDUJPOJTSFRVJSFEGPSBMMNPCJMFBOENBOVGBDUVSFE IPNFJOTUBMMBUJPOTBTXFMMBTBMMOFXDPOTUSVDUJPOBGUFS+BOVBSZ t"6-MJTUFETUSBJOSFMJFGJTSFRVJSFE 3FNPWFUIFUFSNJOBMCMPDLB...
Page 28 - Special requirements for; Final installation check; Testing dryer heating
28 INSTALLATION INSTRUCTIONS Special requirements for manufactured or mobile homes Any installation in a manufactured or mobile home must comply with the Manufactured Home Construction and Safety Standards 5JUMF$'31BSUPS4UBOEBSE$"/$4";.)BOE local codes and ordinances. If you are uncertain wh...
Page 29 - PBDUJWBUFUIFJOTUBMMBUJPOUFTU
29 ENGLISH INSTALLATION INSTRUCTIONS Installation test (Exhaust check) Once you have completed the installation of the dryer, use this test to make sure the condition of the exhaust system is adequate for proper operation of the dryer. This test should be performed to alert you to any serious proble...
Page 30 - FTUSJDUFEPSCMPDLFEBJSGMPX; t$IFDLUIFEVDUDPOEJUJPO; t3FTFUDJSDVJUCSFBLFSPSSFQMBDFGVTF
30 INSTALLATION INSTRUCTIONS Installation test (Exhaust check) (cont.) 3FTUSJDUFEPSCMPDLFEBJSGMPX Avoid long runs or runs with multiple elbows or bends. Excess or crushed transition duct Too many elbows or exhaust too long Check for blockages and lint buildup. Make sure the ductwork is not crushed o...
Page 31 - Operating the dryer
31 ENGLISH NOTE HOW TO USE Operating the dryer 563/0/5)&%3:&3 Press the POWER button to turn on the dryer. The cycle LEDs will illuminate and a signal will TPVOEJGUVSOFEPO3FGFSUPQBHF 3 #&(*/$:$-& Press the START/PAUSE button to begin the cycle. The cycle can be paused at any time eit...
Page 32 - Sensor dry cycles; Manual dry cycles; Cycle guide
32 HOW TO USE Sensor dry cycles Sensor dry cycles utilize LG’s unique dual sensor system to detect and compare the moisture level in clothes and in the air and adjust the drying time as needed to ensure superior results. The dryer automatically sets the dryness level and temperature at the recommend...
Page 33 - FHVMBSDMFBOJOH; Sorting laundry; Loading the dryer; t$IFDLBMMQPDLFUTUPNBLFTVSFUIBUUIFZBSFFNQUZ*UFNT; t/FWFSESZDMPUIFTUIBUIBWFCFFOFYQPTFEUPPJMHBTPMJOF; Loading tips
33 ENGLISH HOW TO USE Following are instructions for starting and using your new dryer. Please refer to specific sections of this manual for more detailed information. Check the lint filter before every load Always make sure the lint filter is clean before starting a new load; a clogged lint filter ...
Page 34 - Cycle modifier buttons
34 HOW TO USE Cycle modifier buttons Sensor dry cycles have preset settings that are selected automatically. Manual dry cycles have default settings, but you may also customize the settings using the cycle setting buttons. Press the button for that option to view and select other settings. To protec...
Page 35 - MAINTENANCE; Regular cleaning; t6OQMVHUIFESZFSCFGPSFDMFBOJOHUPBWPJEUIFSJTLPGFMFDUSJD; Cleaning the exterior
35 ENGLISH MAINTENANCE MAINTENANCE Regular cleaning W WARNING To reduce the risk of fire, electric shock, or injury to persons when using this appliance, follow basic precautions, including the following: t6OQMVHUIFESZFSCFGPSFDMFBOJOHUPBWPJEUIFSJTLPGFMFDUSJD TIPDL Failure to follow this warning can ...
Page 36 - TROUBLESHOOTING; Before calling for service
36 TROUBLESHOOTING Before calling for service Your dryer is equipped with an automatic error-monitoring system to detect and diagnose problems at an early stage. If your dryer does not function properly or does not function at all, check the following before you call for service. 1SPCMFN 1PTTJCMF$BV...
Page 38 - USING SMART DIAGNOSIS
38 Models DLE3050* DLG3051* Description Dryer Electrical requirements Please refer to the rating label regarding detailed information. Gas requirements NG 4-10.5 inches WCLP: 8–13 inches WC (Gas Models only) Dimensions 27” ( W ) X 30” (D) X 38 11 / 16 ” (H), 51” (D with door open) 68.6 cm ( W ) X 76...
Page 39 - Stacking kit installation; This stacking kit includes:; VOTUBCMFDPOEJUJPOTTVDIBTBNPCJMFIPNF
39 ENGLISH OPTIONAL ACCESSORIES Stacking kit installation This stacking kit includes: t5XP TJEFSBJMTt0OF GSPOUSBJMt'PVS TDSFXT Tools needed for installation: t1IJMMJQTTDSFXESJWFS To ensure safe and secure installation, please observe the following instructions. W WARNING t*ODPSSFDUJOTUBMMBUJPODBODBV...
Page 41 - LG Customer Information Center; MFBTFDBMMBOEDIPPTFUIF; Product Registration Information
41 ENGLISH Your LG Dryer will be will repaired or replaced, at LG’s option, if it proves to be defective in material or workmanship under normal VTFEVSJOHUIFXBSSBOUZQFSJPE i8BSSBOUZ1FSJPEwTFUGPSUICFMPXFòFDUJWFGSPNUIFEBUF i%BUFPG1VSDIBTFwPGPSJHJOBMDPOTVNFS purchase of the product. This warranty is go...
Page 43 - MANUAL DE PROPIETARIO; SECADORA; ESP
MANUAL DE PROPIETARIO SECADORA Lea este manual con cuidado antes de utilizar lasecadora y guárdelo para futuras consultas. www.lg.com ESP AÑOL DLE3050* DLG3051*
Page 45 - LEA TODAS LA INSTRUCCIONES ANTES DE USAR; ADVERTENCIA; Su seguridad y la de los demás son de suma importancia.; PELIGRO; otro electrodoméstico.
3 ESP AÑOL INSTRUCCIONES IMPORTANTES DE SEGURIDAD LEA TODAS LA INSTRUCCIONES ANTES DE USAR W ADVERTENCIA Por su seguridad, debe seguir la información indicada en este manual para minimizar el riesgo de incendio, explosión, o descarga eléctrica, o para prevenir daños a la propiedad, lesiones personal...
Page 46 - JODMVZFOEPBDFJUFTDPNFTUJCMFTFOTVTFDBEPSB
4 INSTRUCCIONES IMPORTANTES DE SEGURIDAD LEA TODAS LA INSTRUCCIONES ANTES DE USAR W ADVERTENCIA Por su seguridad, se debe seguir la información indicada en este manual para minimizar el riesgo de incendio, explosión, o descarga eléctrica, o para prevenir daños a la propiedad, lesiones personales o m...
Page 48 - BMFYUFSJPS
6 INSTRUCCIONES IMPORTANTES DE SEGURIDAD LEA TODAS LA INSTRUCCIONES ANTES DE USAR W ADVERTENCIA Por su seguridad, se debe seguir la información indicada en este manual para minimizar el riesgo de incendio, explosión, o descarga eléctrica, o para prevenir daños a la propiedad, lesiones personales o m...
Page 49 - QVFTUBBUJFSSBEFMDBCMFFMÏDUSJDP
7 ESP AÑOL INSTRUCCIONES IMPORTANTES DE SEGURIDAD LEA TODAS LA INSTRUCCIONES ANTES DE USAR W ADVERTENCIA Por su seguridad, se debe seguir la información indicada en este manual para minimizar el riesgo de incendio, explosión, o descarga eléctrica, o para prevenir daños a la propiedad, lesiones perso...
Page 50 - PANEL DE CONTROL FÁCIL PARA USAR; Ejecución de saneamiento de secadoras
8 CARACTERÍSTICAS ESPECIALES PANEL DE CONTROL FÁCIL PARA USAR Gire la perilla selectora de ciclos al ciclo de secado deseado. Añada los ajustes de ciclo o programe las opciones con el toque de un botón. PUERTA REVERSIBLE DE FÁCIL ACCESO La amplia puerta provee acceso para carga y descarga. Se puede ...
Page 51 - Accesorios; NOTA; Accesorios opcionales
9 ESP AÑOL PRESENTACIÓN DE LA SECADORA PRESENTACIÓN DE LA SECADORA PIEZAS Y ACCESORIOS Piezas Accesorios Pedestal (Adquirido por separado) Kit de apilado (Adquirido por separado) NOTA t1ØOHBTFFODPOUBDUPDPOFM%FQBSUBNFOUPEFBUFODJØOBMDMJFOUFEF-(FOFMOÞNFSP FO$BOBEÈTJ falta alguno de los accesorios. t1BS...
Page 52 - Características del panel de control
10 PRESENTACIÓN DE LA SECADORA Características del panel de control A continuación encontrará instrucciones para comenzar a usar su secadora nueva. Para más información por favor consulte las secciones específicas de este manual. W ADVERTENCIA Para reducir el riesgo de incendios, descargas eléctrica...
Page 53 - Pantalla
11 ESP AÑOL PRESENTACIÓN DE LA SECADORA Pantalla La pantalla muestra los ajustes, el tiempo restante estimado, las opciones y los mensajes de estado correspondientes a su secadora. Cuando se gira el secador, la luz en la exhibición iluminará. Pantalla y los iconos %FTDSJQDJØO 5*&.103&45"...
Page 54 - Vista previa del orden de instalación
12 INSTRUCCIONES PARA LA INSTALACIÓN Vista previa del orden de instalación INSTRUCCIONES PARA LA INSTALACIÓN Comprobación y elección de la ubicación adecuada Nivelación de la secadora Conexión de secadoras a gas ventilación de la secadora Conexión del enchufe y la toma de tierra Cómo conectar las se...
Page 55 - Requisitos del lugar de instalación; Espacios de instalación; $ØOFYJØOEFMDPOEVDUPEFWFOUJMBDJØOEFMB; secadoras eléctricas
13 ESP AÑOL INSTRUCCIONES PARA LA INSTALACIÓN Requisitos del lugar de instalación W ADVERTENCIA 4JHBMBTJOTUSVDDJPOFTEFGVODJPOBNJFOUPZDVJEBEPJODMVJEBTFOFTUFNBOVBMZDPOTFHVJSÈRVFTVTFDBEPSBPGSF[DBVOTFSWJDJPGJBCMFZEVSBEFSP Es importante que revise todo este manual antes de instalar y usar su secadora. Se...
Page 56 - Instalaciones con la base pedestal o kit de apilado opcionales; REQUISITOS DE VENTISLCIÓN EN ARMARISO
14 INSTRUCCIONES PARA LA INSTALACIÓN Instalaciones con la base pedestal o kit de apilado opcionales SEPARACIÓN RECOMENDADA PARA LA INSTALACIÓN EN UN HABITÁCULO CERRADO t"MSFBMJ[BSMBJOTUBMBDJØOFOVOIBCJUÈDVMPDFSSBEPEFCFIBCFSTBMJEBTEFWFOUJMBDJØONÓOJNBTFOMBQBSUFTVQFSJPSFJOGFSJPSEFMMVHBS *Espacio req...
Page 57 - Nivelación de la secadora; NBOHBTMBSHBTZHBGBTEFTFHVSJEBE
15 ESP AÑOL Nivelación de la secadora W ADVERTENCIA t Para reducir el riesgo de lesiones personales, cumpla con todos los procedimientos de seguridad recomendados por la industria, incluyendo el uso de use guantes con NBOHBTMBSHBTZHBGBTEFTFHVSJEBE Si no se cumple con esta advertencia se podrán produ...
Page 58 - Inversión de la puerta; t1BSBFWJUBSEB×PTFOMBTFDBEPSBPFOMBQVFSUBTVKFUF; PRECAUCIÓN
16 Inversión de la puerta 1. Abra la puerta para comenzar el proceso de inversión. 2. Quite los tornillos que se muestran en la figura a continuación (4 de la izquierda y 2 de la derecha). 3. Quite los dos tornillos decorativos de la izquierda con un destornillador. 4. Quite los dos tornillos del pe...
Page 59 - t1BSBFWJUBSEB×BSMBTFDBEPSBPMBQVFSUBBQPZFMBQVFSUB
17 ESP AÑOL Inversión de la puerta (cont.) 1. Mueva la puerta hacia la izquierda y alinee los orificios de la bisagra con los orificios de la secadora. 2. Mantenga la bisagra en su lugar mientras coloca los dos tornillos (para evitar que la puerta se caiga). 3. Inserte el pestillo en el lado derecho...
Page 60 - Instalación del kit de ventilación lateral; OPCIÓN 1: VENTILACIÓN LATERAL; t6UJMJDFNBUFSJBMQBSBWFOUJMBDJØOEFNFUBMQFTBEP
18 Instalación del kit de ventilación lateral Su secadora está equipada de fábrica para ventilar en la parte trasera. También puede configurarse para ventilar en la parte inferior o lateralmente (no está disponible la ventilación del lado derecho en los modelos a gas). 1VFEFBERVJSJSTFFMLJUBEBQUBEPSO...
Page 61 - Cónexión del conducto de ventilación de la secadora; PCKFUPTQVOUJBHVEPTOJFOUSFFODPOUBDUPDPOMPTNJTNPT
19 ESP AÑOL Cónexión del conducto de ventilación de la secadora W ADVERTENCIA Para reducir el riesgo de incendio, descargas eléctricas o heridas al usar su electrodoméstico, siga las precauciones básicas, incluyendo lo siguiente: t/PBQMBTUFOJEPCMFFMTJTUFNBEFDPOEVDUP Si no se siguen estas instruccion...
Page 62 - Sistema de conducto
20 INSTRUCCIONES PARA LA INSTALACIÓN Conexión del conducto de ventilación de la secadora (cont.) 3FTUFQJFT NQPSDBEBDPEPBEJDJPOBM/PTFSFDPNJFOEBVTBSNÈTEFDVBUSPDPEPTEF¡ DIRECCIONAMIENTO Y CONEXIÓN DEL SISTEMA DE CONDUCTO DE ESCAPE Siga las pautas indicadas más abajo para maximizar el desempeño de secad...
Page 63 - Conexión de secadoras a gas; Requisitos eléctricos para modelos a gas únicamente
21 ESP AÑOL INSTRUCCIONES PARA LA INSTALACIÓN Conexión de secadoras a gas W ADVERTENCIA Para reducir el riesgo de incendio, descargas eléctricas o heridas al usar su electrodoméstico, siga las precauciones básicas, incluyendo lo siguiente: Requisitos eléctricos para modelos a gas únicamente W ADVERT...
Page 64 - JOTUBMBEPSDBMJGJDBEPBHFODJBEFNBOUFOJNJFOUPPDPNQB×ÓB; Conexión del suministro de gas
22 Conexión de secadoras a gas (cont.) W ADVERTENCIA Para reducir el riesgo de incendio, descargas eléctricas o heridas al usar su electrodoméstico, siga las precauciones básicas, incluyendo lo siguiente: t-BJOTUBMBDJØOZFMNBOUFOJNJFOUPEFCFOQSPWFFSTFQPSVO JOTUBMBEPSDBMJGJDBEPBHFODJBEFNBOUFOJNJFOUPPDP...
Page 65 - Cómo conectar las secadoras eléctricas; Requisitos eléctricos únicamente para modelos eléctricos; t&TUBTFDBEPSBEFCFFTUBSDPOFDUBEBBVOTJTUFNBEF
23 ESP AÑOL Cómo conectar las secadoras eléctricas W ADVERTENCIA Para ayudar a evitar incendios, descargas eléctricas, heridas graves o muerte, el cableado e instalación a tierra deben cumplir DPOMBÞMUJNBFEJDJØOEFM$ØEJHP&MÏDUSJDP/BDJPOBM"/4*/'1" y todas las regulaciones locales aplicable...
Page 66 - t$POFDUFFMDBCMFEFBMJNFOUBDJØOBMBDBKBEFUFSNJOBMFT
24 INSTRUCCIONES PARA LA INSTALACIÓN Cómo conectar las secadoras eléctricas (cont.) SÓLO EE.UU. Conexión de cuatro hilos para secadoras eléctricas: Cable eléctrico con enchufe t4FSFRVJFSFVOBDPOFYJØOEFIJMPTFOUPEBTMBTJOTUBMBDJPOFT de viviendas móviles y prefabricadas, así como en todas las DPOTUSVDDJP...
Page 67 - conductores de
25 ESP AÑOL INSTRUCCIONES PARA LA INSTALACIÓN Conexión de cuatro hilos para secadoras eléctricas: Conexión directa t4FSFRVJFSFVOBDPOFYJØOEFIJMPTFOUPEBTMBTJOTUBMBDJPOFT de viviendas móviles y prefabricadas, así como en todas las DPOTUSVDDJPOFTOVFWBTQPTUFSJPSFTBMEFFOFSPEF t4FSFRVJFSFVOQSPUFDUPSEFUFOTJ...
Page 69 - conductores de
27 ESP AÑOL INSTRUCCIONES PARA LA INSTALACIÓN t*OTUBMFVODBCMFFMÏDUSJDPMJTUBEPQPS6-DPO 3 conductores de DPCSF/ÞN"8(DPNPNÓOJNP . t1SFQBSFVONÓOJNPEFQJFT NEFMPOHJUVEQBSBQPEFS quitar y reemplazar la secadora. 3. Conecte los dos conductores calientes del cable eléctrico a los tornillos del bloque term...
Page 70 - Requisitos especiales para viviendas; Revisión de instalación final; Revisión del flujo de aire; Revisión del nivelado
28 INSTRUCCIONES PARA LA INSTALACIÓN Requisitos especiales para viviendas móviles o prefabricadas Cualquier instalación en una vivienda móvil o prefabricada debe realizarse de conformidad con los Estándares de seguridad ZDPOTUSVDDJØOEFWJWJFOEBTQSFGBCSJDBEBT5ÓUVMP$'31BSUFPFTUÈOEBS$"/$4";.)ZDP...
Page 71 - Activar el test de instalación:; Prueba de instalación (Comprobación del sistema de evacuación)
29 ESP AÑOL INSTRUCCIONES PARA LA INSTALACIÓN 6OBWF[IBZBJOTUBMBEPMBTFDBEPSBIBHBFTUFUFTUQBSB asegurarse de que las condiciones del sistema de evacuación son las adecuadas para el funcionamiento correcto de la secadora. &TUFUFTUUJFOFDPNPPCKFUJWPNPTUSBSMFTJFYJTUFBMHÞOQSPCMFNB importante en el siste...
Page 72 - Test de Instalación; 'MVKPEFBJSFSFTUSJOHJEPPCMPRVFBEP; t$PNQSVFCFMBTDPOEJDJPOFTEFMDPOEVDUP; $ØOFYJØOEFMDPOEVDUPEF; Código de error; HS; Fallo del sensor de humedad.; PS; DPOFDUBSMBTTFDBEPSBTFMÏDUSJDBTwEF
30 INSTRUCCIONES PARA LA INSTALACIÓN Test de Instalación (Comprobación del sistema de evacuación) (cont.) 'MVKPEFBJSFSFTUSJOHJEPPCMPRVFBEP Evite funcionamientos prolongados o funcionamientos con múltiples formaciones de torceduras o codos. Conducto demasiado largo o muy torcido Tubería demasiado lar...
Page 73 - CÓMO USAR; Funcionamiento de la secadora
31 ESP AÑOL CÓMO USAR CÓMO USAR Funcionamiento de la secadora -*.1*"3&-'*-530%&1&-64"4 Si aún no ha limpiado el filtro de pelusas, extráigalo y elimine las pelusas procedentes de la última carga. Esto le ayudará a asegurar un funcionamiento más rápido y eficiente de secado. 1 $&#...
Page 74 - ciclos; Guía de ciclos
32 CÓMO USAR Ciclos de secado con sensor (Sensor dry) Los ciclos de secado con sensor utilizan el sistema exclusivo de sensor doble de LG para detectar y comparar el nivel de humedad en las prendas y en el aire, y programar el tiempo de secado del modo necesario para asegurar resultados superiores. ...
Page 75 - Clasificación de cargas; Etiquetas de mantenimiento de las telas; Cómo cargar la secadora; t3FWJTFUPEPTMPTCPMTJMMPTQBSBBTFHVSBSTFEFRVFFTUÏO; t/VODBTFRVFQSFOEBTRVFIBZBOTJEPFYQVFTUBTBBDFJUF; Consejos útiles de carga
33 ESP AÑOL CÓMO USAR Revise el filtro de pelusa antes de cada uso Asegúrese siempre de que el filtro de pelusa esté limpio antes de iniciar una carga nueva; un filtro de pelusa bloqueado incrementará los tiempos de secado. Para limpiarlo, tire del filtro de pelusa verticalmente y, con los dedos, en...
Page 76 - Botones modificadores de ciclo; Para añadir opciones de ciclo a un ciclo:; Funciones especiales; * Para guardar un programa personalizado:
34 CÓMO USAR NOTA NOTA Botones modificadores de ciclo Los ciclos de secado con senor (sensor dry) tienen ajustes preprogramados que se seleccionan automaticamente. Los ciclos de secado manual (manual dry) tienen ajustes predeterminados, pero pueden Personalizarse usando los botones modificadores de ...
Page 77 - MANTENIMIENTO; Limpieza regular; t%FTFODIVGFMBTFDBEPSBBOUFTEFMJNQJBSMBNJTNBQBSB; Limpieza del exterior
35 ESP AÑOL MANTENIMIENTO MANTENIMIENTO Limpieza regular W ADVERTENCIA Para reducir el riesgo de incendio, descargas eléctricas o heridas al usar su electrodoméstico, siga las precauciones básicas, incluyendo lo siguiente: t%FTFODIVGFMBTFDBEPSBBOUFTEFMJNQJBSMBNJTNBQBSB FWJUBSFMSJFTHPEFEFTDBSHBTFMÏDU...
Page 78 - RESOLUCIÓN DE PROBLEMAS; Antes de llamar a mantenimiento
36 RESOLUCIÓN DE PROBLEMAS Antes de llamar a mantenimiento Su secadora está equipada con un sistema de monitoreo de errores automático para la detección y el diagnóstico de problemas en una etapa temprana. Si su secadora no funciona adecuadamente o no funciona en lo absoluto, revise lo siguiente ant...
Page 80 - ESPECIFICACIONES; UTILIZACIÓN DEL SMART DIAGNOSISTM
38 ESPECIFICACIONES UTILIZACIÓN DEL SMART DIAGNOSIS™ Si experimenta algún problema con su secadora, llame al número 1-800-243-0000(1-888-542-2623 en Canadá). Siga las instrucciones de nuestro agente y estos pasos, cuando así se lo soliciten: 1. Pulse el botón ENCENDIDO/APAGADO (POWER) para encender ...
Page 81 - Instalación del kit de apilado; Este kit de apilado incluye:; el procedimiento de apilado sea demasiado riesgoso para
39 ESP AÑOL ACCESORIS OPCIONALES Instalación del kit de apilado Este kit de apilado incluye: t%PT SJFMFTMBUFSBMFTt6O SJFMGSPOUBMt$VBUSP UPSOJMMPT Herramientas necesarias para la instalación: t%FTUPSOJMMBEPS1IJMMJQT Para asegurar la instalación segura, siga las siguientes instrucciones. W ADVERTENCIA...
Page 83 - -MBNFBM IPSBTBMEÓBEÓBTBMB×P; y seleccione la opción adecuada a partir del menú.; WJTJUFOVFTUSPTJUJP8FCFOIUUQXXXMHTFSWJDFDPN; Información de registro del producto
41 ESP AÑOL Su secadora LG será reparada o reemplazada, a discreción de LG, si se comprueba que existe un defecto en el material o la mano EFPCSBCBKPDPOEJDJPOFTEFVTPOPSNBMFTEVSBOUFFMQFSÓPEPEFHBSBOUÓB i1FSÓPEPEFHBSBOUÓBwFTUBCMFDJEPNÈTBCBKPWJHFOUFEFTEFMBGFDIB i'FDIBEFDPNQSBwEFMBDPNQSBEFMDMJFOUFPSJHJOB...