KitchenAid KFDD500ESS - Manual
KitchenAid KFDD500ESS Range – Manual, read for free online in PDF format. We hope this helps you resolve any issues you may have. If you have further questions, please contact us through the contact form.


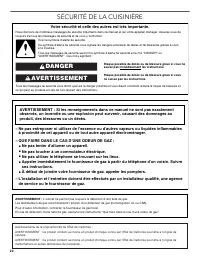
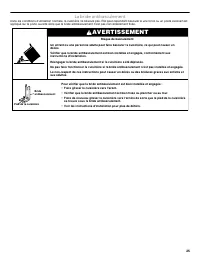
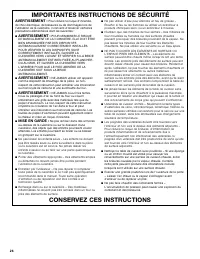

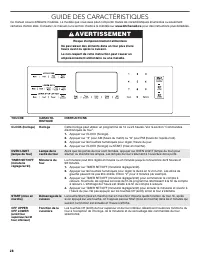
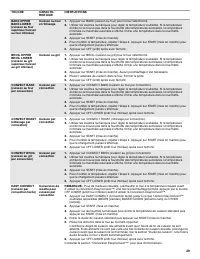
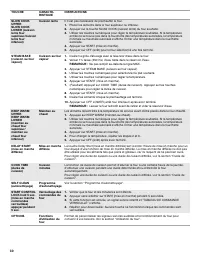
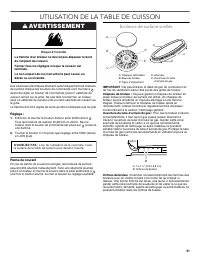
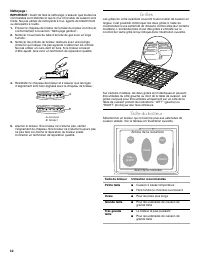
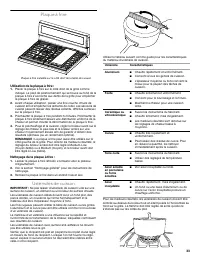
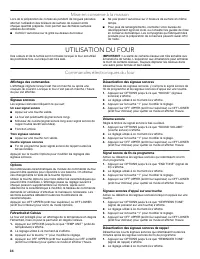
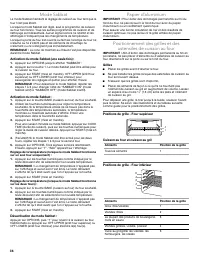
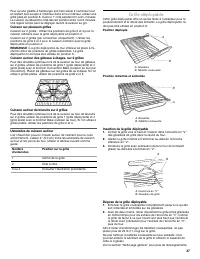
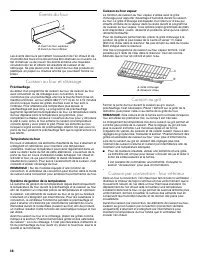
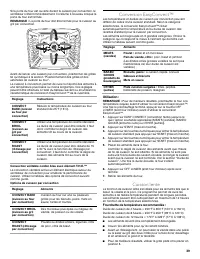
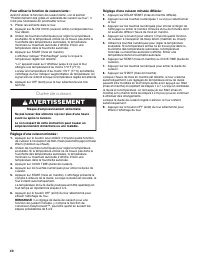
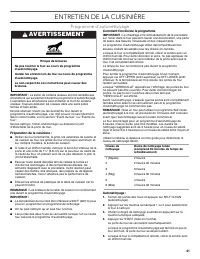
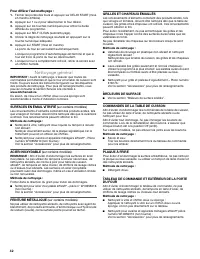
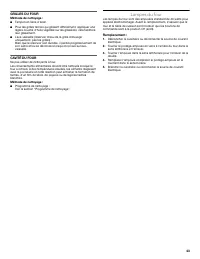
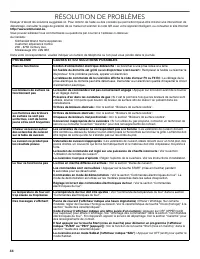
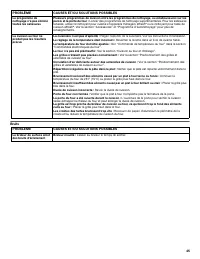
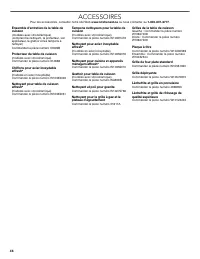


Table of Contents:
- Page 2 – RANGE SAFETY; You; DANGER; WARNING: Gas leaks cannot always be detected by smell.
- Page 3 – WARNING
- Page 4 – For self-cleaning ranges –
- Page 5 – FEATURE GUIDE; Food Poisoning Hazard
- Page 6 – Slow cooking
- Page 8 – COOKTOP USE; Push in and turn knob counterclockwise to; Turn knob to anywhere between HIGH and LOW.; Power Failure; Sealed Surface Burners; Replace the burner cap, making sure the alignment pins are; Turn on the burner. If the burner does not light, check cap; Fire Hazard
- Page 9 – To Clean the Griddle:; Cookware; Back of Range
- Page 10 – Home Canning
- Page 11 – OVEN USE; Electronic Oven Controls; Three Tones; Four Tones
- Page 12 – Press START to select the choice displayed in Step 2. Wait; Keep Warm; Sabbath Mode; Press START, OFF UPPER or OFF LOWER to save the setting; To Activate Sabbath Mode:; Press the number keypad as instructed by the scrolling text to; To Deactivate Sabbath Mode:
- Page 14 – Angle rack assembly up, and then insert into the “V” cutout in; Keep rack assembly lifted up at an angle, and then push in to; Gently slide rack assembly into oven, bypassing the “V”; Using 2 hands, gently pull the sliding shelf and the slide rails at; Oven Vents
- Page 16 – Slow Cook; Recommended Temperature Range:; Press OFF for the selected oven when finished.; Cook Time; Press the keypad for any cooking function except Self-Clean or; To Set a Delayed Timed Cook:; Press the number keypads to enter the number of hours and/or
- Page 17 – RANGE CARE; How the Cycle Works; Choose the clean level desired by pressing the appropriate; Burn Hazard
- Page 19 – PROBLEM SOLVER; PROBLEM; Nothing will operate
- Page 20 – Noises; Oven was not preheated - See the “Baking and Roasting” section.
- Page 21 – ACCESSORIES
- Page 22 – ONE YEAR LIMITED WARRANTY
- Page 23 – Table des matières
- Page 24 – SÉCURITÉ DE LA CUISINIÈRE; AVERTISSEMENT
- Page 25 – La bride antibasculement; Risque de basculement
- Page 27 – Pour les cuisinières avec programme d’autonettoyage –; Pour les appareils avec hotte de ventilation –
- Page 28 – GUIDE DES CARACTÉRISTIQUES; TOUCHE; Risque d'empoisonnement alimentaire
- Page 30 – Insérer les aliments lorsque le préchauffage est terminé.; OPTIONS
- Page 31 – UTILISATION DE LA TABLE DE CUISSON; Enfoncer et tourner le bouton dans le sens antihoraire à; Panne de courant; Brûleurs de surface scellés; Risque d’incendie
- Page 32 – Arrière de la cuisinière
- Page 33 – Plaque à frire; Utilisation de la plaque à frire :; Ustensiles de cuisson
- Page 34 – Mise en conserve à la maison; UTILISATION DU FOUR; Commandes électroniques du four; Trois signaux sonores; Quatre signaux sonores
- Page 35 – Maintien au chaud
- Page 36 – Mode Sabbat; Papier d’aluminium
- Page 37 – Grille déployable
- Page 38 – Préchauffage; Cuisson au gril
- Page 39 – Fourchette de température recommandée :
- Page 40 – Pour utiliser la fonction de cuisson lente :; Durée de cuisson
- Page 41 – ENTRETIEN DE LA CUISINIÈRE; Programme d’autonettoyage; Préparation de la cuisinière :; Fermer les portes des fours et appuyer sur SELF CLEAN; Durée de nettoyage totale
- Page 42 – Nettoyage général
- Page 43 – GRILLES DU FOUR; Méthode de nettoyage :; CAVITÉ DU FOUR; Lampes du four; Débrancher la cuisinière ou déconnecter la source de courant; Brancher la cuisinière ou reconnecter la source de courant
- Page 44 – RÉSOLUTION DE PROBLÈMES; PROBLÈME; Rien ne fonctionne
- Page 45 – Bruits; Brûleur mouillé : Laisser au brûleur le temps de sécher.
- Page 46 – ACCESSOIRES
- Page 47 – SI VOUS AVEZ BESOIN DE SERVICE :; GARANTIE LIMITÉE DE UN AN
THANK YOU for purchasing this high-quality product. Register your new range at www.kitchenaid.com. In Canada, register your
range at www.kitchenaid.ca.
For future reference, please make a note of your product model and serial numbers. These can be located on the serial plates. The
serial plates are located behind the control panel. You may view them by rotating the serial plates up.
Model Number __________________________________________
Serial Number ___________________________________________
Para una versión de estas instrucciones en español, visite www.kitchenaid.com.
Deberá tener los números de modelo y serie, que se pueden encontrar en las placas de serie detrás del panel de control. Los puede
ver al rotar hacia arriba las placas de serie.
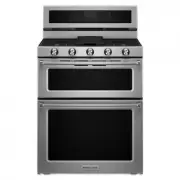
DUAL FUEL
DOUBLE OVEN RANGE
USER INSTRUCTIONS
Table of Contents
RANGE SAFETY.......................................................................................2
The Anti-Tip Bracket .............................................................................3
FEATURE GUIDE .....................................................................................5
COOKTOP USE ........................................................................................8
Sealed Surface Burners ........................................................................8
Grates ....................................................................................................9
Burner Size ............................................................................................9
Griddle ...................................................................................................9
Cookware ..............................................................................................9
Home Canning ....................................................................................10
OVEN USE ..............................................................................................11
Electronic Oven Controls ....................................................................11
Keep Warm .........................................................................................12
Sabbath Mode ....................................................................................12
Aluminum Foil......................................................................................13
Positioning Racks and Bakeware .......................................................13
Roll-Out Rack ......................................................................................13
Oven Vents ..........................................................................................14
Baking and Roasting...........................................................................14
Broiling ................................................................................................15
Lower Oven Convection Cooking.......................................................15
EasyConvect™ Conversion ................................................................15
Slow Cook ...........................................................................................16
Cook Time ...........................................................................................16
RANGE CARE.........................................................................................17
Self-Cleaning Cycle.............................................................................17
General Cleaning.................................................................................18
Oven Lights .........................................................................................18
PROBLEM SOLVER...............................................................................19
ACCESSORIES ......................................................................................21
WARRANTY............................................................................................22
W10694061C
"Loading the manual" means you need to wait until the file loads and becomes available for online reading. Some manuals are very large, and the time they take to appear depends on your internet speed.
Was this manual helpful?
About this manual
- Brand
- KitchenAid
- Model
- KFDD500ESS
- Document type
- Manual
- Category
- Range
- Language(s)
- English, French
- Pages
- 48
- File size
- 2.6 MB
- Format
Other Manuals for KitchenAid KFDD500ESS
Summary
2 RANGE SAFETY You can be killed or seriously injured if you don't immediately You can be killed or seriously injured if you don't follow All safety messages will tell you what the potential hazard is, tell you how to reduce the chance of injury, and tell you what canhappen if the instructions are n...
3 The Anti-Tip Bracket The range will not tip during normal use. However, the range can tip if you apply too much force or weight to the open door without the anti-tip bracket fastened down properly. Tip Over Hazard A child or adult can tip the range and be killed. Verify the anti-tip bracket has be...
4 IMPORTANT SAFETY INSTRUCTIONS SAVE THESE INSTRUCTIONS WARNING: To reduce the risk of fire, electrical shock, injury to persons, or damage when using the range, follow basic precautions, including the following: ■ WARNING: TO REDUCE THE RISK OF TIPPING OF THE RANGE, THE RANGE MUST BE SECURED BY PRO...
Ask a question
Related manuals
Popular KitchenAid Ranges
More KitchenAid Ranges models
 KitchenAid KSIS730PSS Manual
 KitchenAid KFDC506JSS Manual
 KitchenAid KFDC558JSS Manual
 KitchenAid KFED500EBS Manual
 KitchenAid KFED500ESS Manual
 KitchenAid KFEG500EBS Manual
 KitchenAid KFEG500ESS Manual
 KitchenAid KFEG500EWH Manual
 KitchenAid KFEG504KPS User Manual
 KitchenAid KFGC500JSS Manual
 KitchenAid KFGC506JPA Manual
 KitchenAid KFGC558JSS Manual
 KitchenAid KFGD500EBS Manual