KitchenAid KFGC500JPA - Installation Manual
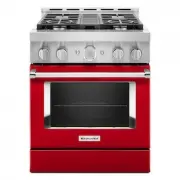
KitchenAid KFGC500JPA Range – Installation Manual, read for free online in PDF format. We hope this helps you resolve any issues you may have. If you have further questions, please contact us through the contact form.


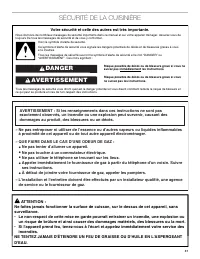

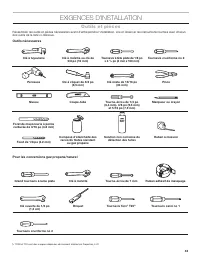
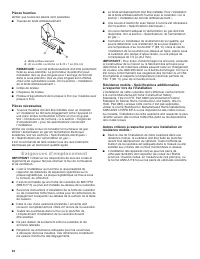
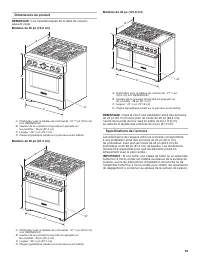
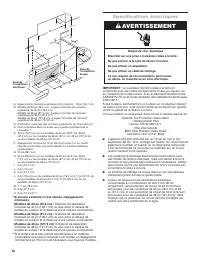
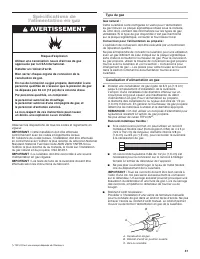
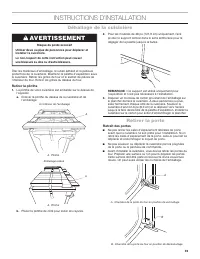
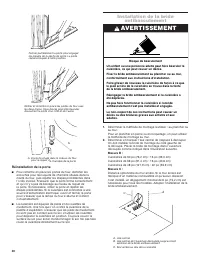
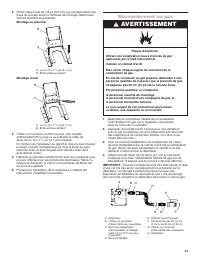
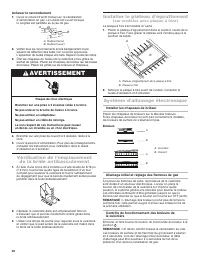
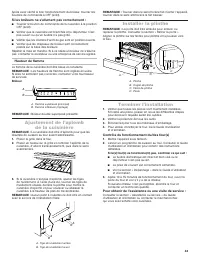
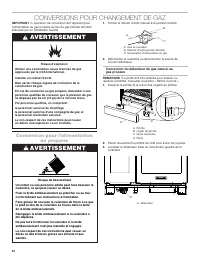
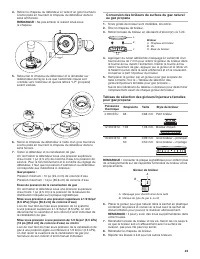
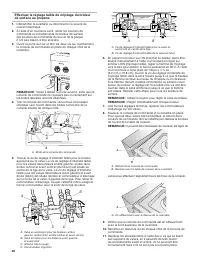
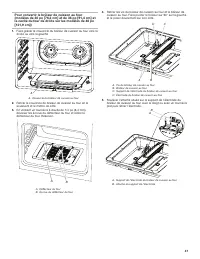

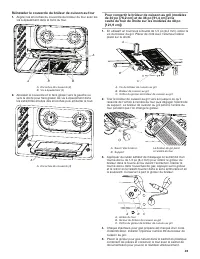
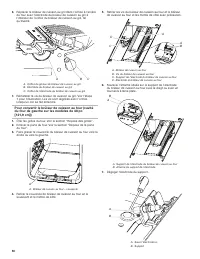
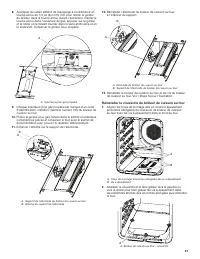
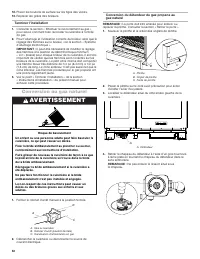
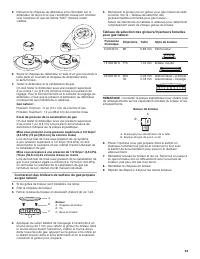

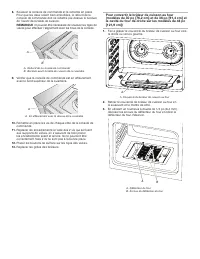
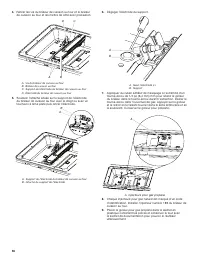
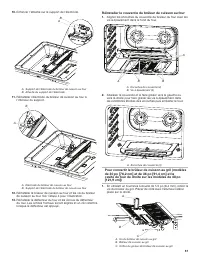
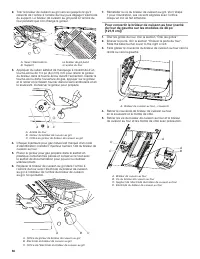
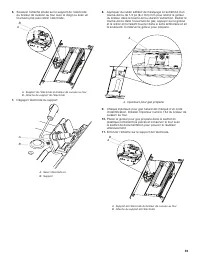
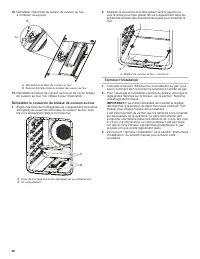


Table of Contents:
- Page 2 – RANGE SAFETY; DO NOT ATTEMPT TO EXTINGUISH AN OIL/GREASE FIRE WITH WATER.
- Page 3 – Tip Over Hazard; To verify the anti-tip bracket is installed and engaged:; WARNING; Slide range back so rear range foot is under anti-tip bracket.
- Page 4 – INSTALLATION REQUIREMENTS; Tools and Parts; Tools Needed
- Page 5 – Location Requirements; Mobile Home - Additional Installation Requirements
- Page 6 – Cabinet Requirements; If not using ventilation, Minimum Clearances
- Page 7 – Explosion Hazard
- Page 8 – Type of Gas; Propane Gas conversion:; Gas Supply Line; Flexible metal appliance connector:; Gas Pressure Regulator
- Page 9 – INSTALLATION INSTRUCTIONS; Unpack the Range; Remove Kick Plate; Remove Door; Door Removal; Excessive Weight Hazard
- Page 10 – Replace the Door; Install Anti-Tip Bracket
- Page 11 – Make Gas Connection
- Page 12 – Complete Connection; Verify Anti-Tip Bracket Location; Install Burner Caps; Burners; Initial Lighting and Gas Flame Adjustments; Electrical Shock Hazard
- Page 13 – Flame Height; Burner; Level Range; If you need Assistance or Service:
- Page 14 – GAS CONVERSIONS; Propane Gas Conversion; To Convert Gas Pressure Regulator from Natural Gas
- Page 19 – Replace Oven Bake Burner Cover
- Page 20 – Convert Oven Bake Burner (left oven cavity on
- Page 22 – Complete Installation; Natural Gas Conversion; To Convert Gas Pressure Regulator from Propane to
- Page 30 – NOTES
- Page 31 – SÉCURITÉ DE LA CUISINIÈRE; Risque possible de décès ou de blessure grave si vous ne; Votre sécurité et celle des autres est très importante.; AVERTISSEMENT
- Page 32 – se trouve sous la bride antibasculement.
- Page 33 – EXIGENCES D’INSTALLATION; Outils et pièces; Outils nécessaires
- Page 34 – Exigences d’emplacement; Résidence mobile – Spécifications additionnelles
- Page 36 – Spécifications électriques
- Page 37 – Type de gaz; Conversion pour l’alimentation au propane :; Canalisation d’alimentation en gaz; Raccord métallique flexible :; Utiliser une canalisation neuve d'arrivée de gaz
- Page 38 – Mise sous pression à une pression supérieure à 1/2 lb/po
- Page 39 – INSTRUCTIONS D’INSTALLATION; Déballage de la cuisinière; Retirer la plinthe; Retirer la porte; Retrait des portes; Risque du poids excessif
- Page 40 – Réinstallation de la porte; Installation de la bride; Risque de basculement
- Page 41 – Raccordement au gaz
- Page 42 – Achever le raccordement; Vérification de l’emplacement; Installer les chapeaux de brûleur; Brûleurs; Allumage initial et réglage des flammes de gaz
- Page 43 – Brûleur; Ajustement de l’aplomb; Pour obtenir de l’assistance ou une visite de service :
- Page 44 – CONVERSIONS POUR CHANGEMENT DE GAZ; Conversion pour l’alimentation; Conversion du détendeur du gaz naturel au
- Page 45 – Tableau de sélection des gicleurs/injecteurs femelles
- Page 51 – Réinstaller le couvercle du brûleur de cuisson au four
- Page 52 – Terminer l’installation; Conversion au gaz naturel; Conversion du détendeur du gaz propane au
- Page 61 – REMARQUES
INSTALLATION INSTRUCTIONS
C
ommerCial
-S
tyle
G
aS
r
anGeS
30" (76.2
Cm
), 36" (91.4
Cm
),
and
48" (121.9
Cm
)
For residential use only
INSTRUCTIONS D’INSTALLATION
C
uiSinière
à
Gaz
de
Style
CommerCial
de
30
po
(76,2
Cm
), 36
po
(91,4
Cm
)
et
48
po
(121,9
Cm
)
Pour utilisation résidentielle uniquement
Table of Contents/Table des matières
W11508887B
RANGE SAFETY ........................................2
INSTALLATION REQUIREMENTS ............4
Tools and Parts ........................................4
Location Requirements ...........................5
Electrical Requirements ..........................7
Gas Supply Requirements ......................7
INSTALLATION INSTRUCTIONS ..............9
Unpack the Range ..................................9
Remove Door ..........................................9
Install Anti-Tip Bracket ..........................10
Make Gas Connection ..........................11
Verify Anti-Tip Bracket Location ...........12
Install Griddle Tray .................................12
Electronic Ignition System ....................12
Level Range ...........................................13
Install Kick Plate ....................................13
Complete Installation ............................13
GAS CONVERSIONS ...............................14
Propane Gas Conversion ......................14
Natural Gas Conversion ........................22
SÉCURITÉ DE LA CUISINIÈRE ..............31
EXIGENCES D’INSTALLATION ..............33
Outils et pièces ......................................33
Exigences d’emplacement ....................34
Spécifications électriques .....................36
Spécifications de l’alimentation en gaz ..37
INSTRUCTIONS D’INSTALLATION ........39
Déballage de la cuisinière .....................39
Retirer la porte .......................................39
Installation de la bride antibasculement..40
Raccordement au gaz ...........................41
de la bride antibasculement ..................42
Installer le plateau d’égouttement ........42
Système d’allumage électronique.........42
Ajustement de l’aplomb de la cuisinière ..43
Installer la plinthe ..................................43
Terminer l’installation .............................43
DE GAZ .....................................................44
Conversion pour l’alimentation
au propane ............................................44
Conversion au gaz naturel ....................52
IMPORTANT:
Save for local electrical inspector’s use.
Installer:
Leave installation instructions with the homeowner.
Homeowner:
Keep installation instructions for future reference.
IMPORTANT :
Conserver ces instructions à l’usage de l’inspecteur des installations
électriques local.
Installateur :
Remettre les instructions d’installation au propriétaire.
Propriétaire :
Conserver les instructions d’installation pour
référence ultérieure.
www.kitchenaid.com (U.S.A.) www.kitchenaid.ca (Canada)
"Loading the manual" means you need to wait until the file loads and becomes available for online reading. Some manuals are very large, and the time they take to appear depends on your internet speed.
Was this manual helpful?
About this manual
- Brand
- KitchenAid
- Model
- KFGC500JPA
- Document type
- Installation Manual
- Category
- Range
- Language(s)
- English, French
- Pages
- 64
- File size
- 17 MB
- Format
Summary
2 RANGE SAFETY WARNING: If the information in these instructions is not followed exactly, a fire or explosion may result causing property damage, personal injury or death. – Do not store or use gasoline or other flammable vapors and liquids in the vicinity of this or any other appliance. – WHAT TO D...
3 WARNING: Gas leaks cannot always be detected by smell.Gas suppliers recommend that you use a gas detector approved by UL or CSA.For more information, contact your gas supplier.If a gas leak is detected, follow the “What to do if you smell gas” instructions. Tip Over Hazard A child or adult can tip...
4 INSTALLATION REQUIREMENTS Tools and Parts Gather the required tools and parts before starting installation. Read and follow the instructions provided with any tools listed here. Tools Needed For Propane/Natural Gas Conversions Large flat-blade screwdriver Adjustable wrench 7 mm Nut Driver Masking ...
Ask a question
Related manuals
Popular KitchenAid Ranges
More KitchenAid Ranges models
 KitchenAid KFED500ESS Installation Manual
 KitchenAid KFEG500EBS User Manual
 KitchenAid KFEG500ESS User Manual
 KitchenAid KFEG500EWH Installation Manual
 KitchenAid KFEG504KPS User Manual
 KitchenAid KFGC500JSS Installation Manual
 KitchenAid KFGC506JPA User Manual
 KitchenAid KFGC558JSS Installation Manual
 KitchenAid KFGD500EBS User Manual
 KitchenAid KFGD500ESS Installation Manual
 KitchenAid KFGD500EWH User Manual
 KitchenAid KFGG500EBS Installation Manual
 KitchenAid KFGG500ESS Installation Manual