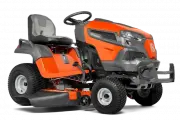
Husqvarna TS 242TXD - User Manual
Husqvarna TS 242TXD – User Manual, read for free online in PDF format. We hope this helps you resolve any issues you may have. If you have further questions, please contact us through the contact form.
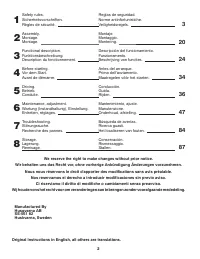


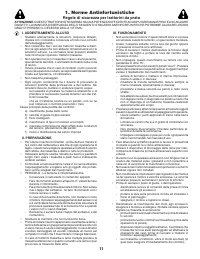


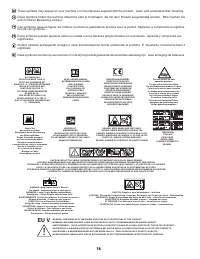
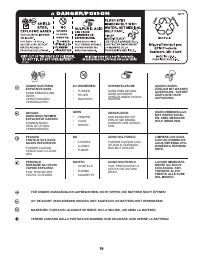

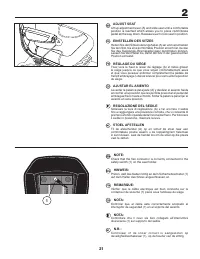
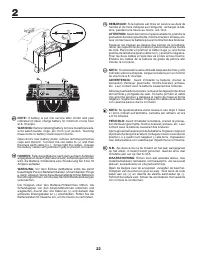
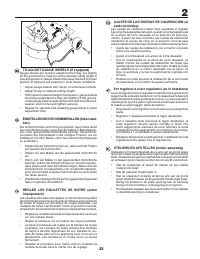
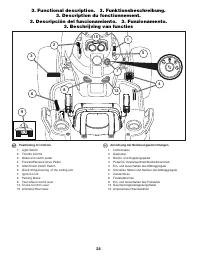
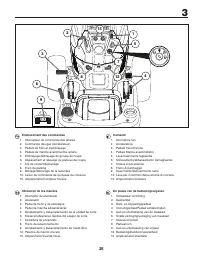
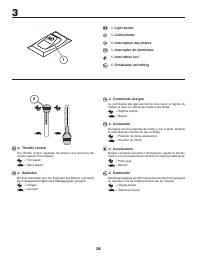
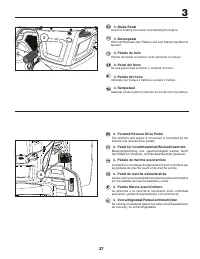
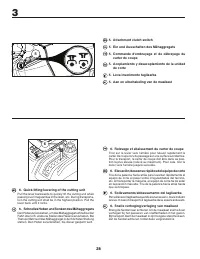

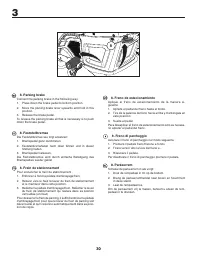
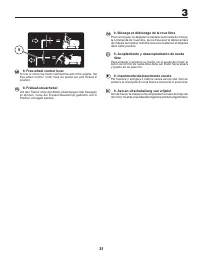

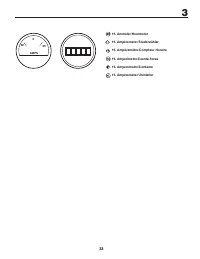
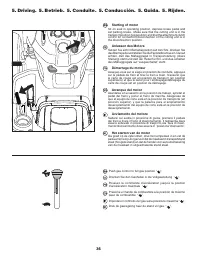
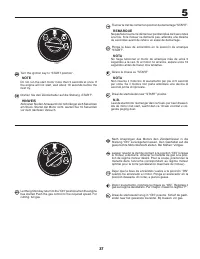

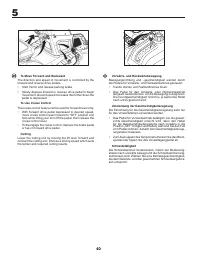
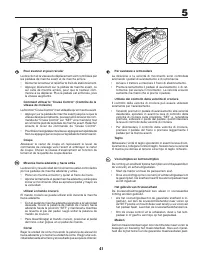

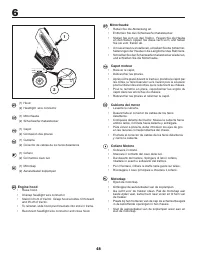
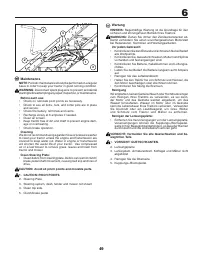
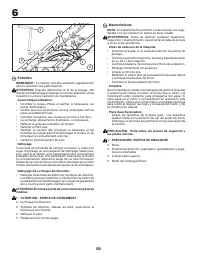
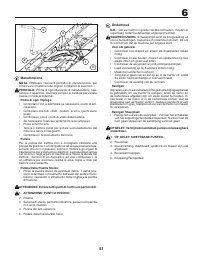
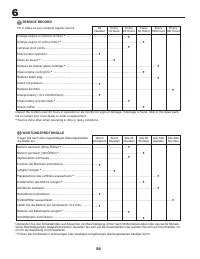
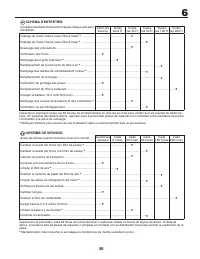
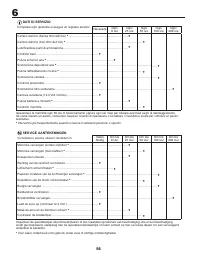
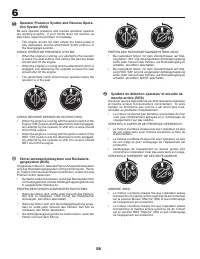
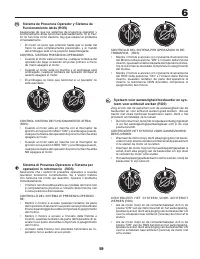
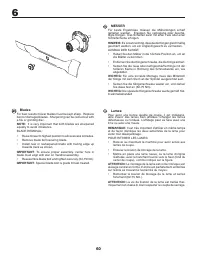

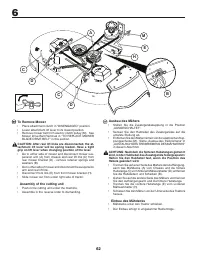
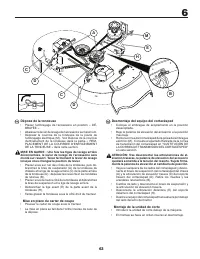
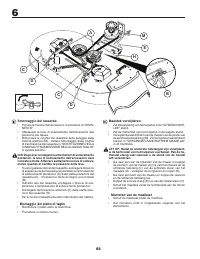


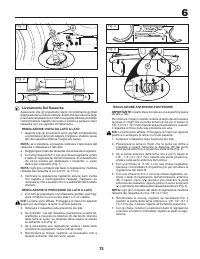

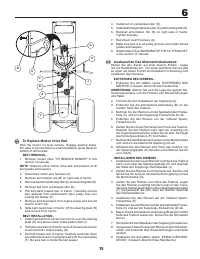
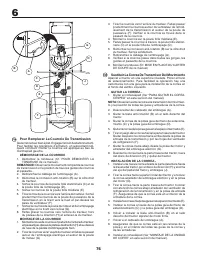
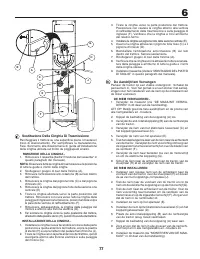

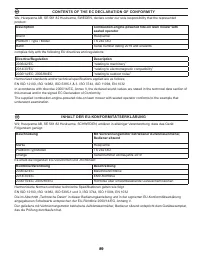
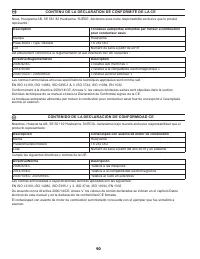


Table of Contents:
- Page 3 – Safe Operation Practices for Ride-On Mowers
- Page 4 – IV. MAINTENANCE AND STORAGE
- Page 5 – Sicherheitshinweise; Hinweise zur sicheren Bedienung von Aufsitzmähern
- Page 6 – IV. WARTUNG UND LAGERUNG
- Page 7 – I. PRÉCAUTIONS D’UTILISATION; Règles de Sécurité
- Page 8 – IV. ENTRETIEN ET ENTREPOSAGE
- Page 9 – Reglas De Seguridad; Prácticas de Operación Seguras para las Segadoras Conducibles; IMPORTANTE
- Page 10 – IV. MANTENIMIENTO Y ALMACENAMIENTO
- Page 11 – I. ADDESTRAMENTO ALL’USO; Norme Antinfortunistiche; Regole di sicurezza per trattorini da prato; ATTENZIONE
- Page 12 – IV. MANUTENZIONE E PERIODI DI INATTIVITA’
- Page 13 – Veiligheidsregels; Veilige bedieningsmethoden voor zittrekkers; BELANGRIJK
- Page 14 – IV. ONDERHOUD EN OPSLAG
- Page 18 – EU V
- Page 24 – Beschrijving van functies; Positioning of controls; Switch; Anordnung der Bedienungseinrichtungen
- Page 25 – luci; Ubicación de los mandos; verlichting
- Page 29 – Zündschloss
- Page 33 – AMPS
- Page 39 – SPURGO DELLA TRASMISSIONE; TRANSMISSIE ONTLUCHTEN
- Page 43 – Sistema per operazioni in retromarcia (ROS); Non falciare in retromarcia; Cutting
- Page 55 – INFORME DE SERVICIO
- Page 60 – Blades; IMPORTANT; MESSER
- Page 61 – Messen
- Page 65 – To Replace Mower Blade Drive Belt
- Page 69 – To Level Mower
- Page 70 – Ausrichten Des Mähers
- Page 71 – Mise À Niveau De La Tondeuse
- Page 72 – Nivelación Del Cortacésped
- Page 73 – Livellamento Del Rasaerba; REGOLAZIONE VISIVA DA LATO A LATO
- Page 74 – Maaier Gelijkmatig Afstellen; VISUEEL AFSTELLEN IN DE BREEDTE
- Page 75 – Austauschen Des Motorantriebsriemens; ENTFERNEN DES RIEMENS -; To Replace Motion Drive Belt
- Page 76 – Sustituir La Correa De Transmisor Del Movimiento; INSTALACIÓN DE LA CORREA -; Pour Remplacer La Courroie De Transmission; DÉMONTAGE DE LA COURROIE
- Page 77 – Sostituzione Della Cinghia Di Trasmissione; RIMOZIONE DELLA CINGHIA -; De Aandrijfriem Vervangen; DE RIEM VERWIJDEREN -
- Page 88 – Onderhoud; Al termine della stagione effettuare i seguenti interventi:; Servizio
- Page 89 – CONTENTS OF THE EC DECLARATION OF CONFORMITY; Description; INHALT DER EU-KONFORMITÄTSERKLÄRUNG; Beschreibung
- Page 92 – CL
Euro
114 20 21-20 Rev. 1
TS 242TXD
Instruction manual
Please read these in struc tions care-
ful ly and make sure you un der stand
them before using this ma chine.
Manuel d’instructions
Merci de lire trés attentivement le
manuel d'instructions. Assurez-vous
d'avoir tout compris avant d'utiliser
ce tracteur.
Manuale di istruzioni
Prima di utilizzare la macchina
leggete queste istruzioni con at-
tenzione ed accertatevi di averle
comprese bene.
Instructieboekje
Lees deze instructies aandachtig en
zorg dat u ze begrijpt voordat u deze
ma chine gebruikt.
Manual de las instrucciones
Por favor lea cuidadosamente y
comp-renda estas intrucciones an tes
de usar esta maquina.
Bedienungsanleitung
Lesen Sie diese Anweisungen
sorgfältig durch und machen Sie sich
mit dem Inhalt vertraut, bevor Sie
diese Maschine benutzen.
"Loading the manual" means you need to wait until the file loads and becomes available for online reading. Some manuals are very large, and the time they take to appear depends on your internet speed.
Was this manual helpful?
About this manual
- Brand
- Husqvarna
- Model
- TS 242TXD
- Document type
- User Manual
- Language(s)
- German, English, Spanish, French, Italian, Dutch
- Pages
- 92
- File size
- 4.1 MB
- Format
Summary
3 1. Safety Rules Safe Operation Practices for Ride-On Mowers IMPORTANT: THIS CUTTING MACHINE IS CAPABLE OF AMPUTATING HANDS AND FEET AND THROWING OBJECTS. FAILURE TO OBSERVE THE FOLLOWING SAFETY INSTRUCTIONS COULD RESULT IN SERIOUS INJURY OR DEATH. I. TRAINING • Read the instructions carefully. Be ...
4 WARNING: CHILDREN CAN BE INJURED BY THIS EQUIPMENT. The American Academy of Pediatrics recommends that children be a minimum of 12 year of age before operating a pedestrian controlled lawn mower and a minimum of 16 years of age before operating a riding lawn mower. • When loading or unloading this...
5 1. Sicherheitshinweise Hinweise zur sicheren Bedienung von Aufsitzmähern WICHTIG: DIESE MÄHMASCHINE KANN HÄNDE ODER FÜSSE ABTRENNEN UND GEGENSTÄNDE DURCH DIE LUFT SCHLEUDERN. BEI MISSACHTUNG DER FOLGENDEN SICHERHEITSHINWEISE BESTEHT DIE GEFAHR SCHWERER VERLETZUNGEN ODER TÖDLICHER UNFÄLLE. I. SCHUL...
Ask a question
Related manuals
Popular Husqvarna Other
More Husqvarna Other models
 Husqvarna TS 154X User Manual
 Husqvarna TS200FR Manual
 Husqvarna TS 215T User Manual
 Husqvarna TS 217T User Manual
 Husqvarna TS 238 User Manual
 Husqvarna TS 242 User Manual
 Husqvarna TS 242XD User Manual
 Husqvarna TS 248G User Manual
 Husqvarna TS 248XD User Manual
 Husqvarna TS 250 XL Manual
 Husqvarna TS 254XG User Manual
 Husqvarna TS300-E3 Manual