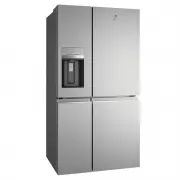
Electrolux EQE6870SA - User Manual
Electrolux EQE6870SA Refrigerator – User Manual, read for free online in PDF format. We hope this helps you resolve any issues you may have. If you have further questions, please contact us through the contact form.


Table of Contents:
- Page 2 – WE’RE THINKING OF YOU; Visit our website to:; CUSTOMER CARE AND SERVICE; Contents
- Page 3 – ENGLISH 3; SAFETY INFORMATION; Note: You must read these warnings; WARNING; • It
- Page 4 – FEATURES AT A GLANCE
- Page 5 – INSTALLING YOUR NEW APPLIANCE
- Page 6 – To level the cabinet using the front rollers:; Door
- Page 7 – CONNECTING THE WATER SUPPLY
- Page 9 – ENGLISH 9; External User interface; DESCRIPTION
- Page 10 – Follow these easy steps to connect you fridge.
- Page 12 – External JADE User interface
- Page 13 – TASTESEALFLEX control panel
- Page 14 – SETTING COOLING TEMPERATURES
- Page 15 – AUTOMATIC ICE & WATER DISPENSER; Dispenser
- Page 17 – ENGLISH 17; STORAGE FEATURESER; CAUTION; Flip Shelf; Drawers; Opening the Crisper Drawer
- Page 18 – Removing the FreshSeal; Crisper; Tilt bin up so the back of the bin is off the; Adjustable Door Bins
- Page 19 – and pull to remove it from the cabinet.; Shelves in 3 Height Positions & Inverted; I P
- Page 20 – GENERAL INFORMATION; CLEANING YOUR REFRIGERATOR; slightly for air circulation.; CHANGING THE FILTER; Remove the air filter cover by squeezing the
- Page 22 – FOOD STORAGE GUIDE; IMPORTANT
- Page 23 – ENGLISH 23; TROUBLESHOOTING; Concern
- Page 26 – NOISES; Appliance noise; BRRR; OK
- Page 27 – ENGLISH 27; Warranty
ENGLISH 1
EQE6870
Refrigeration
User Manual
EN
"Loading the manual" means you need to wait until the file loads and becomes available for online reading. Some manuals are very large, and the time they take to appear depends on your internet speed.
Was this manual helpful?
About this manual
- Brand
- Electrolux
- Model
- EQE6870SA
- Document type
- User Manual
- Category
- Refrigerator
- Language(s)
- English
- Pages
- 28
- File size
- 7.8 MB
- Format
Summary
2 www.electrolux.com WE’RE THINKING OF YOU Thank you for choosing this Electrolux product. We have created it to give you impeccable performance for many years, with innovative technologies that help make life simpler features you might not find on ordinary appliances. Please spend a few minutes read...
ENGLISH 3 • When positioning the appliance, ensure the supply cord is not trapped or damaged. • Do not locate multiple portable socket-outlets or portable power supplies at the rear of the appliance. WARNING R600a refrigerant warning This appliance contains flammable R600a refrigerant. Avoid safety ...
4 www.electrolux.com 2. FEATURES AT A GLANCE 29 30 32 31 1 2 3 4 5 6 7 8 9 11 12 13 14 15 16 17 23 24 25 10 23 28 28 18 19 20 21 22 27 27 24 26 1 Ice Maker 12 Crisper 2 Air distributor - Multiflow 13 Left Snack Zone compartment 3 Air filter 14 Right Snack Zone Compartment 4 Water filter 15 Upper fixed ...
Ask a question
Related manuals
Popular Electrolux Refrigerators
More Electrolux Refrigerators models
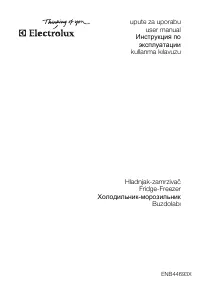 Electrolux ENB 44693 X User Manual
 Electrolux EQE5607BA User Manual
 Electrolux EQE5657BA User Manual
 Electrolux EQE6870BA User Manual
 Electrolux ERN 2372 Manual
 Electrolux ERW0673AOA User Manual
 Electrolux RNT7ME34K1 User Manual
 Electrolux EBE4507SA-L User Manual
 Electrolux EBE5100SDRH User Manual
 Electrolux EBE5307BC-L User Manual
 Electrolux EBE5307BC-R User Manual
 Electrolux EHE5167SB User Manual