Page 2 - Specific warnings for appliances with; I M P O R T A N T S A F E G U A R D S
2 • Use this appliance only as described in this instruction manual. As with all electrical equipment, whilst the instructions aim to cover as many eventuali- ties as possible, caution and common sense should be applied when operating and instal- ling this appliance. • This appliance is designed for...
Page 3 - ELECTRICAL CONNECTIONS; WHAT IS THE WATER-AIR PINGUINO
3 • Refrigerant gas may be odourless. • The appliance must be installed, used and stored in a room with a surface area greater than 15 m². • This appliance contains about 300 g of R290 refrigerant gas. • R290 refrigerant gas complies with European environmental directives. Do not perforate any of th...
Page 4 - DESCRIPTION
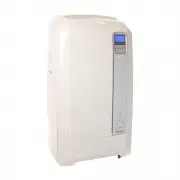
4 DESCRIPTION A Air outlet grille B Control panel with advanced LCD display C Handle D Grille E Castors F Air intake grille with dust filter G Condensate drain connector H Power cable I Pull out tank /tank drawer J Tank opening door K Air exhaust hose L Remote control M Air exhaust hose housing N Wi...
Page 5 - PREPARING FOR USE; Air-conditioning without installation
5 You can also use the “adjustable bar” accessory (T).• Fit the window outlet in the housing in the bar (fig. 4) • Position the bar on the window sill and adjust until it fits in the guides of the blind (the length can be blocked with the pin pro-vided), then lower the blind (fig. 5). • Fit the air ...
Page 6 - Air-conditioning with installation; • Fit the flange accessory (S) provided in the; Keep the air hose as short and free of cur-
6 Keep the air hose as short and free of cur- ves as possible to avoid bottlenecks. Air-conditioning with installation If required, your appliance can be installed semi-permanently (Fig. 8).Proceed as follows:• Drill a 134 mm dia. hole in an outside wall or through a window pane, respecting the heig...
Page 7 - The appliance is fitted with a resin lime-; CF; ” is displayed when the limescale fil-; Setting water hardness; To set water hardness, proceed as follows:; Filling the tank
7 PREPARING FOR OPERATION IN WATER MODE Once the appliance has been installed, it is ready for use. However, its efficiency can be enhanced by ope-rating it in the exclusive De’longhi water mode. The water in the tank increases the cooling po-wer of your Pinguino and at the same time redu-ces noise ...
Page 8 - Replacing the limescale filter
8 ling hole. It holds a maximum of 10 litres. Replace the cap correctly and close the tank, pu- shing it in as far as it will go. The tank hole has a mesh filter to prevent the introduction of foreign matter. If necessary, this filter can be unscrewed and removed for cleaning under running water. • ...
Page 9 - button; Turning the appliance on; Resin filter
9 DESCRIPTION OF THE CONTROL PANEL WITH ADVANCED LCD DISPLAY 1 Air conditioning symbol2 Dehumidifying symbol3 Heating symbol4 Fan symbol5 SMART symbol6 BOOST symbol7 SLEEP symbol8 Alarm symbol9 Temperature indicator10 “No water” symbol11 Timer symbol12 Speed indicator13 AUTOFAN indicator 14 FAN butt...
Page 11 - hl; MODE
11 23 1 2 3 5 4 6 9 11 13 12 16 17 20 21 22 23 24 25 19 18 15 14 10 8 7 nutes before the appliance starts giving out hot air. - In this mode, the fan may operate for short periods, even though the set temperature has already been reached. - In this mode, if the alarm “ hl ” is displayed, empty the i...
Page 13 - USING THE REMOTE CONTROL; Inserting or replacing the batteries; OK; USING THE REMOTE CONTROL UNIT
13 USING THE REMOTE CONTROL • Point the remote control at the receiver on the appliance. The remote control must be no more than 7 metres away from the ap-pliance (without obstacles between the re-mote control and the receiver). • The remote control must be handled with extreme care. Do not drop it ...
Page 14 - When the BOOST function is active, the; SELECTING THE TEMPERATURE
14 BOOST function (fig. 28) Ideal for the summer to cool rooms rapidly. Activate by simply pressing the button. The appliance operates in air conditioning mode at maximum fan speed and maximum power. While this function is selected, it is not possible to set the temperature or change fan speed. When...
Page 15 - PROGRAMMING THE TIMER; Programming start up
15 If you need to disable the timer on or off pro- gramme in advance, press the or but- ton respectively twice. PROGRAMMING THE TIMER The timer can be programmed to start and stop the appliance when required. Programming start up • Press the button. The start-up time and symbol flash on the remote c...
Page 16 - Error messages are displayed on the appliance display.; Low Temperature; Change filter; Probe Failure
16 SELF-DIAGNOSIS The appliance has a self diagnosis system to identify a number of malfunctions. Error messages are displayed on the appliance display. IF ... IS DISPLAYED, ...WHAT SHOULD I DO? Low Temperature (frost prevention) The appliance is fitted with a frost protection device to avoid excess...
Page 18 - CLEANING; Cleaning the cabinet
18 Certain models have a silver ion dust filter and an additional electrostatic filter in the grill at the back Silver ion filter This dust filter is treated with silver ions which not just retain dust particles, but also have an efficient antibacterial action. It also greatly redu- ces concentratio...
Page 19 - Emptying the tank; To facilitate this operation, at the start of the se-
19 Cleaning of the silver ion filter and of the electrostatic filter (certain models only) To clean the silver ion dust filter, the electrostatic filter must be temporarily removed. To clean the filters, use a vacuum cleaner at me- dium power. The silver ion filter can be washed with lukewarm water....
Page 20 - TECHNICAL CHARACTERISTICS:; Limit conditions; oom temperature for air conditioning 21÷35°C; GUARANTEE
20 TECHNICAL CHARACTERISTICS: Power supply voltage Maximum absorbed power in air conditioning Refrigerant Cooling capacity Limit conditions R oom temperature for air conditioning 21÷35°C Room temperature for heating 10÷27°C GUARANTEE The terms of the guarantee and technical assi- stance are given in...
Page 21 - TROUBLESHOOTING
21 PROBLEM CAUSE SOLUTION The air conditioner does not come on • there is no current • it is not plugged into the mains • the internal safety device has tripped • wait • plug into the mains • call the Service Centre The air conditioner works for a short time only • there are bends or kinks in the ai...