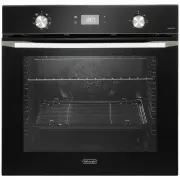
Page 2 - PRODUCT LABEL; codes and specifications:
2 2 Dear Customer, Thank you for having purchased and given your preference to our product. The safety precautions and recommendations reported below are for your own safety and that of others. They will also provide a means by which to make full use of the features offered by your appliance. Please...
Page 3 - IMPORTANT SAFETY PRECAUTIONS AND RECOMMENDATIONS; in this manual, including those for surface temperatures.; This film must be removed before using the; ■ IMPORTANT: The use of suitable protective clothing/gloves is
3 3 IMPORTANT SAFETY PRECAUTIONS AND RECOMMENDATIONS IMPORTANT: This appliance is designed and manufactured solely for the cooking of domestic (household) food and is not suitable for any non domestic application and therefore should not be used in a commercial environment.The appliance guarantee wi...
Page 7 - INSTALLATION; This appliance shall only be serviced by authorised personnel.; FITTING REQUIREMENTS; The oven can be fitted in standard units, 60 cm width and depth.; removing the oven, or of damage caused by this removal.
7 7 INSTALLATION CAUTION: ■ This appliance must be installed in accordance with these installation instructions. ■ This appliance shall only be serviced by authorised personnel. ■ This appliance is to be installed only by an authorised person in compliance with the current electrical regulations and...
Page 10 - FIXING THE OVEN; fixing is only complementary.; Figure 6
10 10 FIXING THE OVEN Introduce the oven into the furniture opening and fix it with 2 screws (not supplied) as figure 5. Before fixing the 2 screws, check the 2 plastic bushes are correctly in place into the fixing holes (the bushes are already fitted on the product and must lie flat). It is essenti...
Page 11 - ELECTRICAL REQUIREMENTS; the load specified on the plate.
11 11 ELECTRICAL REQUIREMENTS ■ The appliance must be connected to the mains checking that the voltage corresponds to the value given in the rating plate and that the electrical cable sections can withstand the load specified on the plate. ■ A suitable isolating switch providing full disconnection f...
Page 13 - ELECTRIC DIAGRAM FOR MODEL NSM 7 NL; Figure 7
13 13 ELECTRIC DIAGRAM FOR MODEL NSM 7 NL Figure 7 1 1a 2 2a 7 7a 6 6a 4a 4 3 3a 5 5a 9 9a L N Thermal ov er load Oven cut-off timer Oven switch Oven thermostat Oven fan motor Cooling fan motor Oven heating elements Oven lamp Line pilot lamp Thermostat pilot lamp Thermal ov er load Earth connection ...
Page 14 - ELECTRIC DIAGRAM FOR MODELS NSM 9 XL and NSM 9 NL; Figure 8
14 14 ELECTRIC DIAGRAM FOR MODELS NSM 9 XL and NSM 9 NL Figure 8 Bottom Top Grill Circular L N 1 1a 2 2a 7 7a 6 6a 4a 4 3 3a 5 5a 9 9a 1 1A J8 J7 N 470 k Ω Ther mal ov er load Door switch Oven switch Oven thermostat Earth connection Oven fan motor Cooling fan motor Oven heating elements Oven lamp Th...
Page 15 - ELECTRIC DIAGRAM FOR MODELS NSM 11 XL and NSM 11 NL; Figure 9
15 15 ELECTRIC DIAGRAM FOR MODELS NSM 11 XL and NSM 11 NL Figure 9 10 10a 2 2a 6 6a 4a 4 3 3a 5 5a 11 11a 11A J8 J7 N L N 470 k Ω Thermal ov er load Door switch Oven switch Oven thermostat Oven fan motor Cooling fan motor Oven heating elements Bottom Top Grill Circular Oven lamp Thermal ov er load E...
Page 16 - USE AND CARE; Levels; USING THE OVEN FOR THE FIRST TIME; the installation environment sufficiently ventilated:
16 16 USE AND CARE CAUTION: ■ This appliance must be used only for the task it has explicitly been designed for, that is for domestic cooking of foodstuffs. Any other form of usage is to be considered as inappropriate and therefore dangerous. ■ Do NOT place combustible materials or products on this ...
Page 17 - Clean the filter after any cooking!; the oven performance.
17 17 Figure 11 GREASE FILTER (OPTIONAL COMPONENT, CAN BE PURCHASED SEPARATELY) ■ A special screen can be fitted at the back of the oven to catch grease particles, mainly when meat is being roasted. Slide in the grease filter on the back of the oven as in fig. 11. ■ Clean the filter after any cookin...
Page 18 - When fitting the sliding shelf supports, make sure that you fit:
18 18 Figure 12 Clip Clip Tab Tab Left Right Left Right TELESCOPIC SLIDING SHELF SUPPORTS(Models NSM 11 XL and NSM 11 NL only) The telescopic sliding shelf supports make it safer and easier to insert and remove the oven shelf and tray. They stop when they are pulled out to the maximum position. Impo...
Page 19 - CONTROL PANELS; MODEL NSM 9 XL
19 19 2 1 4 6 5 6 5 1 4 2 2 1 3 6 5 CONTROL PANELS Figure 13b MODEL NSM 9 XL MODEL NSM 9 NL Figure 13c Figure 13a MODEL NSM 7 NL
Page 20 - the appliance oven has been switched off.; MODEL NSM 11 XL; CONTROLS DESCRIPTION; Oven temperature control knob
20 20 2 1 4 6 5 6 5 1 4 2 Please note: Your appliance has been fitted with a cooling fan to achieve optimum efficiency of the controls and to ensure lower surface temperatures are maintained. The cooling fan motor switches ON/OFF depending on temperature.Depending on cooking temperatures and times, ...
Page 21 - OVEN VERSIONS; MODELS NSM 11 XL, NSM 11 NL
21 21 OVEN VERSIONS MODELS NSM 7 NL, NSM 9 XL, NSM 9 NL Figure 14a MODELS NSM 11 XL, NSM 11 NL Figure 14b
Page 22 - GENERAL FEATURES; different programs to satisfy every cooking; Do not line the oven walls or floor; THERMOSTAT CONTROL KNOB; The elements will turn on or off automatically; HOW TO USE THE OVEN
22 22 GENERAL FEATURES As its name indicates, this is an oven that presents particular features from an operational point of view.In fact, it is possible to insert 9 or 11 (depending on model, see figs. 14a, 14b) different programs to satisfy every cooking need.The 9 or 11 positions, thermostaticall...
Page 23 - position because the other positions have no effect.
23 23 FUNCTION NAME OF THE FUNCTION DESCRIPTION OF THE FUNCTION DEFROSTING FROZEN FOODS Only the oven fan is switched on.To be used with the thermostat knob in the “ ” (off) position because the other positions have no effect. The defrosting is done by simple ventilation without heat. Recommended fo...
Page 25 - SYMBOL; See chapter “EASY STEAM”
25 25 HOT AIR COOKING WITH LOWER HEATING ELEMENT The circular heating element, the fan motor and the lower heating elements are switched on.The temperature must be regulated between the minimum and the maximum position with the thermostat knob. Recommended for: Foods that need to be cooked with more...
Page 26 - BOOSTER; control panel, switches off. You can then select the; EASY STEAM; Alternate Easy Steam cycles with conventional cooking cycles.
26 26 TURBO / BOOSTER This special function allows a fast pre-heating of the cavity. The circular heating element, the fan motor and the upper heating elements are switched on.Set the thermostat knob to the desired temperature; when the pre-heating temperature has been reached, the oven temperature ...
Page 27 - COOKING ADVICE; STERILIZATION; different types of food at the same time.; GRILLING AND “AU GRATIN”; Do not grill for longer than 60 minutes at any one time.
27 27 COOKING ADVICE STERILIZATION Sterilization of foods to be conserved, in full and hermetically sealed jars, is done in the following way: a. Set the switch to position . b. Set the thermostat knob to position 185°C and preheat the oven. c. Fill the grill pan with hot water. d. Set the jars into...
Page 28 - USE OF THE GRILL; Leave to warm up for approximately 5 minutes with the door; closed; you set is higher than the one just used for oven cooking.; OVEN COOKING
28 28 Figure 17 USE OF THE GRILL Leave to warm up for approximately 5 minutes with the door closed . Place the food inside positioning the rack as near as possible to the grill.Insert the drip pan under the rack to collect the cooking juices.Always grill with the oven door closed. CAUTION: You can o...
Page 29 - RECOMMENDED COOKING TEMPERATURE; The cooking settings specified in the; PIZZA
29 29 RECOMMENDED COOKING TEMPERATURE Figure 18 The cooking settings specified in the tables below are guidelines and may vary according to the type and quantity of ingredients and the type of accessory used. The appliance’s cooking performance may differ from the performance of your previous applia...
Page 30 - VEGETABLES
30 30 BAKERY WEIGHT [gr] TEMP. [°C] FUNCTION LEVELS TIME [min.] WATER [ml] ACCESSORIES / DISHES BIGA BREAD 390-410 210-230 2 25-35 110-130 Pizza stone BREAD 4 pieces 90-110 piece 225-240 3 30-40 100-170 Pizza stone FOCACCIA WITH OLIVES 400-500 245-260 3 20-25 - Aluminium baking tray CLASSIC FOCACCIA...
Page 32 - SWEETS
32 32 SWEETS WEIGHT [gr] TEMP. [°C] FUNCTION LEVELS TIME [min.] WATER [ml] ACCESSORIES / DISHES SPUNGE CAKE 360-430 175-180 3 20-30 - Round cake tin JAM CROSTATA 700-800 175-185 3 20-30 - Cake tin PLUM CAKE 450-550 160-180 2 30-40 - Rectangular cake tin MUFFIN 350-450 160-180 2 20-35 140-160 Muffin ...
Page 33 - FROZEN FOODS
33 33 FROZEN FOODS WEIGHT [gr] TEMP. [°C] FUNCTION LEVELS TIME [min.] WATER [ml] ACCESSORIES / DISHES FROZEN POTATOESClassic 580-620 195-205 3 12 - 15 - Air fry tray FROZEN POTATOESRustics 600-700 215-225 3 12 - 15 - Air fry tray NUGGETS 220-270 175-185 4 12 - 17 - Air fry tray POTATO CROQUETTES 700...
Page 34 - MODELS WITH 120 MINUTES; The timer runs the oven for a preset time.
34 34 120’ CUT-OFF TIMER MODELS WITH 120 MINUTES CUT-OFF TIMER The timer runs the oven for a preset time. 1) Starting up (fig. 19). After setting the function selector and thermostat to the required mode and temperature, rotate the timer knob clockwise until you reach the required cooking time (max ...
Page 35 - When using the timer and during a semi-automatic or automatic; ELECTRONIC CLOCK/PROGRAMMER “TOUCH-CONTROL”
35 35 11 12 14 13 1 2 3 4 5 10 9 8 7 6 Description of display symbols: 1. Oven on2. Cooking time3. End of cooking time4. Timer5. Oven temperature6. AM/PM time format7. Screen brightness8. Acoustic signal volume9. Time of day setting10. Programmer ‘touch’ control panel key lock Description of the ‘to...
Page 36 - This is only an alarm that DOES NOT switch off
36 36 “TOUCH-CONTROL” KEYS The “touch-control” keys shall be operated by the fingers (just by touching the key). When using touch controls it is best to use the ball of your finger rather than the tip. Program and menu selection: after starting the procedure, the selection is automatically deactivat...
Page 37 - SEMI-AUTOMATIC COOKING; End; AUTOMATIC COOKING
37 37 SEMI-AUTOMATIC COOKING This is used to automatically switch off the oven after the desired cooking time has elapsed. Check the clock shows the correct time.The semi-automatic cooking program can be set for a maximum period of 10 hours. 1. Select the function and temperature (function and tempe...
Page 38 - and then remember to turn the oven off manually.; and restart programming if necessary.; USER PREFERENCES SETTINGS; On; flashing. Then touch the “; OFF; ACOUSTIC SIGNAL TONE SETTING
38 38 To cancel the automatic cooking program at any time, proceed as described in the “SEMI-AUTOMATIC COOKING” chapter. Turn the temperature and function knobs to the off position, otherwise continue cooking and then remember to turn the oven off manually. ATTENTION - VERY IMPORTANT (AUTOMATIC OR S...
Page 40 - CLEANING AND MAINTENANCE; GENERAL ADVICE; and disconnected from the electrical power supply.; Avoid using cleaning products with a chlorine or acidic base.; ELECTRONIC PROGRAMMER DISPLAY CLEANING (SOME MODELS ONLY); Clean using an appropriate product. Always dry thoroughly.
40 40 CLEANING AND MAINTENANCE GENERAL ADVICE ■ Before you begin cleaning, you must ensure that the appliance is switched off and disconnected from the electrical power supply. ■ Important: The manufacturer declines all liability for possible damage caused by the use of unsuitable products to clean ...
Page 41 - IMPORTANT; You are advised to use a soft cloth and neutral soap.; ENAMELLED PARTS; Dry preferably with a microfibre or soft cloth.; INSIDE OF OVEN; The oven should always be cleaned after use when it has cooled down.; Let the oven; caused by chemical or abrasive cleaning.; Do not store flammable material in the oven.; GRILL HEATING ELEMENT; circular well on the floor of the oven.
41 41 STAINLESS STEEL, ALUMINIUM PARTS, PAINTED AND SILK-SCREEN PRINTED SURFACES Clean using an appropriate product.Always dry thoroughly. IMPORTANT : these parts must be cleaned very carefully to avoid scratching and abrasion. You are advised to use a soft cloth and neutral soap. CAUTION: Do not us...
Page 42 - HYDROCLEAN; With the oven cold, remove all accessories; needed to remove baked-on dirt: for this
42 42 Figure 22 HYDROCLEAN With the oven cold, remove all accessories , pour 100 ml of drinking water into the circular well on the floor of the oven and switch on the hydroclean function at 80-90°C. Do not use any type of detergent. 1. Run the function for at least 35 minutes, depending on the type...
Page 43 - REPLACING THE OVEN LIGHT; the possibility of electric shock.; Let the oven cavity and the heating elements to cool down.; NOTE: Oven bulb replacement is not covered by your guarantee.; This product contains a light source of energy efficiency class G.; WRONG
43 43 Figure 23 REPLACING THE OVEN LIGHT WARNING: Ensure the appliance is switched off before replacing the lamp to avoid the possibility of electric shock. ■ Let the oven cavity and the heating elements to cool down. ■ Switch off the electrical supply. ■ Remove the protective cover (fig. 23). ■ Rep...
Page 44 - REMOVING AND REPLACING THE INNER DOOR GLASS PANE FOR CLEANING; Repairer or Customer Care for help.
44 44 REMOVING AND REPLACING THE INNER DOOR GLASS PANE FOR CLEANING If you wish to clean the inner pane of glass of the door, make sure you follow the precautions and instructions very carefully.Replacing the glass pane and the door incorrectly may result in damage to the appliance and may void your...
Page 45 - REMOVING THE OVEN DOOR; Open the door to the full extent (fig.
45 45 B A C REMOVING THE OVEN DOOR The oven door can easily be removed as follows: ■ Open the door to the full extent (fig. 24). ■ Open the lever “ A ” completely on the left and right hinges (fig. 25). ■ Hold the door as shown in fig. 28. ■ Gently close the door until left and right hinge levers “ ...
Page 46 - To remove the inner pane
46 46 Figure 30 To remove the inner pane ■ Touch the glass retainer tabs in on both sides of the door and remove the glass retainer (figs. 29, 30). ■ Gently lift and pull out the inner pane of glass by releasing it from the bottom retainers. Do not angle the pane too much as you may damage the glass...
Page 47 - After cleaning replace the door glass pane; When replacing the glass pane make sure that:; Position the pane by gently lowering it.
47 47 Figure 32 After cleaning replace the door glass pane When replacing the glass pane make sure that: ■ you replace the inner pane correctly as shown. The pane must be in the position described below in order to fit into the door and to ensure that the oven operates safely and correctly; ■ you ta...
Page 48 - SERVICE AND MAINTENANCE; SERVICING THE APPLIANCE; Servicing shall be carried out only by authorized personnel.; TROUBLESHOOTING; Both the fuse and the mains fuse are intact.
48 48 SERVICE AND MAINTENANCE SERVICING THE APPLIANCE Service may be obtained by contacting our Customer Service Centre to locate the nearest Authorised ELBA APPLIANCES Service Agent shared services with Fisher and Paykel Australia PTY LTD (ELBA Appliances AUS, a division of F&P AUS PTY LTD). Se...
Page 52 - w w w . d e l o n g h i c o o k i n g a p p l i a n c e s . c o m . a u
52 52 w w w . d e l o n g h i c o o k i n g a p p l i a n c e s . c o m . a u C o d . 11 0 6 3 8 3 - ß 0 D e s c r i p t i o n s a n d i l l u s t r a t i o n s i n t h i s b o o k l e t a r e g i v e n a s s i m p l y i n d i c a t i v e .T h e m a n u f a c t u r e r r e s e r v e s t h e r i g h ...