DeLonghi ECAM29031SBPK - User Manual
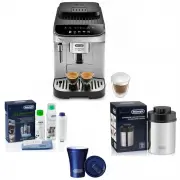
DeLonghi ECAM29031SBPK Coffee Machine – User Manual, read for free online in PDF format. We hope this helps you resolve any issues you may have. If you have further questions, please contact us through the contact form.
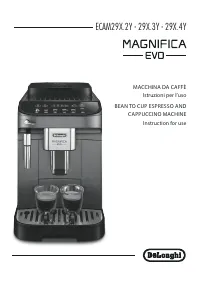
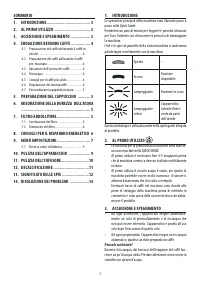
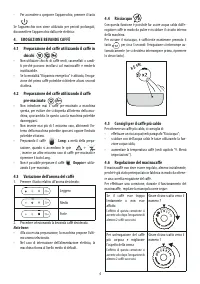
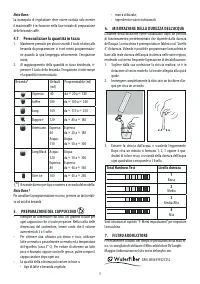
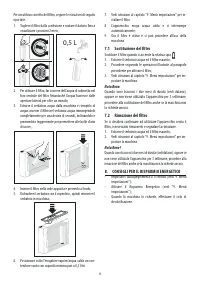
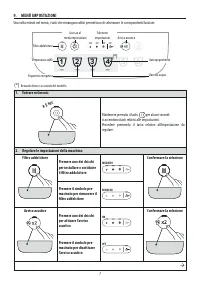
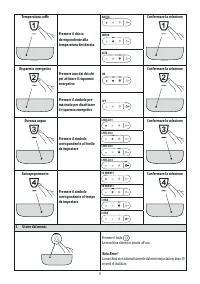
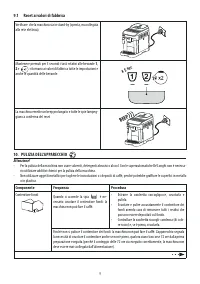
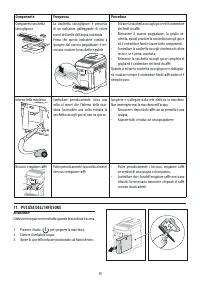

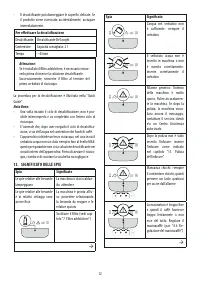
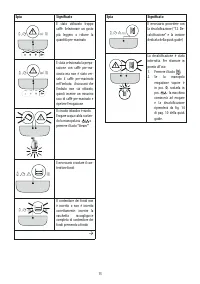
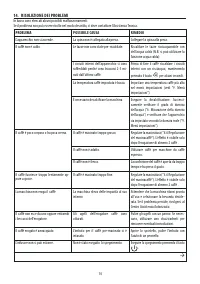
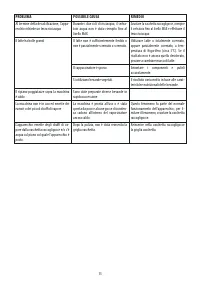


Table of Contents:
- Page 4 – Long; Variazione dell’aroma del caffè; x 5 sec; Consigli per il caffè più caldo
- Page 5 – Total Hardness Test; FILTRO ADDOLCITORE
- Page 7 – MENÙ IMPOSTAZIONI; Mantenere premuto il tasto
- Page 9 – Reset ai valori di fabbrica; BEEP; PULIZIA DELL‘APPARECCHIO; Componente
- Page 10 – PULIZIA DELL’INFUSORE
- Page 11 – DECALCIFICAZIONE; decalcificante
- Page 12 – Per effettuare la decalcificazione; SIGNIFICATO DELLE SPIE; Spia
- Page 14 – RISOLUZIONE DEI PROBLEMI; PROBLEMA
- Page 17 – Making coffee using pre-ground coffee; LONG; Varying the coffee aroma; Tips for a hotter coffee
- Page 18 – WATER SOFTENER FILTER
- Page 20 – Press and hold the
- Page 22 – Reset default values; CLEANING THE MACHINE; Component
- Page 23 – CLEANING THE INFUSER
- Page 24 – action
- Page 25 – To descale; EXPLANATION OF INDICATOR LIGHTS; Light
- Page 26 – TROUBLESHOOTING
ECAM29X.2Y - 29X.3Y - 29X.4Y
MACCHINA DA CAFFÈ
Istruzioni per l’uso
BEAN TO CUP ESPRESSO AND
CAPPUCCINO MACHINE
Instruction for use
"Loading the manual" means you need to wait until the file loads and becomes available for online reading. Some manuals are very large, and the time they take to appear depends on your internet speed.
Summary
4 • Per accendere o spegnere l’apparecchio, premere il tasto . Se l’apparecchio non viene utilizzato per periodi prolungati, disconnettere l’apparecchio dalla rete elettrica: 4. EROGAZIONE BEVANDE CAFFÈ4.1 Preparazione del caffè utilizzando il caffè in chicchi • Non utilizzare chicchi di caffè verdi...
5 Nota Bene: La manopola di regolazione deve essere ruotata solo mentre il macinacaffè è in funzione nella fase iniziale di preparazione delle bevande caffè. 4.7 Personalizzare la quantità in tazza 1. Mantenere premuto per alcuni secondi il tasto relativo alla bevanda da programmare: si è nel menù p...
7 9. MENÙ IMPOSTAZIONI Una volta entrati nel menù, i tasti che rimangono attivi permettono di selezionare le corrispondenti funzioni: 1 2 3 4 5 6 (*) (*) Bevande diverse a seconda del modello 1. Entrare nel menù: x 5 sec Mantenere premuto il tasto per alcuni secondi: si accendonoi tasti relativi all...