DeLonghi 3300 - User Manual

DeLonghi 3300 – User Manual, read for free online in PDF format. We hope this helps you resolve any issues you may have. If you have further questions, please contact us through the contact form.


Table of Contents:
- Page 2 – CAFETERA ELECTRICA MODELO ESAM3300/ MACCHINA DA CAFFÈ ESAM3300; Visit; Visita
- Page 3 – K L
- Page 4 – O P E R A T I N G I N S T R U C T I O N S
- Page 5 – SHORT CORD INSTRUCTIONS; in water or other liquid.; SAVE THESE INSTRUCTIONS; THIS PRODUCT IS FOR HOUSEHOLD USE ONLY
- Page 6 – Control panel
- Page 7 – SAFETY WARNINGS
- Page 8 – PREPARING THE COFFEE MAKER; FILLING THE WATER TANK; pushing it all the way in.; FILLING THE CONTAINER WITH COFFEE BEANS; IMMEDIATELY AFTER, WITHIN A MAXIMUM OF 30 SECONDS,; turn the
- Page 9 – ) Before preparing the coffee, always make sure that the green
- Page 11 – ADJUSTING THE COFFEE GRINDER; Coffee has been used to factory
- Page 12 – HOT WATER DELIVERY
- Page 13 – You
- Page 14 – 0 CLEANING AND MAINTENANCE; CLEANING THE COFFEE MAKER
- Page 15 – CLEANING THE INFUSER; wait for all the indicator lights to go off; • press the two red release buttons on the infuser sideways and; Never wash the infuser in the dishwasher; PUSH
- Page 16 – if it is still hard to insert the infuser, leave it out of the machine,; CORRECTLY; CORRECT
- Page 17 – SETTING THE WATER HARDNESS
- Page 18 – LIGHT; 1 MEANING OF THE NORMAL OPERATION INDICATOR LIGHTS
- Page 19 – LIGHTS
- Page 22 – LIMITED WARRANTY; What does the warranty cover?; If repairs become necessary, see contact information below:; How does state law apply?
De’Longhi America, Inc.
Park 80 West, Plaza One
Saddle Brook, NJ 07663
#1-866-Latte-Best
1-866-528-8323
De’Longhi Canada, Inc.
6150 McLaughlin Road
Mississauga, Ontario
L5R 4E1 Canada
#1-866-Latte-Best
1-866-528-8323
FIDUCIA ITALIANA S.A DE C.V
Pestalozzi #814
Col. Narvarte
Del. Benito Juarez
C.P. 03100
tels: 5543 1447
lada sin costo: 01 800 711 8805
www.delonghi.com
5732149900/
10.06
"Loading the manual" means you need to wait until the file loads and becomes available for online reading. Some manuals are very large, and the time they take to appear depends on your internet speed.
Was this manual helpful?
About this manual
- Brand
- DeLonghi
- Model
- 3300
- Document type
- User Manual
- Language(s)
- English
- Pages
- 22
- File size
- 1.4 MB
- Format
Other Manuals for DeLonghi 3300
Summary
IMPORTANT INSTRUCTIONS SAVE THESE INSTRUCTIONS MODE D’EMPLOI IMPORTANT CONSERVEZ LES PRESENTES INSTRUCTIONS INSTRUCIONES IMPORTANTES REPASE Y GUARDE ESTAS INSTRUCCIONES LEA ESTE INSTRUCTIVO ANTES DE UTILIZAR EL APARATO ISTRUZIONI IMPORTANTI CONSERVARE LE ISTRUZIONI COFFEE MAKER TYPE ESAM3300/CAFETER...
4 O P E R A T I N G I N S T R U C T I O N S Important safeguards … … … … … … … … … … … … … … … … … … … …5 1 Description of the appliance (see page 3) … … … … … … … … … … … … …6 2 Safety warnings … … … … … … … … … … … … … … … … … … … … … …7 3 Installation … … … … … … … … … … … … … … … … … … … … … … …...
Ask a question
Related manuals
Popular DeLonghi Other
More DeLonghi Other models
 DeLonghi Vertuo Next Nespresso ENV120.BW Manual
 DeLonghi WD1000 User Manual
 DeLonghi WIR2 NAT GAS User Manual
 DeLonghi 14 F Manual
 DeLonghi 24 E Manual
 DeLonghi 634H Manual
 DeLonghi 5500 User Manual
 DeLonghi AC 230 User Manual
 DeLonghi AD679/699 Manual
 DeLonghi BAR 32 User Manual
 DeLonghi BC080 Manual
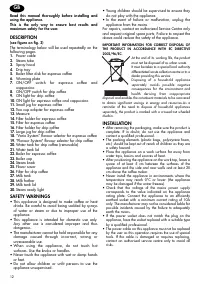 DeLonghi BCO 130 Manual