Page 3 - DellTM PowerEdgeTM; Getting Started
Dell™ PowerEdge™ R810 Systems Getting Started With Your System Regulatory Model E05S Series
Page 5 - Installation and Configuration; Unpacking the System; Installing the Rails and System in a Rack
Getting Started With Your System 3 Installation and Configuration WARNING: Before performing the following procedure, review the safety instructions that came with the system. Unpacking the System Unpack your system and identify each item. Installing the Rails and System in a Rack Assemble the rails...
Page 6 - Optional – Connecting the Keyboard, Mouse, and Monitor
4 Getting Started With Your System Optional – Connecting the Keyboard, Mouse, and Monitor Connect the keyboard, mouse, and monitor (optional). The connectors on the back of your system have icons indicating which cable to plug into each connector. Be sure to tighten the screws (if any) on the monito...
Page 7 - Turning On the System
Getting Started With Your System 5 Securing the Power Cable(s) Attach the power cable retention bracket on the right bend of the power supply handle. Bend the system power cable into a loop as shown in the illustration and attach to the bracket’s cable clasp. Plug the other end of the power cable in...
Page 8 - Installing the Optional Bezel; Complete the Operating System Setup
6 Getting Started With Your System Installing the Optional Bezel Install the bezel (optional). Complete the Operating System Setup If you purchased a preinstalled operating system, see the operating system documentation that ships with your system. To install an operating system for the first time, ...
Page 10 - Other Information You May Need; Obtaining Technical Assistance
8 Getting Started With Your System Other Information You May Need WARNING: See the safety and regulatory information that shipped with your system. Warranty information may be included within this document or as a separate document. • The rack documentation included with your rack solution describes...
Page 11 - Technical Specifications
Getting Started With Your System 9 Technical Specifications Processor Processor type Up to four Intel ® Xeon ® 7500 series processors (up to eight core processors)Or Up to four Intel Xeon 6500 series processors (up to eight core processors) Expansion Bus Bus type PCI Express Generation 2 Expansion s...
Page 17 - Systèmes DellTM; Guide de mise en route
Systèmes Dell™ PowerEdge™ R810 Guide de mise en route Modèle réglementaire série E05S
Page 18 - Remarques, précautions et avertissements
Remarques, précautions et avertissements REMARQUE : une REMARQUE indique des informations importantes qui peuvent vous aider à mieux utiliser votre ordinateur. PRÉCAUTION : une PRÉCAUTION vous avertit d'un risque d'endommagement du matériel ou de perte de données en cas de non-respect des instructio...
Page 19 - Installation et configuration; Déballage du système; Installation des rails et du système dans un rack
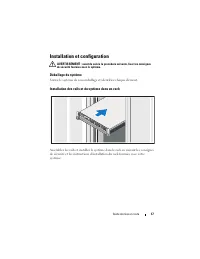
Guide de mise en route 17 Installation et configuration AVERTISSEMENT : avant de suivre la procédure suivante, lisez les consignes de sécurité fournies avec le système. Déballage du système Sortez le système de son emballage et identifiez chaque élément. Installation des rails et du système dans un ...
Page 20 - Facultatif – Connexion du clavier, de la souris et du moniteur
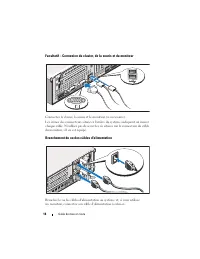
18 Guide de mise en route Facultatif – Connexion du clavier, de la souris et du moniteur Connectez le clavier, la souris et le moniteur (si nécessaire). Les icônes des connecteurs situées à l'arrière du système indiquent où insérer chaque câble. N'oubliez pas de serrer les vis situées sur le connect...
Page 21 - Fixation du ou des câbles d'alimentation
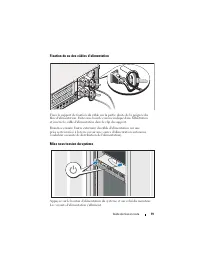
Guide de mise en route 19 Fixation du ou des câbles d'alimentation Fixez le support de fixation du câble sur la partie droite de la poignée du bloc d'alimentation. Faites une boucle comme indiqué dans l'illustration et insérez le câble d'alimentation dans le clip du support. Branchez ensuite l'autre...
Page 22 - Installation du cadre en option; Fin de l'installation du système d'exploitation
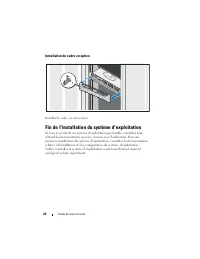
20 Guide de mise en route Installation du cadre en option Installez le cadre (si nécessaire). Fin de l'installation du système d'exploitation Si vous avez acheté un système d'exploitation préinstallé, consultez tout d'abord la documentation associée, fournie avec l'ordinateur. Pour une première inst...
Page 23 - Systèmes d'exploitation pris en charge
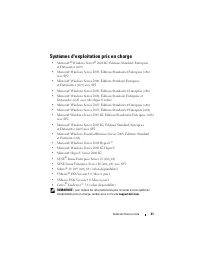
Guide de mise en route 21 Systèmes d'exploitation pris en charge • Microsoft ® Windows Server ® 2008 R2, Éditions Standard, Enterprise, et Datacenter (x64) • Microsoft Windows Server 2008, Éditions Standard et Enterprise (x86) avec SP2 • Microsoft Windows Server 2008, Éditions Standard, Enterprise e...
Page 24 - Autres informations utiles; Obtention d'une assistance technique
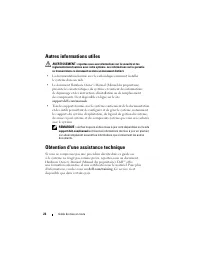
22 Guide de mise en route Autres informations utiles AVERTISSEMENT : reportez-vous aux informations sur la sécurité et les réglementations fournies avec votre système. Les informations sur la garantie se trouvent dans ce document ou dans un document distinct. • La documentation fournie avec le rack ...
Page 25 - Caractéristiques techniques
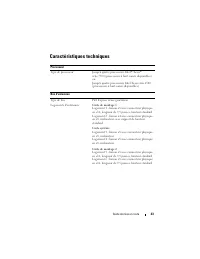
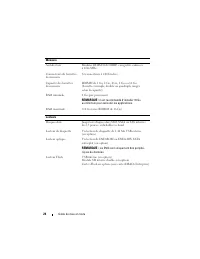
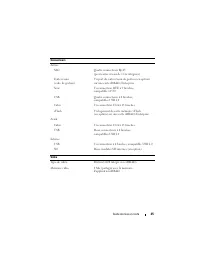
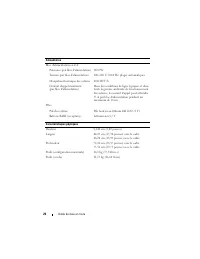
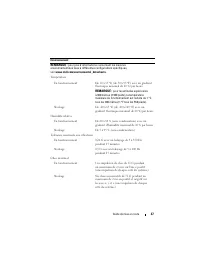
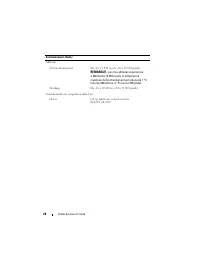
Guide de mise en route 23 Caractéristiques techniques Processeur Type de processeur Jusqu'à quatre processeurs Intel ® Xeon ® série 7500 (processeurs à huit cœurs disponibles)ou Jusqu'à quatre processeurs Intel Xeon série 6500 (processeurs à huit cœurs disponibles) Bus d'extension Type de bus PCI Ex...
Page 31 - Sistemas DellTM; Primeiros passos
Sistemas Dell™ PowerEdge™ R810 Primeiros passos com o sistema Modelo de Regulamentação Série E05S
Page 32 - Notas, Avisos e Advertências
Notas, Avisos e Advertências NOTA: Uma NOTA fornece informações importantes que o ajudam a usar melhor o computador. AVISO: Uma ADVERTÊNCIA indica um potencial de danos ao hardware ou de perda de dados caso as instruções não sejam seguidas. ADVERTÊNCIA: Uma ADVERTÊNCIA indica um potencial de danos à...
Page 33 - Instalação e configuração; Como remover o sistema da embalagem; Como instalar os trilhos e o sistema no rack
Primeiros passos com o sistema 31 Instalação e configuração ADVERTÊNCIA: Antes de executar este procedimento, siga as instruções de segurança fornecidas com o sistema. Como remover o sistema da embalagem Remova o sistema da embalagem e identifique cada item. Como instalar os trilhos e o sistema no r...
Page 34 - Opcional – Como conectar teclado, mouse e monitor
32 Primeiros passos com o sistema Opcional – Como conectar teclado, mouse e monitor Conecte o teclado, o mouse e o monitor (opcional). Os conectores na parte traseira do sistema têm ícones que indicam quais cabos devem ser ligados a cada conector. Certifique-se de apertar os parafusos (se houver alg...
Page 35 - Como ligar o sistema
Primeiros passos com o sistema 33 Como prender o(s) cabo(s) de alimentação Conecte o suporte de retenção do cabo de alimentação na dobra direita da alça da fonte de alimentação. Curve o cabo de alimentação, conforme mostrado na ilustração e prenda-o ao gancho localizado no suporte. Conecte a outra e...
Page 36 - Instalação do painel frontal; Conclua a instalação do sistema operacional
34 Primeiros passos com o sistema Instalação do painel frontal Instale o painel frontal (opcional). Conclua a instalação do sistema operacional Caso tenha adquirido um sistema operacional pré-instalado, consulte a respectiva documentação fornecida com o sistema. Para instalar um sistema operacional ...
Page 37 - Sistemas operacionais compatíveis
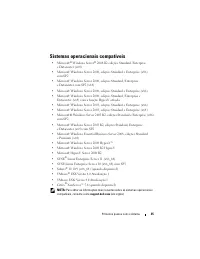
Primeiros passos com o sistema 35 Sistemas operacionais compatíveis • Microsoft ® Windows Server ® 2008 R2 edições Standard, Enterprise e Datacenter (x64) • Microsoft Windows Server 2008, edições Standard e Enterprise (x86) com SP2 • Microsoft Windows Server 2008, edições Standard, Enterprise e Data...
Page 38 - Outras informações úteis; Como obter assistência técnica
36 Primeiros passos com o sistema Outras informações úteis ADVERTÊNCIA: Consulte as informações de regulamentação e de segurança fornecidas com o sistema. As informações sobre garantia podem estar incluídas neste documento ou serem fornecidas em um documento separado. • A documentação do rack incluí...
Page 39 - Especificações técnicas
Primeiros passos com o sistema 37 Especificações técnicas Processador Tipo de processador Até quatro processadores Intel ® Xeon ® da série 7500 (até 8 processadores de núcleo)Ou Até quatro processadores Intel Xeon da série 6500 (até 8 processadores de núcleo) Barramento de expansão Tipo de barrament...
Page 45 - Procedimientos iniciales
Sistemas Dell™ PowerEdge™ R810 Procedimientos iniciales con el sistema Modelo reglamentario serie E05S
Page 46 - Notas, precauciones y avisos
Notas, precauciones y avisos NOTA: Una NOTA proporciona información importante que le ayudará a utilizar mejor el ordenador. PRECAUCIÓN: Un mensaje de PRECAUCIÓN indica la posibilidad de daños en el hardware o la pérdida de datos si no se siguen las instrucciones. AVISO: Un mensaje de AVISO indica e...
Page 47 - Instalación y configuración; Desembalaje del sistema; Instalación de los rieles y del sistema en un rack
Procedimientos iniciales con el sistema 45 Instalación y configuración AVISO: Antes de realizar el procedimiento siguiente, revise las instrucciones de seguridad incluidas con el sistema. Desembalaje del sistema Desembale el sistema e identifique cada elemento. Instalación de los rieles y del sistem...
Page 48 - Conexión de los cables de alimentación
46 Procedimientos iniciales con el sistema Conexión del teclado, el ratón y el monitor (opcional) Conecte el teclado, el ratón y el monitor (opcional). Los conectores de la parte posterior del sistema incluyen iconos que indican qué cable debe enchufarse en cada conector. Asegúrese de apretar los to...
Page 49 - Fijación de los cables de alimentación
Procedimientos iniciales con el sistema 47 Fijación de los cables de alimentación Fije el soporte de retención del cable de alimentación en el codo derecho del asa de la fuente de alimentación. Doble el cable de alimentación del sistema en forma de bucle, como se muestra en la ilustración, y fíjelo ...
Page 50 - Encendido del sistema
48 Procedimientos iniciales con el sistema Encendido del sistema Presione el botón de encendido del sistema y del monitor. Los indicadores de alimentación deberían encenderse. Instalación del embellecedor opcional Instale el embellecedor (opcional).
Page 51 - Instalación del sistema operativo
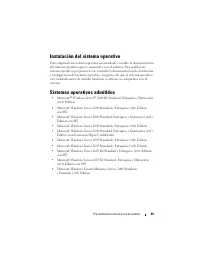
Procedimientos iniciales con el sistema 49 Instalación del sistema operativo Si ha adquirido un sistema operativo preinstalado, consulte la documentación del sistema operativo que se suministra con el sistema. Para instalar un sistema operativo por primera vez, consulte la documentación de instalaci...
Page 52 - Otra información útil
50 Procedimientos iniciales con el sistema • Microsoft Windows Server 2008 Hyper-V™ • Microsoft Windows Server 2008 R2 Hyper-V • Microsoft Hyper-V Server 2008 R2 • SUSE ® Linux Enterprise Server 11 (x86_64) • SUSE Linux Enterprise Server 10 (x86_64) con SP3 • Solaris ® 10 10/9 (x86_64) (cuando esté ...
Page 53 - Obtención de asistencia técnica
Procedimientos iniciales con el sistema 51 Obtención de asistencia técnica Si no comprende alguno de los procedimientos descritos en esta guía o si el sistema no funciona del modo esperado, consulte el Manual del propietario del hardware . Dell™ cuenta con una amplia oferta de formación y certifica-...
Page 54 - Especificaciones técnicas
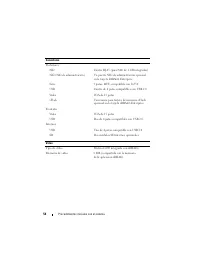
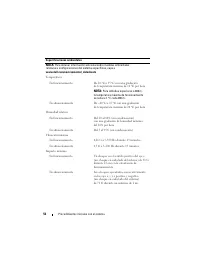
52 Procedimientos iniciales con el sistema Especificaciones técnicas Procesador Tipo de procesador Hasta cuatro procesadores Intel ® Xeon ® serie 7500 (procesadores de hasta ocho núcleos)O bien: Hasta cuatro procesadores Intel Xeon serie 6500 (procesadores de hasta ocho núcleos) Bus de expansión Tip...

















 Dell POWEREDGE R710 User Manual
 Dell PowerEdge R720 User Manual
 Dell PowerEdge R720xd User Manual
 Dell PowerEdge R730 User Manual
 Dell PowerEdge R730xd User Manual
 Dell PowerEdge R805 Quick Guide
 Dell PowerEdge R815 Quick Guide
 Dell PowerEdge R820 User Manual
 Dell PowerEdge R900 User Manual
 Dell PowerEdge R920 User Manual
 Dell PowerEdge RAID Controller H800 User Manual