Daikin 3MXS-E - User Manual
Daikin 3MXS-E Air Conditioner – User Manual, read for free online in PDF format. We hope this helps you resolve any issues you may have. If you have further questions, please contact us through the contact form.
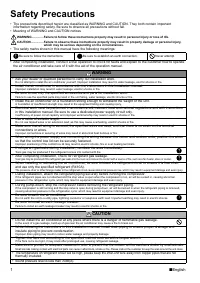
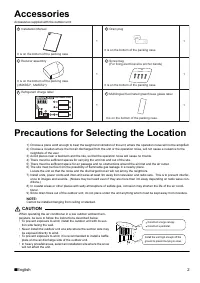
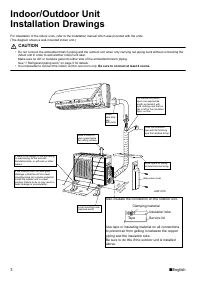
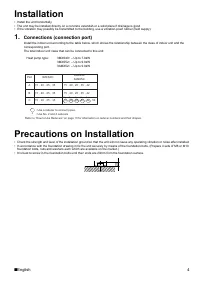
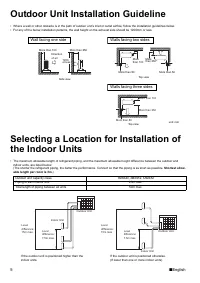
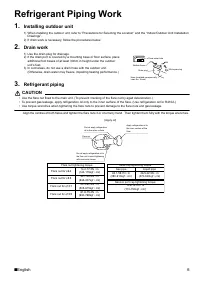

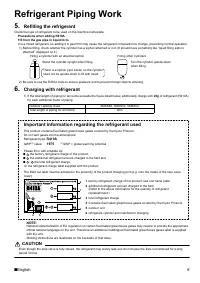
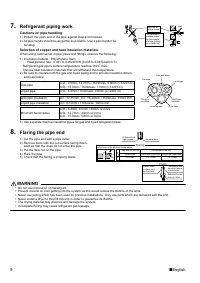
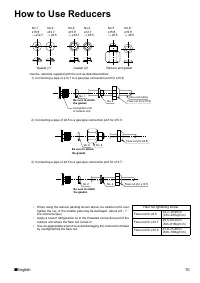
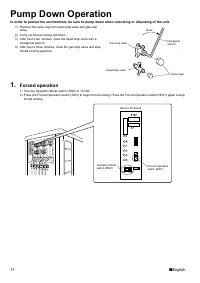
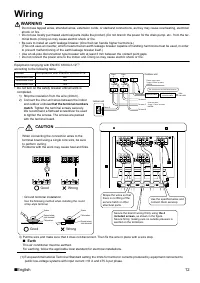
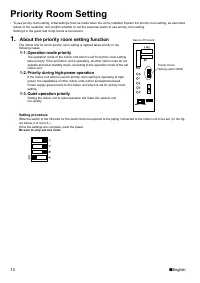
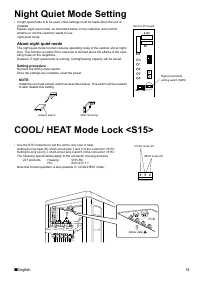
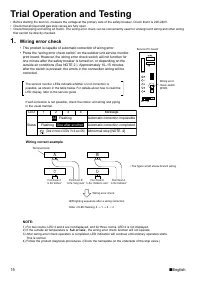
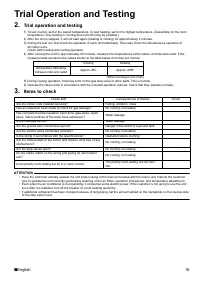

Table of Contents:
- Page 4 – English; Safety Precautions; WARNING
- Page 5 – Accessories; CAUTION
- Page 6 – Installation Drawings
- Page 7 – Installation
- Page 8 – Outdoor Unit Installation Guideline; Wall facing one side; Walls facing two sides; Walls facing three sides
- Page 9 – Refrigerant Piping Work; Installing outdoor unit; Refrigerant piping
- Page 10 – Purging air and checking gas leakage
- Page 11 – Refilling the refrigerant; Charging with refrigerant; Important information regarding the refrigerant used
- Page 12 – Refrigerant piping work; Flaring the pipe end
- Page 13 – How to Use Reducers
- Page 14 – Pump Down Operation; Forced operation
- Page 15 – Wiring
- Page 16 – Priority Room Setting; About the priority room setting function
- Page 17 – Night Quiet Mode Setting; About night quiet mode
- Page 18 – Trial Operation and Testing; Wiring error check
- Page 19 – Trial operation and testing
INSTALLATION
MANUAL
R410A Split Series
Models
3MXS40K3V1B2
3MXS52E4V1B2
3AMX52E4V1B2
"Loading the manual" means you need to wait until the file loads and becomes available for online reading. Some manuals are very large, and the time they take to appear depends on your internet speed.
Summary
1 n English Safety Precautions • The precautions described herein are classified as WARNING and CAUTION. They both contain important information regarding safety. Be sure to observe all precautions without fail. • Meaning of WARNING and CAUTION notices WARNING..............Failure to follow these in...
n English 2 Accessories Accessories supplied with the outdoor unit: Precautions for Selecting the Location 1) Choose a place solid enough to bear the weight and vibration of the unit, where the operation noise will not be amplified.2) Choose a location where the hot air discharged from the unit or t...
3 n English Indoor/Outdoor Unit Installation Drawings For installation of the indoor units, refer to the installation manual which was provided with the units.(The diagram shows a wall-mounted indoor unit.) CAUTION • Do not connect the embedded branch piping and the outdoor unit when only carrying o...