Canon Prima BF-9s Set- User Manual
Canon Prima BF-9s Set– User Manual, read for free online in PDF format. We hope this helps you resolve any issues you may have. If you have further questions, please contact us through the contact form.


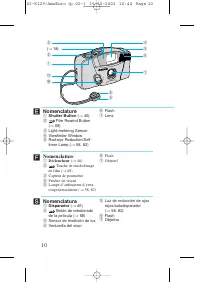
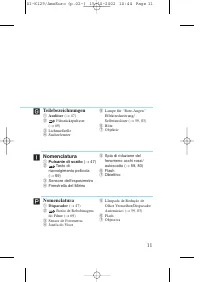
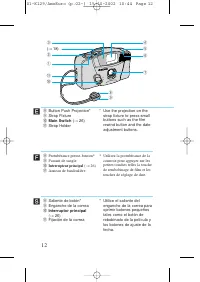
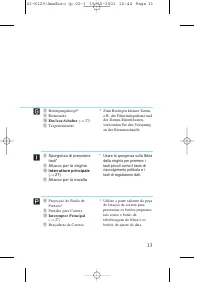
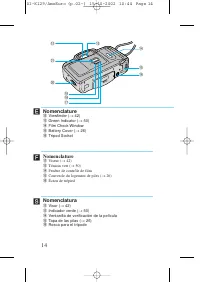


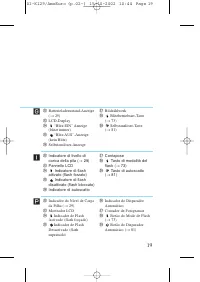


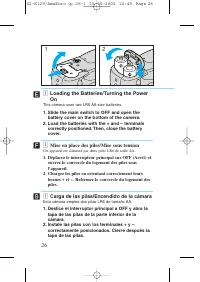
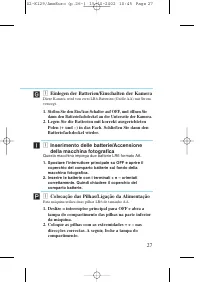
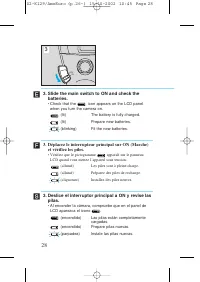
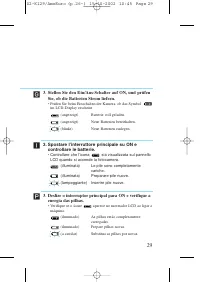
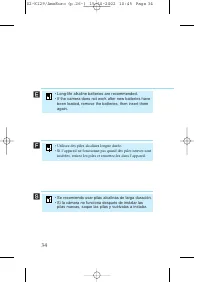

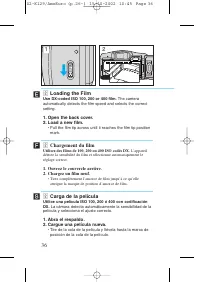
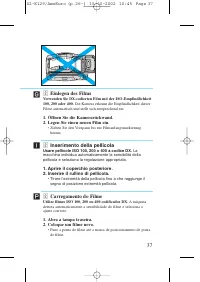
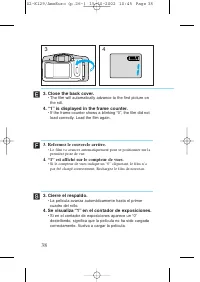
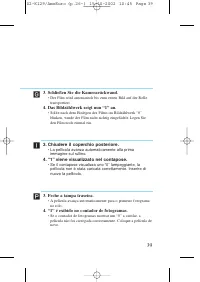
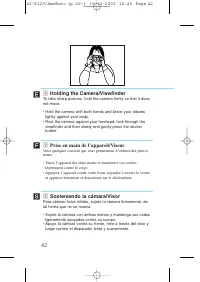
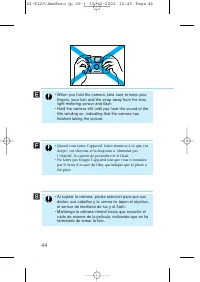
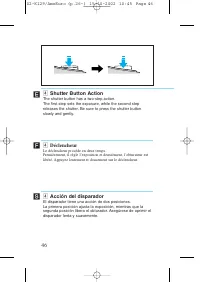
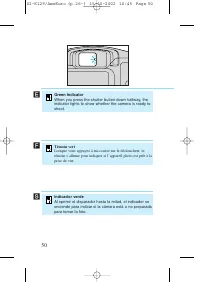
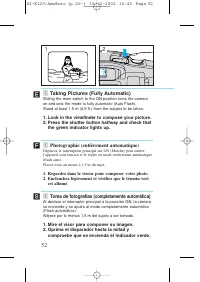

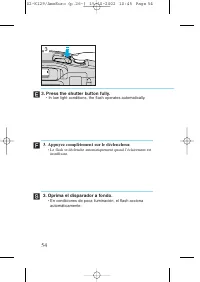
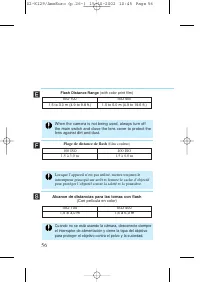
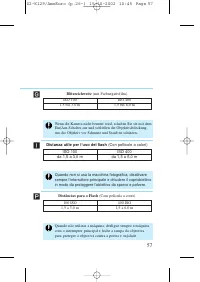

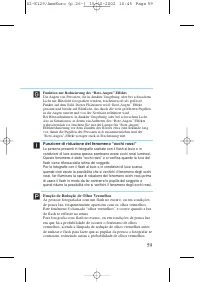
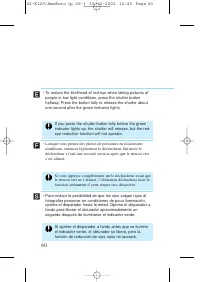
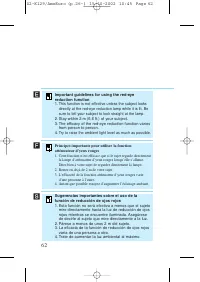
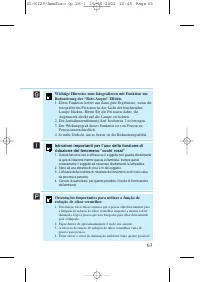
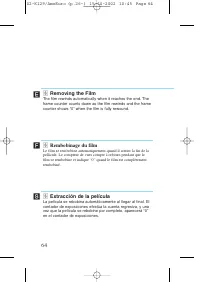
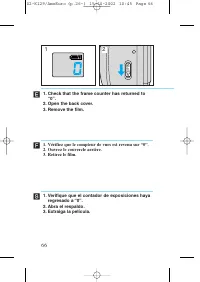

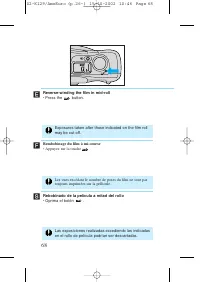
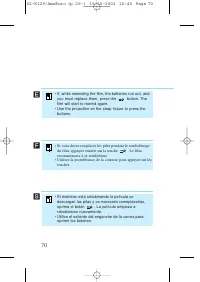
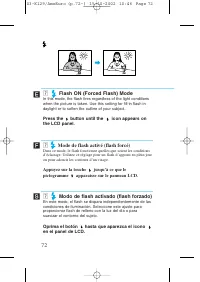

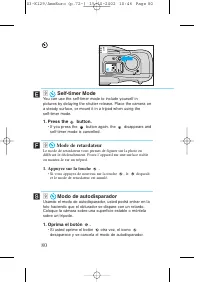
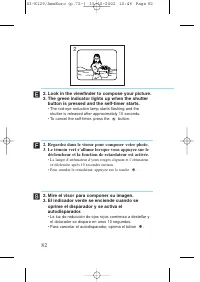
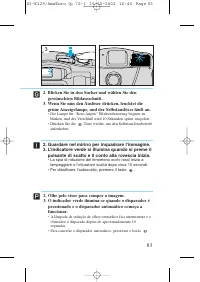
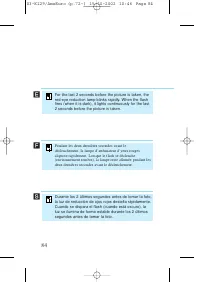

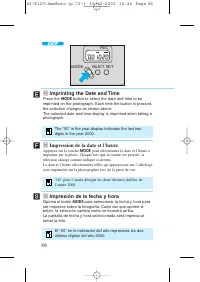
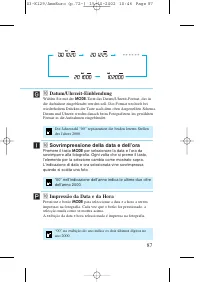
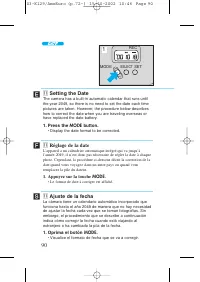

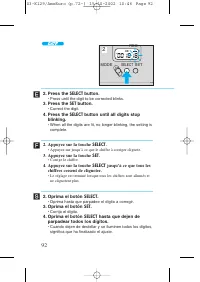
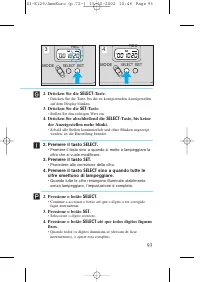

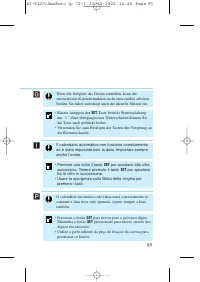
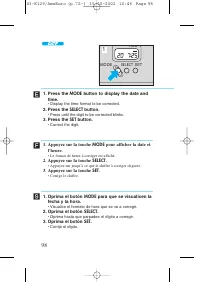
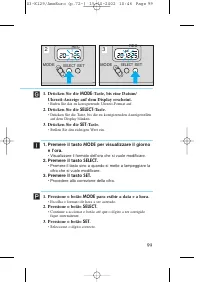

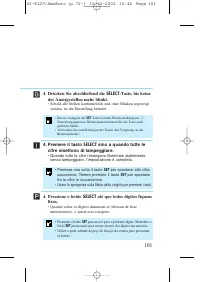

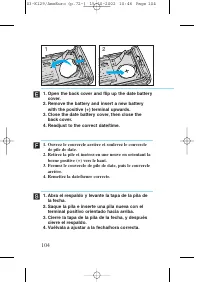
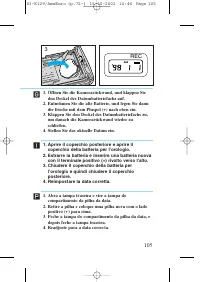
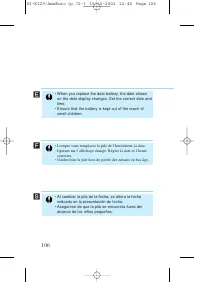

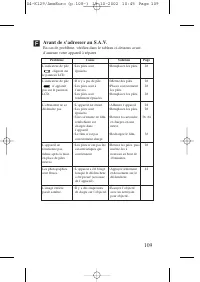


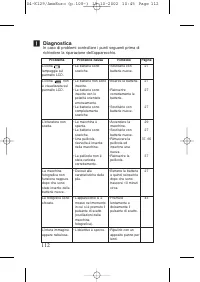


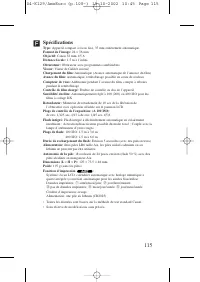


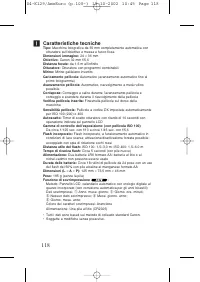

Table of Contents:
- Page 2 – Handling Precautions
- Page 4 – Précautions d’emploi; Cet appareil n’est pas étanche, et ne doit pas être utilisé en
- Page 5 – Precauciones de manipulación
- Page 6 – Wichtige Hinweise zum Gebrauch; Das -Zeichen entspricht den EG-Richtlinien; Hinweise für Deutschland; Batterien und Akkumulatoren gehören nicht in den Hausmüll !
- Page 7 – Precauzioni per l’uso
- Page 8 – Precauções no Manuseamento
- Page 10 – Shutter Button; Nomenclature; Déclencheur; Touche de rembobinage; Nomenclatura; Disparador
- Page 11 – Pulsante di scatto; Tasto di; Teilebezeichnungen; Auslöser
- Page 12 – Main Switch; Passant de sangle; Interrupteur principal; Anneau de bandoulière; Interruptor principal
- Page 13 – Presilha para Correia; Interruptor Principal; Braçadeira da Correia; Interruttore principale; Attacco per la tracolla
- Page 14 – Film Check Window; Fenêtre de contrôle de film; Ventanilla de verificación de la película
- Page 15 – Finestrella di controllo pellicola
- Page 20 – Thank you for purchasing this Canon product.; Table of Contents
- Page 21 – Merci d’avoir acheté cet appareil photo Canon.; Table des matières; Impression de la date et l’heure
- Page 22 – Muchas gracias por adquirir este producto Canon.; Tabla de contenidos
- Page 23 – Inhaltsverzeichnis; Einstellen von Datum
- Page 24 – Grazie per aver acquistato questo prodotto Canon.; Indice
- Page 25 – Obrigado por comprar este produto Canon.; Sumário; Impressão da Data e da Hora
- Page 26 – Mise en place des piles/Mise sous tension; Cet appareil est alimenté par deux piles LR6 de taille AA.; Chargez les piles en orientant correctement leurs; Carga de las pilas/Encendido de la cámara; Esta cámara emplea dos pilas LR6 de tamaño AA.; Deslice el interruptor principal a OFF y abra la; This camera uses two LR6 AA-size batteries.; Slide the main switch to OFF and open the
- Page 27 – Questa macchina impiega due batterie LR6 formato AA.; Spostare l’interruttore principale su OFF e aprire il; Colocação das Pilhas/Ligação da Alimentação; Esta máquina utiliza duas pilhas LR6 de tamanho AA.; Deslize o interruptor principal para OFF e abra a; Einlegen der Batterien/Einschalten der Kamera; dann den Batteriefachdeckel an der Unterseite der Kamera.
- Page 28 – et vérifiez les piles.; • Vérifiez que le pictogramme apparaît sur le panneau; Deslice el interruptor principal a ON y revise las
- Page 29 – • Controllare che l’icona sia visualizzata sul pannello; Deslize o interruptor principal para ON e verifique a
- Page 34 – pilas nuevas, saque las pilas y vuélvalas a instalar.
- Page 36 – Chargement du film; L’appareil; Carga de la película
- Page 37 – Inserimento della pellicola; La; Carregamento do Filme; A máquina; Einlegen des Films; Die Kamera erkennt die Empfindlichkeit dieser
- Page 38 – “1” est affiché sur le compteur de vues.; • Si le compteur de vues indique un “0” clignotant, le film n’a; Se visualiza “1” en el contador de exposiciones.; • Si en el contador de exposiciones aparece un “0”; “1” is displayed in the frame counter.; • If the frame counter shows a blinking “0”, the film did not
- Page 39 – “1” é exibido no contador de fotogramas.; • Se o contador de fotogramas mostrar um “0” a cintilar, a
- Page 42 – Prise en main de l’appareil/Viseur; • Tenez l’appareil des deux mains et maintenez vos coudes; Sosteniendo la cámara/Visor
- Page 43 – Come tenere la macchina fotografica/Mirino; • Tenere la fotocamera con entrambe le mani e appoggiare; Maneira de Segurar a Máquina/Visor
- Page 52 – the green indicator lights up.; Toma de fotografías (completamente automática); compruebe que se encienda el indicador verde.
- Page 53 – Scatto di fotografie (completamente automatica); che l’indicatore verde si illumini.
- Page 54 – • In low light conditions, the flash operates automatically.; Appuyez complètement sur le déclencheur.; • Le flash se déclenche automatiquement quand l’éclairement est
- Page 55 – • Em condições de pouca luminosidade, o flash dispara; Premere a fondo il pulsante di scatto.; • In condizioni di illuminazione scarsa, il flash si attiva; Drücken Sie den Auslöser schließlich ganz durch.; • Bei schwachem Licht wird der Blitz automatisch gezündet.
- Page 56 – Flash Distance Range; Alcance de distancias para las tomas con flash
- Page 59 – Funktion zur Reduzierung des “Rote-Augen” Effekts; Funzione di riduzione del fenomeno “occhi rossi”
- Page 63 – Diese Funktion liefert nur dann gute Ergebnisse, wenn die
- Page 66 – Verifique que el contador de exposiciones haya
- Page 67 – Certifique-se de que o contador de exposições
- Page 68 – • Press the button.; Rembobinage du film à mi-course; • Appuyez sur la touche .; Rebobinado de la película a mitad del rollo; • Oprima el botón .
- Page 69 – Rebobinagem da película a meio do rolo; • Pressione o botão .; Rückspulen des Films vor seinem Ende; • Premere il tasto .
- Page 80 – • If you press the button again, the disappears and; Mode de retardateur; • Si vous appuyez de nouveau sur la touche , le disparaît; Modo de autodisparador; • Si usted oprime el botón otra vez, el icono
- Page 81 – Modo de Disparador Automático; • Se pressionar o botão de novo, o ícone desaparece e o; Selbstauslöser-Betriebsart; • Falls Sie die -Taste noch einmal drücken, verschwindet das; Modalità autoscatto; • Se si preme di nuovo il tasto l’icona scompare e la
- Page 82 – button is pressed and the self-timer starts.; • The red-eye reduction lamp starts flashing and the; déclencheur et la fonction de retardateur est activée.; • La lampe d’atténuateur d’yeux rouges clignote et l’obturateur
- Page 83 – • Die Lampe für “Rote-Augen” Effektreduzierung beginnt zu; pulsante di scatto e il conto alla rovescia inizia.; • La spia di riduzione del fenomeno occhi rossi inizia a
- Page 86 – Impresión de la fecha y hora; Oprima el botón; para seleccionar la fecha y hora para; Imprinting the Date and Time; Press the; MODE; button to select the date and time to be; Appuyez sur la touche; MODE; pour sélectionner la date et l’heure à
- Page 87 – Pressione o botão; para seleccionar a data e a hora a serem; Sovrimpressione della data e dell’ora; Premere il tasto; per selezionare la data e l’ora da
- Page 90 – Ajuste de la fecha; • Visualice el formato de fecha que se va a corregir.; Réglage de la date; Appuyez sur la touche; • Le format de date à corriger est affiché.; Setting the Date; • Display the date format to be corrected.
- Page 91 – Ajuste da Data; Pressione o botão; • Escolha o formato de data a ser acertado.; • Rufen Sie das zu korrigierende Datum-Format auf.; Impostazione della data; • Visualizzare il formato della data che si vuole modificare.
- Page 92 – hasta que dejen de; • Cuando dejen de destellar y se iluminen todos los dígitos,; • Appuyez sur jusqu’à ce que le chiffre à corriger clignote.; Appuyez sur la touche; • Corrige le chiffre.; Appuyez sur la touche; • Le réglage est terminé lorsque tous les chiffres sont allumés et; button until all digits stop
- Page 93 – sino a quando tutte le; • Quando tutte le cifre rimangono illuminate stabilmente
- Page 94 – • Une seule pression sur la touche; déplace le réglage au; SET
- Page 98 – para que se visualicen la; • Visualice el formato de hora que se va a corregir.; • Le format de heure à corriger est affiché.; button to display the date and; • Display the time format to be corrected.
- Page 99 – • Visualizzare il formato dell’ora che si vuole modificare.
- Page 100 – SELECT
- Page 101 – Drücken Sie abschließend die
- Page 105 – REC; Aprire il coperchio posteriore e aprire il
- Page 108 – Troubleshooting
- Page 110 – Localización de averías
- Page 111 – Im Problemfall
- Page 112 – Diagnostica
- Page 113 – Localização e Solução de Problemas
- Page 114 – Specifications
- Page 115 – Spécifications
- Page 116 – Especificaciones
- Page 117 – Technische Daten
- Page 118 – Caratteristiche tecniche
- Page 119 – Especificações
CT1-7462-000
© CANON INC. 2000
PRINTED IN CHINA
CANON INC.
30-2, Shimomaruko 3-chome, Ohta-ku, Tokyo 146-8501, Japan
U.S.A.
CANON U.S.A. INC.
For all inquiries concerning this camera, call toll free in the U.S.
1-800-828-4040
or write to: Customer Relations, Canon U.S.A., Inc.
One Canon Plaza, Lake Success, N.Y. 11042-1198
CANADA
CANON CANADA INC. HEADQUARTERS
6390 Dixie Road, Mississauga, Ontario L5T 1P7, Canada
CANON CANADA INC. MONTREAL BRANCH
5990, Côte-de-Liesse, Montréal Québec H4T 1V7, Canada
CANON CANADA INC. CALGARY OFFICE
2828, 16th Street, N.E. Calgary, Alberta T2E 7K7, Canada
For all inquiries concerning this camera, call toll free in Canada
1-800-828-4040
EUROPE,
CANON EUROPA N.V.
AFRICA &
Bovenkerkerweg 59-61, P.O. Box 2262, 1180 EG Amstelveen,
MIDDLE EAST
The Netherlands
CANON PHOTO VIDEO FRANCE S.A. Service Center
102, Avenue du Général de Gaulle 92257 La Garenne-Colombes Cedex, France
CANON UK LTD.
Woodhatch Reigate Surrey RH2 8BF, United Kingdom
CANON EURO-PHOTO G. m. b. H.
Siemensring 90-92, D-47877 Willich, Germany
CANON ITALIA S.p.A.
Palazzo L, Strada 6, 20089 Rozzano, Milanofiori, Milano, Italy
CANON Benelux N.V./S.A.
Bessenveldstraat 7, 1831 Diegem (Machelen), Belgium
CANON Schweiz AG
Geschäftsbereich Wiederverkauf, Industriestrasse 12, CH-8305 Dietlikon,
Switzerland
CANON G. m. b. H.
Oberlaaerstrasse 233, 4th floor, 1100 Wien, Austria
CANON España, S. A.
C/Joaquín Costa, 41, 28002 Madrid, Spain
SEQUE Soc. Nac. de Equip., Lda.,
Praça da Alegria, 58, 2°, 1269-149 Lisboa, Portugal
CENTRAL &
CANON LATIN AMERICA, INC. DEPTO DE VENTAS
SOUTH AMERICA 6505 Blue Lagoon Drive, Suite 325, Miami, FL33126 U.S.A.
CANON LATIN AMERICA, INC. CENTRO DE SERVICIO Y
REPARACION
Apartado 2019, Zona Libre de Colón, República de Panamá
ASIA
CANON HONGKONG CO., LTD.
9/F, The Hong Kong Club Building, 3A Chater Road, Central, Hong Kong
OCEANIA
CANON AUSTRALIA PTY. LTD.
1 Thomas Holt Drive, North Ryde, N.S.W. 2113, Australia
CANON NEW ZEALAND LTD.
Fred Thomas Drive, P.O. Box 33-336, Takapuna, Auckland, New Zealand
JAPAN
CANON SALES CO., INC.
12-15 Mita, 3-Chome, Minato-ku, Tokyo 108-8011, Japan
00-K129/AmeEuro (Front) 21-10-2002 10:31 Page 1
"Loading the manual" means you need to wait until the file loads and becomes available for online reading. Some manuals are very large, and the time they take to appear depends on your internet speed.
Summary
Handling Precautions 1. This camera is not resistant to water, and should not be used outdoors if it is raining or snowing. If it is accidentallydropped in water, contact an authorized Canon servicefacility. Keep the camera out of salt spray and excessivehumidity. If used at the beach, clean it thor...
Précautions d’emploi 1. Cet appareil n’est pas étanche, et ne doit pas être utilisé en extérieur lorsqu’il pleut ou qu’il neige. Si l’appareil tombeaccidentellement dans l’eau, portez-le au Service Après-VenteCanon. Évitez d’exposer l’appareil aux embruns et à unehumidité excessive. Si l’appareil a ...
Precauciones de manipulación 1. Esta cámara no es resistente al agua, y no la deberá usar bajo la lluvia o la nieve. Si la deja caer accidentalmente enel agua, póngase en contacto con un servicio Canonautorizado. 2. Guarde la cámara en un lugar fresco, seco y libre de polvo. Asegúrese de proteger la...