Page 2 - IMPORTANT; • To reduce the risk of burns,; Contents
2 BREVILLE RECOMMENDS SAFETY FIRST At Breville we are very safety conscious. We design and manufacture consumer products with the safety of you, our valued customer, foremost in mind. In addition we ask that you exercise a degree of care when using any electrical appliance and adhere to the followin...
Page 4 - WARNING
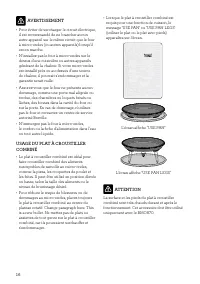
4 Immediately stop using the appliance and contact Breville Consumer Support. WARNING • This appliance shall be serviced only by qualified personnel. Contact Breville Consumer Support or the nearest Breville Authorized Servicer for examination, repair or adjustment. • Do not cover or block any openi...
Page 13 - SPECIFICATIONS
13 FOR HOUSEHOLD USE ONLY SAVE THESE INSTRUCTIONS SPECIFICATIONS Power Input 120V~ 60Hz 1 400W Microwave Input Power: 1 200 WConvection Input Power: 1 400WGrill Input Power: 1 100 W Power Output Microwave Output Power:1 100 W 2 450MHz Outside Dimensions 12.5 inches/316mm (H)20.4 inches/519mm (W)20.2...
Page 14 - Components; Rating Information
14 120 V~ 60 Hz 1 400 W Components D F G E A B C A. Viewing windowB. Door handle Pull handle to open. C. LCD screenD. Function buttons FAST COMBI, FROM FROZEN, AIRFRY, OVEN, MICROWAVE, FOOD MENU E. A BIT MORE™ F. Instant +30/START button & TIME/Select dial Each press adds 30 second increments at...
Page 15 - Assembly; BEFORE FIRST USE
15 Assembly BEFORE FIRST USE Before first use remove all promotional stickers and packaging material. Carefully unpack the microwave oven and keep all the packing material until all the parts of the microwave oven have been found and the appliance has been assembled. It is recommended to keep all th...
Page 17 - Functions; NOTE
17 Functions SETTING THE CLOCK - 12 OR 24-HOUR CLOCK DISPLAY Press SET CLOCK on shortcuts panel . The clock can be set as 12- or 24-hour clock display.When entering the SET CLOCK setting, ‘12’ will flash. To select a 12-hour clock display, press START to confirm the selection. START Instant +30 TIME...
Page 19 - TURNTABLE OFF; Turntable; TIME & POWER LEVEL ADJUSTMENT; Turning the TIME Dial
19 SETTING CHILD LOCK This setting allows you to lock the interface of the microwave oven. Press CHILD LOCK on shortcuts panel.The CHILD LOCK symbol will be displayed on the LCD screen To deselect CHILD LOCK, press the CHILD LOCK button again. The CHILD LOCK symbol will disappear from the LCD screen...
Page 20 - Turning The ADJUST Dial; DYNAMIC POWER ADJUSTMENT
20 Turning The ADJUST Dial When the ADJUST dial is turned clockwise HIGH will flash and 100% will be displayed. STOP CLEAR ADJUST When the ADJUST dial is turned counterclockwise the POWER LEVEL % will start to decrease from 100% to 10%, in 10% increments. STOP CLEAR ADJUST DYNAMIC POWER ADJUSTMENT T...
Page 23 - Cooking
23 Depending on the FUNCTION and the FOOD TYPES selected, the MICROWAVE, OVEN, GRILL, AIRFRY or FAST COMBI icons will be displayed on the LCD SCREEN. Oven Grill Microwave Airfry Fast Combi NOTE Go to our website breville.com to discover many recipes created for the Combi Wave™ 3-in-1 Microwave oven....
Page 24 - AIRFRY
24 Press FROM FROZEN button on the main interface to enter FROM FROZEN function. Select the desired type of meat between chicken, meat and fish by turning the START/ TIME or the ADJUST dials. Press Start to select.Turn the ADJUST dial to adjust quantity or weight. Minimum amount is 8oz (225g) and ma...
Page 27 - FOR BEST RESULTS; Popcorn
27 FOR BEST RESULTS • Foods should be cooked in a microwave safe container, either plastic, pyrex or ceramic. • Moist foods will cook more evenly because microwave energy heats water molecules very efficiently. Add approximately 1 tablespoon of water per 4oz. (115g) of food when cooking soft and har...
Page 28 - Soften butter
28 Bacon The SMART COOK BACON setting is designed to cook bacon slices until crisp, by using the microwave function.Cook times are based on the bacon directly from the refrigerator (approx. 40°F/5°C).Arrange bacon slices in a single layer on a plate. Turn the ADJUST dial to select number of slices a...
Page 29 - Pizza; Chicken Nuggets
29 NOTE The butter should be soft enough to push your finger easily into the center. The butter should not be melted.The SMART COOK SOFTEN BUTTER setting can also be selected from the SHORTCUTS panel. Pizza The SMART COOK PIZZA setting is designed to cook whole frozen pizzas, using both microwave an...
Page 30 - SMART REHEAT; Beverage
30 Use the provided Combi Crisp pan to cook the chicken. For chicken pieces, use the Combi Crisp pan in high position. For whole chicken, use the Combi Crisp pan in low position. Halfway through the cook program, an alert tone will sound and STIR/TURN will flash. Open door or press STOP/CLEAR button...
Page 31 - By time; SMART DEFROST
31 Halfway through the cook program, an alert tone will sound and STIR/TURN will flash. Open door or press STOP/CLEAR button once to pause. Stir the food in the plate and press START to continue the reheating program. When reheating 2 plates, it is recommended to switch the plates position (from top...
Page 34 - MICROWAVE UTENSILS
34 Hints & Tips SOME IMPORTANT TIPS FOR MICROWAVE COOKING To help equalize energy in the food so that it cooks evenly follow these helpful tips. • Arrange foods with varying size ends, such as chicken drumsticks and broccoli with the thicker or tougher part positioned to the outside of the dish....
Page 36 - Troubleshooting; PROBLEM; POSSIBLE PROBLEM
36 Troubleshooting PROBLEM EASY SOLUTION Microwave oven interfering with radio, TV or similar equipment. • Clean door and sealing surface of the oven. • Reorient the receiving antenna of radio or television. • Relocate the microwave oven with respect to the receiver. • Move the microwave oven away f...
Page 37 - Notes
37 Troubleshooting PROBLEM EASY SOLUTION Microwave oven interfering with radio, TV or similar equipment. • Clean door and sealing surface of the oven. • Reorient the receiving antenna of radio or television. • Relocate the microwave oven with respect to the receiver. • Move the microwave oven away f...
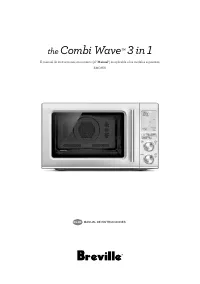
Page 39 - the; Combi Wave
FR-CA MANUEL D'INSTRUCTIONS the Combi Wave ™ 3 in 1
Page 42 - AVERTISSEMENT
4 reçu la supervision ou les instructions relatives à l'usage de l'appareil d'une personne responsable de leur sécurité. • Vérifiez régulièrement le cordon d'alimentation. Ne faites pas fonctionner l'appareil si le cordon ou la fiche sont endommagés, s'il fonctionne mal ou lorsqu'il a été endommagé ...
Page 51 - SPÉCIFICATIONS; Diamètre du; USAGE DOMESTIQUE SEULEMENT
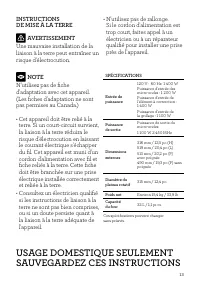
13 INSTRUCTIONS DE MISE À LA TERRE AVERTISSEMENT Une mauvaise installation de la liaison à la terre peut entraîner un risque d'électrocution. NOTE N'utilisez pas de fiche d'adaptation avec cet appareil. (Les fiches d'adaptation ne sont pas permises au Canada.) • Cet appareil doit être relié à la ter...
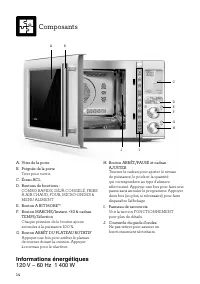
Page 52 - Composants; Informations énergétiques
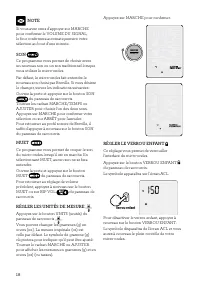
14 120 V ~ 60 Hz 1 400 W D F G E A B C I J H Composants A. Vitre de la porteB. Poignée de la porte Tirer pour ouvrir. C. Écran ACLD. Boutons de fonctions : COMBO RAPIDE, DÉJÀ CONGELÉ, FRIRE À AIR CHAUD, FOUR, MICRO-ONDES & MENU ALIMENT E. Bouton A BIT MORE™ F. Bouton MARCHE/Instant. +30 & ca...
Page 53 - Assemblage; AVANT LA PREMIÈRE UTILISATION
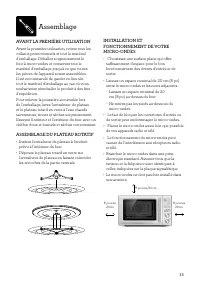
15 Assemblage AVANT LA PREMIÈRE UTILISATION Avant la première utilisation, retirez tous les collants promotionnels et tout le matériel d'emballage. Déballez soigneusement le four à micro-ondes et conservez tout le matériel d'emballage jusqu'à ce que toutes les pièces de l'appareil soient assemblées....
Page 55 - Fonctions
17 Fonctions RÉGLAGE DE L'HORLOGE – AFFICHAGE SUR 12 ou 24 HEURES Appuyez sur RÉGLER L'HORLOGE sur le panneau de raccourcis . L'affichage peut être réglé sur 12 heures ou 24 heures.En activant ce réglage, le nombre '12' clignotera. Pour sélectionner l'affichage sur 12 heures, appuyez sur MARCHE pour...
Page 56 - RÉGLER LE VERROU ENFANT
18 NOTE Si vous avez omis d'appuyer sur MARCHE pour confirmer le VOLUME DU SIGNAL, le four confirmera automatiquement votre sélection au bout d'une minute. SON Ce programme vous permet de choisir entre un nouveau son ou un son traditionnel lorsque vous utilisez le micro-ondes. Par défaut, le micro-o...
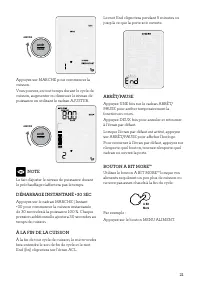
Page 57 - MODE ATTENTE; ARRÊT DU PLATEAU ROTATIF; Tourner le cadran TEMPS
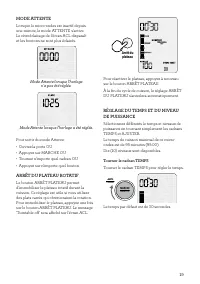
19 MODE ATTENTE Lorsque le micro-ondes est inactif depuis une minute, le mode ATTENTE s'active. Le rétroéclairage de l'écran ACL disparaît et les boutons ne sont plus éclairés. Mode Attente lorsque l'horloge n'a pas été réglée. Mode Attente lorsque l'horloge a été réglée. Pour sortir du mode Attente...
Page 58 - Tourner le cadran AJUSTER
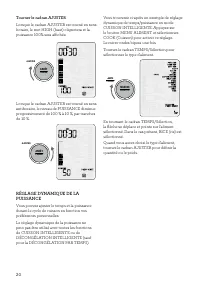
20 Tourner le cadran AJUSTER Lorsque le cadran AJUSTER est tourné en sens horaire, le mot HIGH (haut) clignotera et la puissance 100% sera affichée. ARRÊT PAUSE AJUSTER Lorsque le cadran AJUSTER est tourné en sens antihoraire, le niveau de PUISSANCE diminue progressivement de 100 % à 10 %, par tranc...
Page 63 - FRIRE À AIR CHAUD
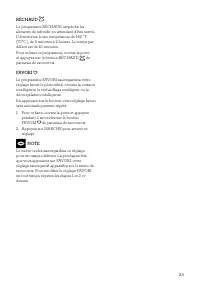
25 Placez les aliments dans le plat à croustiller combiné, en position inférieure.Appuyez sur le bouton DÉJÀ CONGELÉ de l'interface principale pour activer cette fonction. Sélectionnez le type de viande désiré (poulet, viande, poisson) en tournant l'un des cadrans MARCHE/Temps ou AJUSTER. Appuyez su...
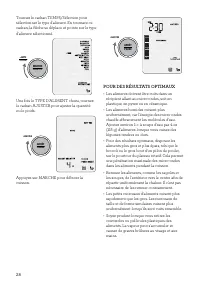
Page 66 - POUR DES RÉSULTATS OPTIMAUX
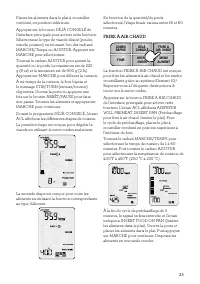
28 Tournez le cadran TEMPS/Sélection pour sélectionner le type d'aliment. En tournant ce cadran, la flèche se déplace et pointe sur le type d'aliment sélectionné. MARCHE Instant +30 TEMPS Sélection Une fois le TYPE D'ALIMENT choisi, tournez le cadran AJUSTER pour ajuster la quantité ou le poids. ARR...
Page 68 - Beurre ramolli
30 À mi-temps de la cuisson, le four bipera et le message STIR/TURN (Remuer/tourner) clignotera. Ouvrez la porte et appuyez une fois sur ARRÊT/PAUSE. Tournez le bacon, refermez la porte et appuyez sur MARCHE pour continuer. Si vous cuisez plus de 2 tranches, déplacez les tranches du centre vers le p...
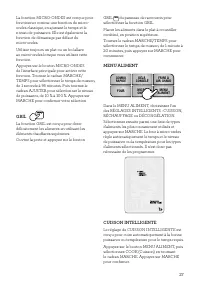
Page 70 - RÉCHAUFFAGE INTELLIGENT; Boisson
32 MICRO-ONDES si vous faites cuire un poulet entier.Le temps de cuisson est basé sur du poulet sorti directement du réfrigérateur (environ 40 °F/5 °C).Le poids minimal de poulet à cuire est de 8 oz (225 g) et le maximum est de 4,5 lb (2 kg).Utilisez le plat à croustiller combiné fourni pour cuire l...
Page 71 - Selon le temps; DÉCONGÉLATION INTELLIGENTE
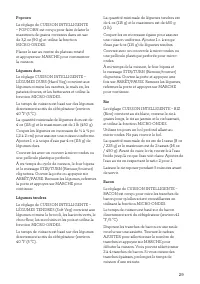
33 minutes avant de la boire, car une boisson surchauffée peut vous brûler ou vous ébouillanter. Restes d'aliment Le réglage de RÉCHAUFFAGE INTELLIGENT – RESTES D'ALIMENTS (Leftovers) est idéal pour réchauffer les restes d'aliments laissés au réfrigérateur (environ 40 °F/5 °C). Pour un réchauffage u...
Page 72 - Poulet
34 ARRÊT PAUSE AJUSTER Appuyez sur MARCHE pour commencer la décongélation. Tous les TYPES D'ALIMENTS non sélectionnés ainsi que les messages PRESS START et INPUT QUANTITY disparaîtront de l'écran ACL. La minuterie s'affichera et le compte à rebours commencera. NOTE Vous pouvez augmenter ou diminuer ...
Page 74 - USTENSILES POUR MICRO-ONDES; Trucs et astuces
36 produits à base de pâte peut être avantageux. Cela permet à l'énergie de pénétrer à l'intérieur des aliments, de tous les côtés et de bas en haut. Utilisez une grille en plastique ou en céramique qui va au micro-ondes. Si une grille n'est pas disponible, utilisez un bol à l'envers pour surélever ...
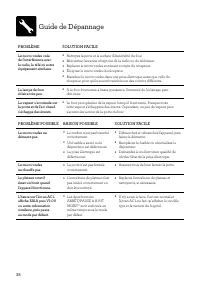
Page 76 - Guide de Dépannage; PROBLÈME; PROBLÈME POSSIBLE RAISON POSSIBLE
38 Guide de Dépannage PROBLÈME SOLUTION FACILE Le micro-ondes crée de l'interférence avec la radio, la télé ou autre équipement similaire. • Nettoyez la porte et la surface d'étanchéité du four. • Réorientez l'antenne réceptrice de la radio ou du téléviseur. • Replacez le micro-ondes en tenant compt...
Page 78 - INSTRUCCIONES; Se deben seguir las precau-; Contenido
2 BREVILLE RECOMIENDA ANTEPONER LA SEGURIDAD En Breville somos muy cons- cientes de lo importante que es la seguridad. La seguridad es nuestra prioridad a la hora de diseñar y fabricar productos para clientes como usted. Para su seguridad, le pedimos que ejerza suma precaución al usar cualquier apar...
Page 80 - ADVERTENCIA
4 (incluyendo niños) cuyas capacidades físicas, sensoriales o mentales sean diferentes o estén reducidas, o carezcan de experiencia o conocimiento, a menos que dichas personas reciban una supervisión o capacitación para el funcionamiento del aparato por una persona responsable de su seguridad. • Ins...
Page 90 - NOTA; ESPECIFICACIONES TÉCNICAS; Diámetro del
14 PARA USO EXCLUSIVO EN EL HOGAR GUARDE ESTAS INSTRUCCIONES dudas sobre si el equipo está correctamente conectado a tierra. • No use un prolongador o cable de extensión. Si el cable de alimentación es demasiado corto, solicite a un electricista o técnico calificado que instale un tomacorriente cerc...
Page 91 - Datos técnicos; Componentes
15 Datos técnicos 120 V ~ 60 Hz 1 400 W Componentes D F G E A B C A. Visor al interiorB. Manija de la puerta Tire de la manija para abrir. C. Pantalla LCDD. Funciones predefinidas FAST COMBI (Combi rápido), FROM FROZEN (Congelados), AIRFRY (Fritura con aire), OVEN (Horno), MICROWAVE (Microondas), FO...
Page 92 - Montaje; ANTES DEL PRIMER USO
16 Montaje ANTES DEL PRIMER USO Antes del primer uso, retire todas las pegatinas promocionales y todo el embalaje. Desembale el horno de microondas con cuidado y conserve todo el embalaje hasta que haya encontrado todas las piezas y el aparato esté montado por completo. Se recomienda guardar todo el...
Page 94 - Funciones
18 Funciones CONFIGURACIÓN DEL RELOJ - FORMATO DE 12 O 24 HORAS Presione SET CLOCK (Configurar reloj) en el panel de accesos directos. El reloj puede configurarse en un formato de 12 o 24 horas.Cuando acceda a la función para configurar el reloj, el número “12” parpadeará en la pantalla. Si desea es...
Page 96 - MODO STANDBY; BOTÓN TURNTABLE OFF; AJUSTE DEL TIEMPO Y LA POTENCIA; El selector TIME
20 CONFIGURACIÓN DEL BLOQUEO PARA NIÑOS Esta configuración le permite bloquear la interfaz del horno de microondas.Presione CHILD LOCK (Bloqueo para niños) en el panel de accesos directos.El símbolo del bloqueo para niños aparecerá en la pantalla LCD. Para desactivar CHILD LOCK, presione el botón ot...
Page 97 - El selector ADJUST; AJUSTE DINÁMICO DE LA POTENCIA
21 El selector ADJUST Si gira el selector ADJUST en sentido horario, la palabra “HIGH” (Alto) parpadeará en la pantalla y aparecerá también “100%”. STOP CLEAR ADJUST Si gira el selector ADJUST en sentido antihorario, el nivel de potencia, indicado en porcentajes, comenzará a disminuir de 100 % a 10 ...
Page 101 - MODO AIRFRY
25 Presione el botón FROM FROZEN de la interfaz principal para activar el modo para congelados. Gire el selector START/TIME (Inicio/Tiempo) o ADJUST (Ajustar) para elegir el tipo de carne deseado. Las opciones disponibles son: pollo, carne y pescado. Presione START para seleccionar.Gire el selector ...
Page 104 - COCCIÓN INTELIGENTE
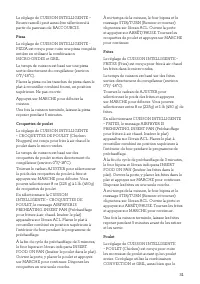
28 COCCIÓN INTELIGENTE Las opciones de cocción inteligente están diseñadas para cocinar automáticamente a la potencia o temperatura correctas, durante el tiempo adecuado.Presione el botón FOOD MENU (Menú de comida), luego seleccione COOK (Cocinar) girando el dial START (Inicio). Ahora presione el se...
Page 106 - Función Soften butter
30 Ponga las tiras de tocino en un plato sin superponerlas. Gire el selector ADJUST (Ajustar) para establecer el número de tiras y presione START (Inicio) para comenzar a cocinar. Puede seleccionar entre 2 y 4 tiras de tocino de tamaño estándar. Si cocina tocino cortado grueso, agregue otro minuto a...
Page 107 - Función Pizza; Función Chicken nuggets
31 Gire el selector ADJUST (Ajustar) para seleccionar el peso y presione START (Inicio) para empezar a ablandarla. La cantidad mínima de mantequilla es de 4 onzas (115 g) y la cantidad máxima es de 1 lb (450 g). NOTA La mantequilla debe estar lo suficientemente blanda para introducir un dedo por el ...
Page 108 - RECALENTADO INTELIGENTE
32 A la mitad del programa de cocción, se oirá un pitido y el mensaje “STIR/TURN” parpadeará en la pantalla para indicar que debe dar vuelta la comida. Abra la puerta o pause presionando STOP/CLEAR (Detener/Borrar) una vez. Dé vuelta las papas fritas y presione START para reanudar el programa de coc...
Page 109 - DESCONGELADO INTELIGENTE
33 Función Beverage La función inteligente BEVERAGE (Bebidas) es ideal para recalentar bebidas, como cafés o tés, que se hayan enfriado. BEVERAGE calienta las bebidas a una temperatura de 140- 150 °F (60–65 °C) para que pueda disfrutarlas de inmediato.Ponga las tazas lo más cerca posible del borde d...
Page 110 - Función Chicken
34 Una vez que haya elegido el tipo de comida, gire el selector ADJUST (Ajustar) para ajustar la cantidad o el peso. STOP CLEAR ADJUST Presione START para comenzar a descongelar. Justo después, desaparecerán de la pantalla LCD todos los tipos de comida no seleccionados y los mensajes para presionar ...
Page 112 - Claves y consejos; UTENSILIOS PARA MICROONDAS
36 Claves y consejos CONSEJOS IMPORTANTES PARA COCINAR EN MICROONDAS Siga estos consejos útiles para igualar la energía en la comida y así lograr que se cocine de manera uniforme. • Coloque los alimentos con extremos de diferentes tamaños, como patas de pollo y brócoli, con la parte más gruesa o más...
Page 114 - Solución de problemas; PROBLEMA; POSIBLE PROBLEMA
38 Solución de problemas PROBLEMA SOLUCIÓN FÁCIL El horno de microondas interfiere con la radio, el televisor equipos similares. • Limpie la puerta y las superficies de sellado del horno. • Reoriente la antena receptora de la radio o el televisor. • Cambie el horno de microondas de lugar con respect...
Page 115 - Notas
39 Solución de problemas PROBLEMA SOLUCIÓN FÁCIL El horno de microondas interfiere con la radio, el televisor equipos similares. • Limpie la puerta y las superficies de sellado del horno. • Reoriente la antena receptora de la radio o el televisor. • Cambie el horno de microondas de lugar con respect...
Page 116 - Breville Consumer Support; Breville USA; USA
Breville is a registered trademark of Breville Pty. Ltd. A.B.N. 98 000 092 928. Copyright Breville Pty. Ltd. 2021. • Due to continued product improvement, the products illustrated/photographed in this brochure may vary slightly from the actual product. • En raison de son amélioration continue, le pr...