Zip MT2790Z8-91295 - Manuals
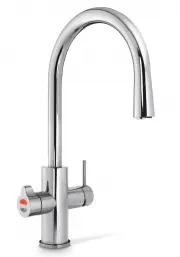
User Manual Zip MT2790Z8-91295


Summary
Page 2 of 20 803341 - Tap Installation Instructions - 02.17 - v2.02 Apply a light smearing of silicon sealant on the underside of the spacer to ensure a watertight fit. 1.2 Cut a 35mm hole in the bench / sink top. BENCH TOP 1.1 Ø35mm ALL THREAD ROD STAINLESS STEEL SPACER SPIDER CLAMP NUT BLACK PLAST...
803341 - Tap Installation Instructions - 02.17 - v2.02 Page 3 of 20 BLACK PLASTIC SPACER 1.3 Installation Instructions Pass all the hoses, tubes and USB lead through the 35mm hole. 1.4 35mm hole Note Note : feed each of the three tubes and electrical cable evenly in between the legs of the SPIDER CL...
Page 4 of 20 803341 - Tap Installation Instructions - 02.17 - v2.02 2 - HydroTap Arc/Cube The HydroTap Arc/Cube has a spout that may be fixed in one of 6 angular positions (depending on the position of the rotary control) and fixed in one of two height positions. The spout is fixed and does not swiv...
Zip Faucets Manuals
-
 Zip CT1001
User Manual
Zip CT1001
User Manual
-
 Zip CT1001-1
User Manual
Zip CT1001-1
User Manual
-
 Zip CT1002-1
User Manual
Zip CT1002-1
User Manual
-
 Zip CT1003
User Manual
Zip CT1003
User Manual
-
 Zip CT1003-1-91295
User Manual
Zip CT1003-1-91295
User Manual
-
 Zip FT1001
User Manual
Zip FT1001
User Manual
-
 Zip H52783Z00AU-91295
User Manual
Zip H52783Z00AU-91295
User Manual
-
 Zip H52783Z01AU-91295
User Manual
Zip H52783Z01AU-91295
User Manual
-
 Zip H52783Z03AU-91295
User Manual
Zip H52783Z03AU-91295
User Manual
-
 Zip H52783Z05AU-91295
User Manual
Zip H52783Z05AU-91295
User Manual
-
 Zip H52783Z07AU-91295
User Manual
Zip H52783Z07AU-91295
User Manual
-
 Zip H52783Z09AU-91295
User Manual
Zip H52783Z09AU-91295
User Manual
-
 Zip H52783Z11AU-91295
User Manual
Zip H52783Z11AU-91295
User Manual
-
 Zip H52784Z00AU
User Manual
Zip H52784Z00AU
User Manual
-
 Zip H52784Z01AU
User Manual
Zip H52784Z01AU
User Manual
-
 Zip H52784Z03AU
User Manual
Zip H52784Z03AU
User Manual
-
 Zip H52784Z05AU
User Manual
Zip H52784Z05AU
User Manual
-
 Zip H52784Z07AU
User Manual
Zip H52784Z07AU
User Manual
-
 Zip H52784Z09AU
User Manual
Zip H52784Z09AU
User Manual
-
 Zip H52784Z11AU
User Manual
Zip H52784Z11AU
User Manual