Zip HT1017Z3 - Manuals
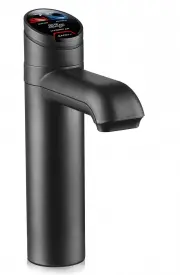
User Manual Zip HT1017Z3
1

2

3

4

5

6

7

8

9

10

11

12

13

14

15

16

Summary
Page 2 - This page intentionally left blank
Page 2 of 16 Zip HydroTap Installation and Operating Instructions - 89585 - March 2016 v2.03 This page intentionally left blank
Page 3 - Before Commissioning:; Check List
Zip HydroTap Installation and Operating Instructions - 89585 - March 2016 v2.03 Page 3 of 16 Before Installation: A. Read the instructions. B. Note: Not all fittings are supplied with the appliance kit. Isolation valves are not supplied. C. The pressure limiting valve must be fitted as part of the k...
Page 4 - Contents
Page 4 of 16 Zip HydroTap Installation and Operating Instructions - 89585 - March 2016 v2.03 Contents Contents . . . . . . . . . . . . . . . . . . . . . . . . . . . . . . . . . . . . . . . . 5 Read These Warnings First. . . . . . . . . . . . . . . . . . . . . . . . . . . 6 Models covered by these in...
Zip Faucets Manuals
-
 Zip CT1001
User Manual
Zip CT1001
User Manual
-
 Zip CT1001-1
User Manual
Zip CT1001-1
User Manual
-
 Zip CT1002-1
User Manual
Zip CT1002-1
User Manual
-
 Zip CT1003
User Manual
Zip CT1003
User Manual
-
 Zip CT1003-1-91295
User Manual
Zip CT1003-1-91295
User Manual
-
 Zip FT1001
User Manual
Zip FT1001
User Manual
-
 Zip H52783Z00AU-91295
User Manual
Zip H52783Z00AU-91295
User Manual
-
 Zip H52783Z01AU-91295
User Manual
Zip H52783Z01AU-91295
User Manual
-
 Zip H52783Z03AU-91295
User Manual
Zip H52783Z03AU-91295
User Manual
-
 Zip H52783Z05AU-91295
User Manual
Zip H52783Z05AU-91295
User Manual
-
 Zip H52783Z07AU-91295
User Manual
Zip H52783Z07AU-91295
User Manual
-
 Zip H52783Z09AU-91295
User Manual
Zip H52783Z09AU-91295
User Manual
-
 Zip H52783Z11AU-91295
User Manual
Zip H52783Z11AU-91295
User Manual
-
 Zip H52784Z00AU
User Manual
Zip H52784Z00AU
User Manual
-
 Zip H52784Z01AU
User Manual
Zip H52784Z01AU
User Manual
-
 Zip H52784Z03AU
User Manual
Zip H52784Z03AU
User Manual
-
 Zip H52784Z05AU
User Manual
Zip H52784Z05AU
User Manual
-
 Zip H52784Z07AU
User Manual
Zip H52784Z07AU
User Manual
-
 Zip H52784Z09AU
User Manual
Zip H52784Z09AU
User Manual
-
 Zip H52784Z11AU
User Manual
Zip H52784Z11AU
User Manual